Preparing for Installation of Your Metal Panels

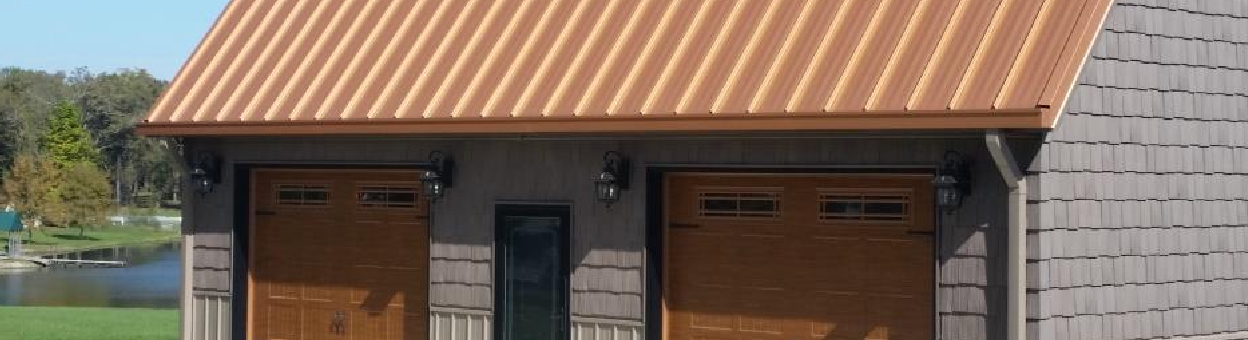
There is no doubt that selecting metal roof and wall products is a wise investment. To make the most of that investment, it’s important to take certain preparation steps before beginning your metal panel installation. Once you’ve purchased the materials you need, the next order of business is to ensure the metal panels, trim and components are properly prepped. This is your best chance at keeping your job site safe, making sure your materials are not lost or damaged and ensuring your project stays on schedule so you reap the benefits of going metal.


  • Step One: Project Planning

    Starting your project with a clear plan will yield the best results. When planning your metal panel installation project, choosing an appropriate time to install is essential. Considerations will vary based on your location and include:

    • Moisture levels: it’s better to install when it’s dry (no rain, dew, snow or ice) as installing when surfaces are slick increases chances of slipping and injury.
    • Wind conditions: it’s better to install in low-wind conditions to prevent chances of injury/product damage.
  • Step Two: Material Check

    Once your materials are delivered to your warehouse or job site, the next order of business is to make sure you’ve received all of the building materials you ordered and that all pieces are in good condition. You will need to:

    • Manage a material receiving checklist
    • Check your panels for moisture, denting/bending, wind damage and additional transit abrasion
    • Ensure proper storage of your materials, including panels and trim in bundled and stacked sheets, to protect them from damage and prevent corrosion and/or galvanic reaction

    Check out ABC’s blog post on metal panel delivery and material handling for details on proper loading and unloading, cutting and job site safety. Additionally, our post on metal panel storage provides best practices on keeping your panels and components in pristine condition whether they’re going to be installed immediately or stored for future use or sale.

  • Step Three: Metal Panel Installation Preparation

    Once the location of the project is defined and the materials have been ordered, delivered and checked, the ultimate responsibility for on-site panel preparation lies with the installer, who should:

    • Re-check that all materials are present and in good condition
    • Arrange the material so that it stays undamaged and doesn’t pose a hazard to anyone on the site during installation
    • Ensure all metal panel installation tools are available and properly functioning, including drills, ladders and seamers
    • Make sure all safety preparations have been made and all safety gear is in good condition, including gloves, eye masks, safety helmets, boots and wrist guards.

Metal building panel and components manufacturers often make a variety of resources available for review, including product details, technical bulletins and installation manuals that can help building owners, distributors/contractors and installers alike. For more information on preparing for metal panel installation, contact your local ABC representative.

Metal Roof Pitch Part II: Panel Selection for Your Building End-Use

In part one of our series on metal panel roof pitch, we looked at the engineering and strength considerations that need to be taken into account when designing or specifying a building. In part two, we’ll review how to make the right metal panel selection for your building end-use by looking at the building type and roof pitch to find the optimal combination of form and function.

Types of roof panels:

Different types of metal roof panels are better suited for certain roof pitches and this mostly has to do with panel rib height and how they’re seamed together. For instance, the lower the pitch, the taller the rib of the roof panel needs to be in order to optimize water carrying capacity. Also, the lower the pitch, the slower water runs off the roof; combined with wind pressure, this can hold water at the eave. As an example:

  • On 2:12 and lower pitches for commercial/industrial jobs, weathertightness warranties will use a mechanically seamed panel because it creates an impenetrable lock that keep water from seeping between the panels. Seamed panels can be thought of as more hydrostatic (resistant to water), whereas non-seamed panels are hydrokinetic, i.e., water runs off of them, but they are not designed to be a water barrier.

Building Type and Use:

Whether residential, post-frame or commercial, structures follow general design criteria regarding metal roof slope, based on to the building type and use. For instance:

Gabled v. Hipped: gabled roofs provide more interior headroom while with hipped roofs, endwall sheet height can be reduced, making for easier ordering and installation as you don’t have to cut/miter the sheets.

  • Residential v. Post-Frame and Commercial Use: While it can generally be assumed that thicker-gauge panels are stronger, the type of building construction, location and end-use can affect the choice in panel thickness. Residential roofs generally have steeper slopes (often due to aesthetic sensibilities), while commercial and post-frame buildings will typically have a shallower pitch to increase the strength of the building. Buildings such as pole barns, post-frame buildings, warehouses and garages can require roof panels to span longer distances between supporting trusses and purlins and therefore require thicker panels to ensure the roof is structurally sound and can aid in reducing the chance of collapse under the weight of snow and water—particularly when the roof pitch is low. For smaller buildings—like residences—with supporting trusses and purlins that are typically closer together, thinner panels can be used in conjunction with thicker trim for an economic, structurally ideal residential metal roofing system. See our blog on metal panel gauges for more.
  • Economics: When a roof has a shallower pitch, less material is needed to cover the same roof span. This can be more economical since fewer square feet of material needs to be purchased, or at least help in offsetting the cost of the thicker panels commonly used on low-slope roof—a consideration often important to companies with multiple properties. Likewise, while more material may need to be purchased for a high-sloped roof, you may be able to buy thinner, less expensive panels since high-slope roofs don’t typically need to be able to support heavier loads like low-slope roofs do.
  • Aesthetics: Traditional residences typically feature a higher roof pitch while this may be less important to commercial building owners. However—from a functional standpoint—thicker panels can be more forgiving of installation errors such as over-tightened screws and aren’t as likely to transfer waves and bumps in sheathing.

Solar Panels and Roof Pitch:

The geographic location of a structure will determine the angle at which the solar panels should be installed. Generally. the closer to the equator you get, the lower the slope the solar panels can tolerate as roofs closer to the equator have more consistent exposure to sunlight as compared to those farther away. If you plan to add solar panels to your metal roof, be sure to check the Solar Reflective Index (SRI) values and minimum slopes set by the ASTM and local governing codes. These standards will advise adequate slope based on your location as well as help control things such as heat island effects, etc.  For more information on solar reflectance and how it is affected by the color of your metal roof panels, see our blog post on cool metal roofs.

Conclusion:

Roof slope is a factor that affects many decisions when it comes to any metal building roofing project regardless of the building’s end use. When embarking on any metal roofing project, be sure that the panels you’ve selected meet local building codes and are produced by a quality manufacturer with knowledge and experience designing for different applications to ensure you get exactly what you’re looking for. For more information on metal panel selection for your building end-use and to learn more about recommendations on roof slope for different building types, contact your local ABC representative today.

 Additional Resources:

For more information on slope requirements, visit NRCA’s website. For more information on steep-slope metal roofs and their benefits, visit the Metal Construction Association’s website.