Ordering Metal Roof & Wall Trim Online

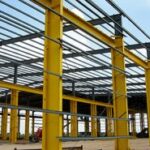
Metal roof and wall trim is used to seal joints and edges to keep moisture out while providing a seamless transition between panels to create a polished look. With our online ordering tool, you can browse our selection and order the trim your customers need from anywhere at any time. Learn more about ordering trim online!

Online Trim Options

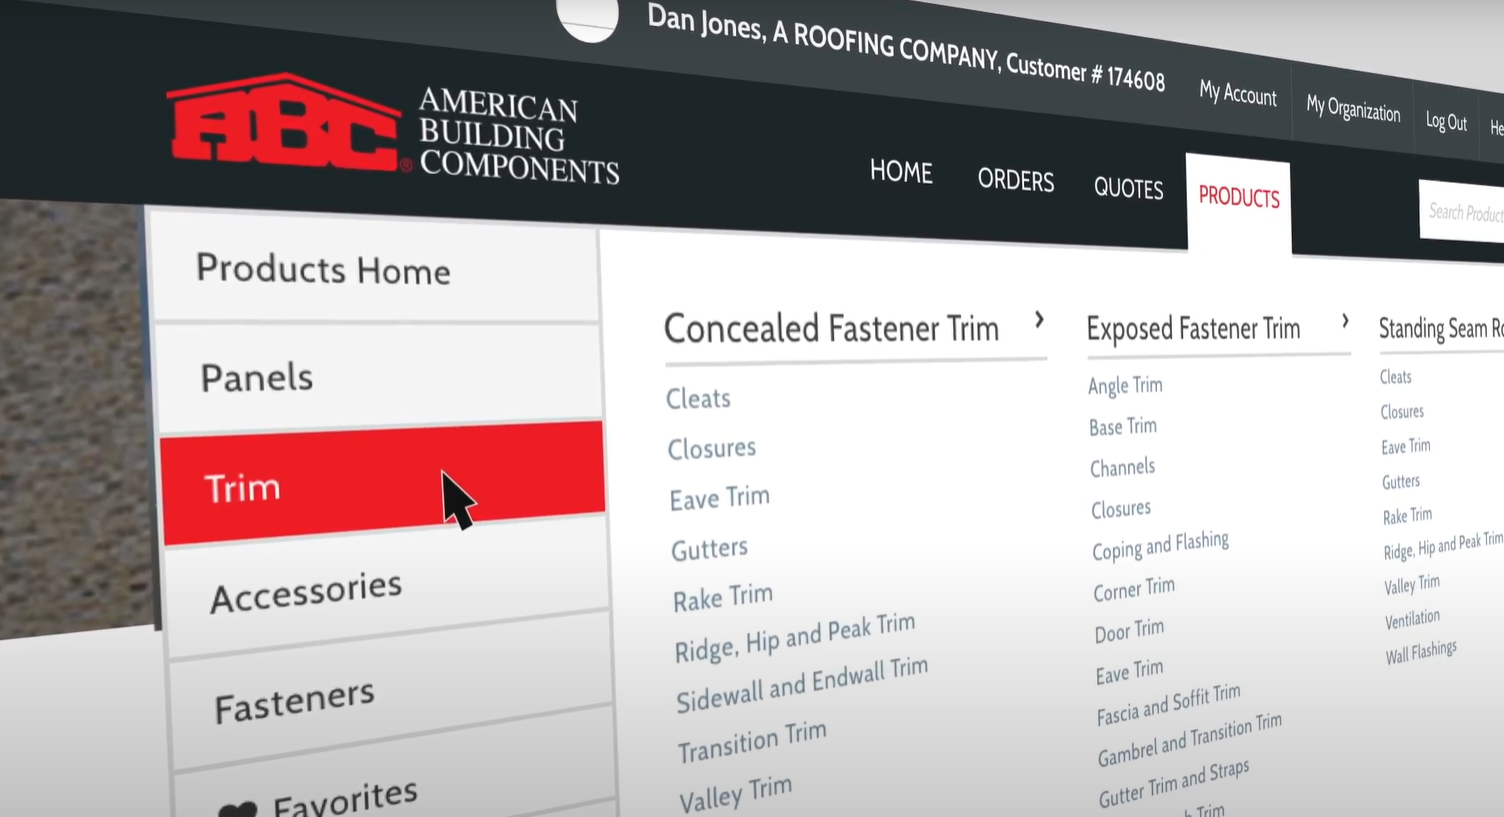
Our metal roofing and wall trim is available in all standard colors to match our panels. The trim style and profile you select should depend on the panel profile used on your building project. When ordering through the ecommerce platform, there are four main trim categories to choose from: 

  • Concealed Fastener Trim – used with our SL-16 Panel
  • Exposed Fastener Trim – used with multiple profiles, such as Imperial Rib and PBR
  • Standing Seam Trim – used with LokSeam
  • Custom Trim – used in a variety of applications

All ecommerce manuals are organized based on the panel groupings, indicating the correct type of trim for each panel. Choosing the proper trim is important because the following variables are different for each panel profile: 

  • Rib Heights
  • Rib Spacing
  • Installation Methods
  • Attachment Methods

Ordering Custom Trim

ABC Metal Roofing makes it easy to order custom trim to meet your specific needs. Just like our standard trims, special trim is available in all of our standard colors, with length options up to 20 feet.  ABC also sells flat sheets and coil stock, if you prefer to fabricate your own trim items. Learn more about how to order:


How to Draw Trim

When drawing your trim, keep these points in mind:

  • All dimensions must be noted in inches with a tolerance of 1/16 of an inch
  • Custom trim can be produced in lengths of up to 20ft.
  • Color side must always be noted
  • Label all degrees of bend
  • Trim ends can be hemmed (the standard is ½”)
  • Label each trim with a piecemark of your choosing to help identify the special trim throughout order and production process

Special trim drawings must be submitted online before the order can be completed. Each customer has the option to upload their own saved document or download and edit a standard template.


Pricing

All custom trims are priced based on the total square footage of each part. Each gauge and color system has a unique cost per square foot. Bends are priced at $0.80 each while hems are $1.60 each.

If you’re planning to reorder the same trim, we can work with you to set up a unique part number to make it easier to reorder.


Placing Your Order

Browse our selection of trim to find the best fit for your customer’s project. Visit our online ordering tool to place your order today! Not a registered user?  Register for an account to access this convenient tool. 

Residential Metal Roofing Aesthetics

As the housing market continues to grow, so does the market for new construction homes and repair and remodel of existing homes. With the enhanced focus on sustainability and energy efficiency as well as new exterior design trends, metal roofing has become a popular option for homes across the country. As a result, the residential roofing market has grown at a rate of 14% per year.


Why are so many homeowners choosing metal roofing? In addition to its durability and sustainability, metal roofing offers superior design flexibility to fully customize the exterior of the home. Learn more about the aesthetic benefits of metal roofing for every home style.


Aesthetic Benefits of Residential Metal Roofing

The roof makes up a significant part of your home’s exterior, so it’s important to make the right choice. Metal roofing is the best option for your home as it offers superior design flexibility compared to traditional roofing materials. It is also a great choice to make your home stand out from the rest of the neighborhood.


Customizable

Residential metal roof panels come in a variety of styles, profiles and colors to complement every home style.


Create your desired exterior home aesthetic with a broad range of metal roofing colors from earth tones to bright colors and everything in between. Choose bold red or blue shades to make your home stand out. To create a natural looking home exterior, add a touch of brown, gray or green to your roof.


Eye-Catching Accent

One way to add curb appeal to your home is to mix and match materials. Using a variety of textures on your home’s exterior adds dimension and visual interest. Even if you’re not planning to install a complete metal roof, you can still use metal roofing as an accent. Consider installing metal roof panels on your covered porch and dormers to make your home stand out.


Fits Any Home Style

Metal roofing is a timeless option for every home style, from contemporary to classic, adding texture and dimension to your home’s exterior. Depending on the style of your home, metal roofing can add a touch of modernity or create the rustic charm that you’ve always dreamed of.


Ranch


Metal roofing adds a touch of rustic charm to traditional ranch style homes. When selecting metal roofing colors, it’s important to choose a color that complements the brick exterior. Light, natural tones such as browns and grays are ideal for this home style.

Craftsman


Craftsman homes are known for their rustic charm and are typically designed with natural materials such as wood, stone and metal. This makes metal roofing a perfect fit for your Craftsman-style home. Natural roofing colors such as browns, blues and grays are a great option to complement exterior cladding and accents.

Colonial


The architecture of Colonial-style homes is defined by the roofline and evenly spaced exterior features such as windows and columns. Metal roofing is a great option to add a classic touch to your Colonial home. Choose from a variety of bold metal roofing colors to create contrast and highlight the symmetry of your home’s exterior. For a more neutral look, consider traditional colors such as gray, brown and blue.

Tudor


Tudor-style homes are defined by mixed materials, half-timber framing and steeply pitched roofs. With the steep pitch, your roof will be highly visible, making it even more important to select a durable, aesthetically pleasing material like metal roofing. To complement the brickwork and accents on your Tudor-Style home, consider dark metal roofing tones such as browns and grays.

Modern


Modern-Style homes typically feature clean lines and low-pitched roofs. Although the low pitch roof is not highly visible, it can still create a bold contrast for your home’s exterior. Metal roofing is an ideal choice for modern homes as it is available in bold, eye-catching colors, such as black and blue, to highlight unique architectural features of your home. The sleek lines of metal roofing also contribute to the modern look. Use our metal roofing color visualizer tool to discover how metal roofing will look on your home.


Achieving the “Modern Farmhouse” Look

The Modern Farmhouse is becoming popular with homeowners. It is characterized by a gable roof, featuring a top ridge and sloped sides that create a triangle. When deciding on roofing materials to achieve this style, homeowners have increasingly chosen standing seam metal roofing, as it delivers traditional rustic charm with a touch of modernity.


Modern Farmhouses typically feature a solid white exterior, relying on a variety of architectural features and accents to add curb appeal. To create visual interest, pair dark colored accents with light colored siding.


For example, adding black exterior windows and a black metal roofing will create eye-catching contrast with white siding.


Metal roof panels come in a broad selection of bold colors that are ideal for creating contrast against the white exterior cladding. Not interested in a complete metal roof? Add metal roof panels to your covered porch or dormers to mix and match textures.


How Much Does Residential Roofing Cost?

Residential metal roofing is a bigger upfront investment than traditional roofing options, but it ultimately provides long-term value that you can trust. While most asphalt roofs have a lifespan of 15-20 years, metal roofing can last up to 60 years. With the durability and longevity of metal roofing, you’ll see your investment pay off after 10 years.


Hidden or concealed fastener panels are typically a more expensive option, offering sleek lines without exposed screws. For a more cost-efficient solution, explore exposed fastener metal roofing.


Why Choose Residential Metal Roofing?

Residential metal roofing is a value add for your home. It offers the design flexibility you want with the energy efficiency, durability and cost effectiveness that you need. Contact an expert today and learn more about these popular residential metal roofing styles:


5V Crimp – Ideal for coastal regions, this panel offers rustic charm with a contemporary mill-style finish.
SL-16 – This concealed fastener panel offers a clean, straight line appearance to add a modern touch to any home.
LokSeam – This snap together panel offers a sleek appearance that is ideal for adding a touch of modernity to your home’ exterior.

Selecting Metal Roofing Trim

There are a variety of factors to consider when selecting metal roofing trim, including the application, roofing style and curb appeal expectations. Once you’ve made your selection, it’s important to ensure that the trim is properly installed to protect your building from water leaks.


Common Metal Roofing Trim

Before jumping into considerations for metal roofing trim selection, here are some of the most common types of metal roofing trim:

Valley Trim: Used when two roofs are joined together to help drain off rain and snow.
Transition Flashing: Used for roofs with two different pitches.
Endwall/Sidewall Flashing: Used for projections that come out of the roof such as dormers, chimneys, lean tos and more.
Gable Trim: Used to end panels on the roof.
Eave Trim: Applied where the Fascia board is installed on the low side of the roof.

Metal Roofing Trim Considerations

For consistent performance, it’s ideal to purchase metal roofing trim from the same manufacturer that produced your metal roofing panels. This will extend the life of your roof panel and protect your structure from damage. It will also ensure that the paint systems are compatible. When selecting metal roof trim, look for a heavier gauge material to improve dent resistance. For added protection, look for steel panels that have a Class 4 Hail Rating and a Class A Fire Rating.

Selecting Trim for Your Metal Roof

Roof Style

To select metal roofing trim for your building project, you should examine the roof to determine the metal roofing style. Is it a fastened through or concealed fastener roof? What are your expectations for curb appeal? Do you want a rustic look or a touch of modernity?

Gutters
Consider whether or not your roof will have gutters as this will affect the selection and application of eave trim.

Ridge Caps
Ridge caps are installed on the peak of the roof to help protect against damage from exposure to wind, sun and rain. There are two types of ridge caps to consider for your metal roof: single bend and double bend. Single bend ridge caps are designed for use on homes with roof ventilation materials and provide a clean, modern look.. Double bend ridge caps on the other hand are more durable, making them ideal for post-frame applications.

Roof Overhangs
Do you have overhangs on your roof? For homes and buildings that have ventilation on the eaves, consider adding ventilation material in the peak of the roof . For non-vented overhangs, use a closure to keep out weather and critters.

Roofing Composite
You will need to examine any existing roofing composite materials to determine whether to keep it or remove it. Additional framing material might be needed if installing panels over the existing roof. This will affect the selection of gable and eave trims.

To learn more about how to select metal roofing trim, reach out to your local ABC representative.

Why Choose ABC

At ABC, we offer a wide variety of trim to accommodate most applications. If none of our standard trim offerings fit your project, we can manufacture custom trim designed to fit your unique specifications. We offer a broad color palette for our metal roof panels, trim and gutter systems so you can create eye-catching curb appeal.

Browse our selection of metal roofing trim or contact a sales representative today.

Tips for Installing Metal Roofing Accessories

A properly-installed metal roof is expected to last 60 years or longer. However, incorrectly-installed roofing accessories can cause serious damage and decrease the life of your metal roof. The key to a long-lasting metal roof is correctly selecting and installing metal roofing accessories.

Considerations

When selecting and installing metal roofing accessories, it’s important to consider several factors.

Type of Construction– Consider the roofing substrate when selecting accessories. The fasteners used for installation will vary depending on the material that the panels and trim are attached to, such as framing or plywood sheeting.

Geometry of the Roof– When examining the geometry of the roof, look for symmetry and protrusions. If the roof has a chimney, skylight or other feature, flashing will be necessary to prevent leaks.

Roof Pitch & Slope– Since each panel profile channels water differently, it’s important to consider the slope and pitch of your roof when selecting metal roof panels. The recommended trim and accessories will depend on the panel profile selection.

Next, you can consider the aesthetic appeal of the available panel profiles and accessories for your building project.

Selecting Metal Roofing Accessories

Once you’ve examined your roof and selected the appropriate panel profile, you can choose metal roofing accessories to go with it. Each panel series has specific installation resources with a product checklist that outlines the standard accessories that should be used.

Installing Metal Roofing Accessories

When installing metal roofing accessories, it’s important to use caution when penetrating the roofing panels and select compatible materials. In most cases, the roofing contractor will be responsible for proper installation. All penetrations should be added to the project specifications and approved ahead of time by the roofing contractor.

Our manuals recommend detailed accessory installation instructions for each of the roof conditions mentioned above down to the trim, sealant and fasteners. For the longevity of your metal roof, it’s crucial to follow the standard details for your roofing conditions. Make sure to use the equipment offered by your manufacturer to preserve the weathertightness warranty.

Here are some things to avoid when installing metal roofing accessories:

  • Using dissimilar materials – Accessories made of dissimilar materials such as lead, copper and graphite can cause damaging reactions and corrosion.
  • Penetrating the roof before coordinating with the roofing contractor – To maintain the weathertightness warranty, all pipe penetrations should be coordinated with the roofing contractor.
  • Choosing the wrong clip for your insulation thickness – There are several different clip systems available that vary depending on the roof substrate.
  • Using an abrasive saw – Make sure to use the recommended tools. Using an abrasive saw could damage the cut edge, causing premature corrosion to the panel or trim, and likely damaging the paint system. This will void any finish warranty and create a potential spot for the roof system to leak. Instead, use snips or hand shears.

At ABC, we offer color matching fasteners, trim and other accessories to make your metal roofing project run smoothly. Have a question about installing metal roofing accessories? Reach out to your local ABC representative.

How To Prepare for Metal Roof Installation

Metal Roofing Installation Prep

If you’re looking to replace your current roof, metal roofing is a durable, low-maintenance alternative to asphalt shingles. To make the most of your investment, it’s important to plan ahead for the metal roof installation process. Learn about the steps that you and your contractor should take to prepare for metal roofing installation.

Consider Metal Roofing Options: Profiles, Gauge, Color, Etc.

Consult with a local distributor to select metal roofing materials for your building project. They’ll be able to provide resources such as product information, color charts, technical literature and product samples.

There are several factors to consider when selecting metal roofing panels. The most important consideration is the roof pitch. Make sure to choose a metal panel profile that will perform best with the pitch of your roof in order to keep it weathertight. Once you’ve selected the panel style, choose from a variety of profiles and colors depending on your budget and aesthetic preferences.

For residential applications, the Imperial Rib® panel, an exposed fastener panel, offers rustic charm. The SL-16® panel, a concealed fastener panel, provides a clean, sleek aesthetic.

Choose a Contractor

Next, you’ll need to select a contractor. During this process, it’s important to choose a contractor that has experience installing metal roofing. In many cases, your local distributor can provide references to narrow down your search.

Building Owner Prep Work

Although the contractor will be responsible for most of the heavy lifting, there are a few things you should do to prepare for metal roof panel installation.

Clear the Space

Make sure to clear the space around your home or building to prepare an adequate workspace for your contractor. For commercial properties, you may want to set up barriers to keep your customers safe. For residential buildings, you should remove items from the yard, patio, deck or balcony to keep them from being damaged. Consider protecting landscaping that’s in close proximity to the building by covering it with a tarp.

Alert Your Neighbors

As a courtesy to your neighbors, consider warning them about the loud noises that will likely occur during the metal roofing installation process.

Make Arrangements

Make arrangements for any individuals that may be disturbed by the noise. For residential buildings, you should also make arrangements for pets that may need to go outside during the day.

Contractor Prep Work

Measure the Roof & Create a Materials List

Once you’ve hired a contractor, they’ll begin their prep work by measuring the roof to create a materials list and determine order quantities. This list should contain all of the necessary materials including:

  • Panels
  • Trim (Edging)
  • Screws
  • Closure Strips/Closures
  • Venting Material
  • Other Roofing Accessories

Before the materials list is finalized, you should discuss with your contractor whether or not to vent the ridge cap. In residential situations, this is necessary to circulate air throughout the house.

Order Materials

In most cases, your contractor will be responsible for ordering the roofing materials through the local distributor. Before the order is placed, consider which warranty option is best for you. While a 40-year warranty is the most common choice, some of the lighter gauge materials offer a 20-year warranty option.

Inspect Material

Once the roofing materials are delivered, it’s important to inspect them. Your contractor should do the following:

  • Check the bill of lading to make sure that all materials have been delivered
  • Check the materials for damage including dents and scratched paint
  • If something is wrong with the order, contact the distributor to order replacement materials
Remove Old Roofing and Repair Damage

Remove the existing roofing down to the decking. After the existing roofing materials have been removed, the installer should check for bad decking and make any necessary repairs. All ice and water shields and underlayment should be removed and replaced as well.

Metal Roofing Installation

After all of the prep work is completed, the metal roof installation process can begin. During the installation process, it’s important to communicate with the main contact for your project about any concerns you may have. Once the installation process has been completed, make sure the work is done to your liking. Be sure to finalize payment and warranty information as well.

To learn more about the best practices for metal roof installation, contact your local ABC representative.

What Makes a Metal Building Green?

Longevity, reduced material consumption and decreased energy usage are what determine if a structure is sustainable. A design-build contractor or builder should understand the metal building owner’s sustainability goals from the onset of the design phase.

In addition to protecting the environment, designing a sustainable building can save your company money through reduced energy costs and garner recognition through several certification programs including LEED®, Green Globes and the Living Building Challenge

Metal buildings are a sustainable, or “green”, option from fabrication through the end of their lifespan. Here are some of the features of steel buildings that make them green: 

Durability

One benefit of metal buildings is the exceptional durability of the building components including metal siding, roofing and framing . Compared to traditional building materials like lumber or shingles, steel is resistant to damage from the elements including severe weather, insects and even fire. 

Lumberyard Entrance
Rice Lumber’s retail store utilizes CF Flute insulated metal panels in slate gray. For the warhouse, PBR in 26-gauge slate gray were used for the wall and soffit panel, while and 7.2 Panel was selected under deck for the rubber roof.

This longevity means that there’s no need to consume additional resources to repair or replace your metal building for decades, contributing to its overall sustainability.  

Reduced Impact at the Building Site 

The benefits of metal buildings extend beyond the materials used. Since metal buildings are fabricated off site, there’s less disruption of the area surrounding the building. They can be erected quickly with less waste.

Decreased Temperatures in Urban Areas

Additionally, buildings featuring cool metal roofing panels can help reduce the heat-island effect. The heat-island effect refers to the increase in temperature created when dark and heat absorbing roofing materials are used. These roofing materials can raise the temperature of surrounding areas by as much as seven degrees. This excess heat can be detrimental to plants, trees and people in urban areas. Since cool metal roofing reflects heat instead of absorbing it, less heat is transmitted to the surrounding areas. This helps plants retain water and people remain more comfortable. This also translates to decreased energy usage and decreased greenhouse gas emissions from the electricity used for cooling buildings. 

Improved Energy Efficiency

Metal buildings can also be designed for improved energy efficiency. Combine a variety of components such as insulated metal roof and wall panels and high-performance windows and doors to create an energy efficient building envelope. These components work together to create an effective thermal and vapor barrier, ultimately reducing energy consumption. 

Further improve the energy efficiency of your metal building by choosing cool metal roofing. Since these panels reflect the sun’s rays, less heat is absorbed into the building itself. This helps to reduce heating and cooling costs. 

Metal roofing panels are the perfect substrate for the installation of solar panels. Solar panels can be attached to a variety of metal panel styles. For standing seam metal roofing, solar panels can be clipped to the roof panel to avoid penetrating the substrate.  This renewable energy source will help reduce your building’s carbon footprint and lower electricity costs. 

Responsible Material Usage

When selecting sustainable materials for your building project, metal should be at the top of your list. Steel products contain a significant percentage of recycled material and are 100% recyclable at the end of the building’s life.

Since most metal buildings are prefabricated in shops, there’s less overall waste both at the job site and during fabrication. Any scrap materials that are created during fabrication can be recycled and reused. 

Indoor Environmental Quality 

One important component of sustainability is the interior performance of your building. This is achieved when the well-being of the building’s occupants is protected. Since metal building components are pre-finished off-site during fabrication, there are less harmful, volatile organic compounds released into the building. 

Additionally, metal buildings offer flexibility of design, allowing for the incorporation of windows, doors and skylights throughout in order to provide natural light and exterior views. This has been shown to benefit building users. 

How to Prevent Ice Dams on Metal Roofs

Those in areas prone to below-freezing temperatures are likely familiar with ice dams and the costly damage they can cause. With winter weather already upon us, it’s important to ensure your building is protected against the dangerous and expensive effects of ice dams.

What Causes Ice Dams to Develop?

Most ice dams are a result of building air barrier flaws. When warm indoor air escapes through a rooftop, it warms the roof sheathing. This rise in temperature melts the underside of the layer of snow on top. The melted snow then moves down the slope of the roof toward the eaves, where it freezes into ice. As this process continues, the ice thickens, resulting in ice dams. These obstructions can cause water to back up and form a reservoir that can damage ceilings.

Ice Dams | ABC Blog

How Can Ice Dams Be Prevented?

To prevent ice dams, follow these four steps:

  1. Seal Air Leaks: Sealing air leaks between the warm building interior and the attic or ceiling is imperative to prevent increased sheathing temperatures that can lead to ice dams. If your roof leaks every winter, it’s likely that an air leak is to blame. And, getting a new roof is not likely to help—even if it features more ventilation. The simple way to determine if you have air leaks is to get into your attic and check. Leaks can likely be easily sealed with two-component polyurethane spray foam. And extending any exhaust fans that don’t reach outside can help adequately seal the structure.
  1. Ensure Proper Insulation: Many buildings don’t have adequate insulation levels to prevent ice damming. Building codes based on your geographic location can help you determine how much insulation you need. If the structure’s design doesn’t allow for adequate insulation, we recommend installing as much closed-cell spray polyurethane foam as possible. If replacing your roof, you can also install additional rigid foam insulation on top of the existing roof sheathing before you install the new roof. When taking that approach, make sure all products used are compatible with your new roof and adhere to manufacturer’s recommendations. It’s also imperative that attic insulation completely covers the top plates of a building’s exterior walls.
  1. Improve Ventilation: Improving ventilation alone will not prevent air leaks that cause ice damming and should never be your first or only defense. In fact, improving ventilation without sealing air leaks and installing adequate insulation can increase heating costs and make ice damming problems worse. Despite this, if combined with steps one and two above, addressing your roof ventilation can’t hurt. The best ventilation options include soffit and ridge vents. It’s important to remember that all attic ventilation systems require an insulation dam (blocking) between the trusses and ventilation baffles at the attic’s perimeter, facing the soffits, to maintain a ventilation channel from the soffit to the attic and protect against wind-wash.
  1. Use Underlayment: Covering your roof sheathing with two or more layers of rubberized membrane underlayment is another protection method that is far less effective if not used in concert with steps one and two. To use properly, it should extend from roof eaves to a point that’s three feet higher than your exterior wall.

Additional measures like framing your roof with raised-heel trusses can also help prevent ice dams. Additionally, avoiding including valleys as well as gutters that are at or above the roofing plane is ideal. Taking these steps can help ensure people and property are safe from overhead dangers. This should be a priority when designing, installing and maintaining your metal roof.

For additional information on how metal roofs perform in winter weather, read part one and part two of our ‘Metal Roofs and Snow’ blog series. For additional tips on how to winter-proof your roof, reach out to a local ABC representative today.

DISTRIBUTORS: Shop online at shop.abcmetalroofing.com!

What You Need to Know About Insulated Metal Panels

Insulated Metal Panels (IMPs), simply put, are the insulated version of single-skin (uninsulated) metal panels. As the name suggests, IMPs provide insulation and, therefore, thermal control and barrier protection to structures. This helps ensure air, heat and moisture stay outside of a building, reducing the chances of mold, corrosion and rotting.

ABC Blog: Insulated Metal Panels (IMPs)A versatile and practical choice, IMPs are designed for many roof and vertical and horizontal wall applications—including ceiling panels and wall partitions for commercial, industrial and post-frame building types. IMPs are ideal for sustainability-minded designs, offering excellent R-values (indicating their insulating power) and improving energy efficiency. What’s more, they’re available in various colors, thicknesses, widths and finishes, providing many customization options to choose from.

Here, we’ll take a look at some of the many benefits of using IMPs. Plus, we’ll review some factors to consider when deciding if IMPs are the right choice for a building project.

Choosing IMPs:

There are several important factors that go into the decision to use IMPs. While they offer tremendous benefits, it’s always good to research the product to ensure it meets your needs. The manufacturer, as always, is a great resource to help determine the optimal material and product, given all the parameters. Here are some of the main factors to consider.

 Benefits of using IMPs:
  • Installation and Maintenance: IMPs have similar requirements to single-skin in terms of time and labor.
  • Longevity: IMPs can enhance the building lifespan, as they protect from unwanted and damaging heat and moisture.
  • Versatility: Available in a range of panel colors, thicknesses, widths and finishes, IMPs offer many customization options.
  • Energy Savings: Because they help regulate interior temperature, IMPs are more effective at energy conservation as compared to single-skin panels.
  • Energy Performance: Contractors and builders can use IMPs to achieve necessary energy performance levels with this single-source enclosure, providing a continuous blanket of protection.
  • R-Value Performance: IMP tests show thermal performance values up to R-8.515 (roof panels) and 7.08 (wall panels) per inch of panel thickness. i.e., a 2.5-inch-deep panel would easily meet the International Energy Conservation Code and ASHRAE minimums.
  • Cost: While generally more expensive than single-skin panels, this cost is often offset by long-term savings.
  • Tax Savings: Federal, state and/or local governments often offer incentives for using sustainable or “green” products that meet energy-efficiency requirements. Your personal tax advisor can share more information on any currently available incentive programs.
How to know if you need an insulated metal panel:
  • Building Type/End Use: Any structure that will hold people or goods should consider using IMPs. Specialized facilities that require reliable temperature and moisture regulation are excellent candidates for IMP use. These include refrigerated warehouses, research laboratories, government facilities, defense contractors, technology companies, MRI clinics and food production facilities, to name a few.
  • Geography and Weather: Depending on region/weather considerations, IMPs might be the best choice. To help determine if that is the case, you can calculate the functional amount of insulation needed in your area by using the minimum rated R-values method or the maximum U-factor assembly calculation. [For IMPs, the Maximum U-Factor Assembly calculations is recommended and can be tested using ASTM C1363.]
  • Meeting Fire Rating Requirements: To become fire-rated, IMP manufacturers can submit full-size product samples to a testing laboratory like Underwriters Laboratories (UL). The products are then tested according to standard, agreed-upon procedures such as ANSI/UL 263, “Standard for Fire Tests of Building Construction and Materials.” The manufacturer can provide confirmation as to whether a particular IMP meets the requirement for your project.

All things considered, the advantages IMPs offer often make them ideal for many building applications. This is particularly true when it comes to energy efficiency and sustainability for the post-frame, commercial, industrial and institutional markets. For more information on IMPs, check out ABC’s IMP resources or reach out to an ABC representative in your area.

Metal Panel Installation: Surface Considerations and Building Applications

In our last blog post, we outlined the steps to take before metal panel installation to ensure projects are built to last. In this post, we’ll take a look at the important metal panel installation considerations that should be made, particularly when working with varying surface conditions and building end-uses.

Surface Considerations:

During the installation of metal panels, it is critical that installers:

  • make sure everything is square and on a level plane (i.e., plumb and true). If it’s not, it will need to be corrected. Note: It is not recommended that the building owner do this themselves unless they are experienced and comfortable assuming the associated risks.
  • ensure the integrity of the substrate is not compromised. If installation issues or delays are caused by faulty substrate, for example, the parties responsible for the substrate would need to correct the causal issue. In retrofit projects, existing substrate issues must be addressed, but it is likely that the original builder will not be able to be sourced to correct the problem. In this case, a roofing consultant or knowledgeable substrate tradesman can help advise.
Installing Metal Panels with Different Building Applications

While installation is generally the same for most end-use applications, some equipment may vary. Depending on the other products or materials in the mix, there are certain caveats to keep in mind. For instance:

  • Over Asphalt Shingles: While installing a metal roof over an existing asphalt shingle roof is possible, it is not recommended to place metal panels directly over asphalt. In this scenario, keep in mind that:
    • It’s best to remove asphalt shingles or use a furring strip to create a buffer. (This means you can use a 1” x 4” piece of wood to provide clearance between the asphalt shingles and the metal panels.)
    • It’s not ideal to lay underlayment on top of asphalt and then install a metal roof because the shingle will curl and those imperfections will show through the metal, particularly when using lighter gauge.
  • Over Dissimilar Metals: Do not let your metal panels come into contact with dissimilar metals or allow run-off water that has been in contact with dissimilar metals to come into contact with the metal panels.
  • Over Treated Lumber: Separator material can be recommended by your installer or preferred material provider (lumber yard, home improvement store, etc.) and should be used; appropriate fasteners designed to be used to connect treated lumber with metal panels should always be used in these cases as well.
Other Metal Panel Installation Considerations:

The need for the following features and considerations can vary based on projects.

  • Vapor barriers
  • Ice and water shields
  • Regardless of all else, you’ll always want to be sure local codes/Homeowners Association (HOA) requirements are met.
Final FAQ:

How to choose a Metal Panel installer? End-users can request a list of nearby installers who may be able to help with their project from their metal building material supplier. Material manufacturers do not make these recommendations.

What if your panels are installed incorrectly? Let the installer know about any issues as soon as possible and work to get them resolved quickly. If you think the improper installation jeopardizes the product warranty, please advise the company that sold the material to you (metal panel distributor) as soon as possible. They will work with the manufacturer to resolve any warranty issues.

For more information on metal panel installation considerations or to find a metal panel distributor or installer in your area, contact your local ABC representative.


Metal Roof Pitch Part I: Engineering and Strength Considerations

Whether you’re an owner who needs to consider roofing material options because of the nature or design of your building, or a distributor/contractor whose job it is to recognize whether a suggested design will or won’t work based on a range of circumstances, it is critical to understand the engineering behind why roof pitch and tensile strength are important on a metal building project. In part one of our series, we look at the engineering and strength considerations that need to be taken into account when designing or specifying a building, while part two will review the best type of metal panel to use based on the pitch and end-use of your building,

Engineering Considerations:

Ideally, your roof pitch will be the “sweet spot” between having a roof pitch that’s so shallow that the beared load is increased and having a roof pitch that’s so steep that wind uplift probability is increased—a factor which can also vary based on the building width. Specific engineering considerations with regard to roof slope include:

  • Snow Load Requirements: lower slopes create more load that the roof/structure must support. For example, when you have a flat roof and it snows, the snow will stay on the roof, adding more weight; on a sloped roof, a good amount of the snow will slide off of the roof, so the load will remain in an acceptable range the structure can support.
  • Wind Load: Preventing roof damage from high winds is largely dependent on roof geometry, slope and building material used. If outside air is allowed to penetrate a structure through cracks and other openings when wind flows over a building, the air pressure beneath the roof assembly increases. When this pressure becomes greater than the pressure directly above the roof (which happens as wind flows over a building), this can cause upward force on the roof system, leading to loss of structural integrity and significant damage. Wind uplift rating and minimum slope requirements are dictated by building codes in the market, so be sure to check with your local municipality for specific details.
  • Water Diversion: the steeper the pitch the faster it will channel and divert water, preventing it from pooling and causing other issue like mold, mildew and paint degradation. As with the snow load considerations mentioned above, the less additional weight burdening the roofing system, the better.
  • Minimizing Debris: steeper-sloped roofs also help minimize the chance that debris, mold and mildew have to build up on the roofing system. Unless there is a catastrophic weather event that drops large amounts of heavy debris—tree branches for example—there is a small chance that debris on a roof of any slope will exceed its ability to carry the load. However, because the more debris is able to slide down and off of a metal roof, the less that needs to be manually cleaned. Additionally, access to and cleaning the eaves of sloped roofs is much easier and less time-consuming that trying to perform the same maintenance on a roof with less slope.

The Strength of Metal Panels:

  • Tensile strength: This refers to the panel’s ability to resist breaking when it’s placed under pressure or tension—meaning the panel has a measured ability to bend under a certain amount of stress before it snaps. Galvanized steel panels can withstand between 50,000 and 80,000 pounds of pressure per square inch (50 KSI – 80 KSI)—significantly higher than the tensile strength of other roofing materials. Despite this, metal panels remain lighter and more impact resistant, keeping the likelihood and cost of repairs to a minimum. Check the tensile strength of your metal panels with the manufacturer and be sure to reference common testing standards related to roof slope, including ISO ratings and ASTM standards that test tensile strength.
  • Steel Hardness and Density: While it can generally be assumed that thicker-gauge panels are stronger, the type of building construction, location and end-use can affect the choice in panel thickness. Buildings such as pole barns, post-frame buildings, warehouses and garages can require roof panels to span longer distances and therefore require thicker panels as they are more structurally sound. These thicker panels will also aid in reducing the chance of collapse under the weight of snow and water—particularly when the roof pitch is low. For smaller buildings—like residences—with supporting trusses and purlins that are typically closer together, thinner panels can be used in conjunction with thicker trim for an economic, structurally ideal residential metal roofing system. See our blog on metal panel gauges for more.

Conclusion:

Following common standards, doing adequate research and conforming to manufacturer guidelines regarding slope will ensure you’re reaping the full benefit of your metal roof panel selection. For more information on metal roofs and to learn more about recommendations on roof slope, contact your local ABC representative today.

Additional Resources:

For more information on slope requirements, visit NRCA’s website. For more information on steep-slope metal roofs and their benefits, visit the Metal Construction Association’s website.