When to Call a Metal Panel Manufacturer: Part 1

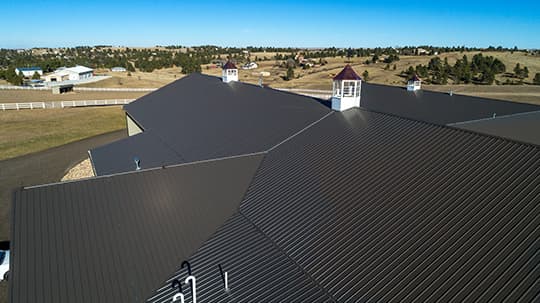
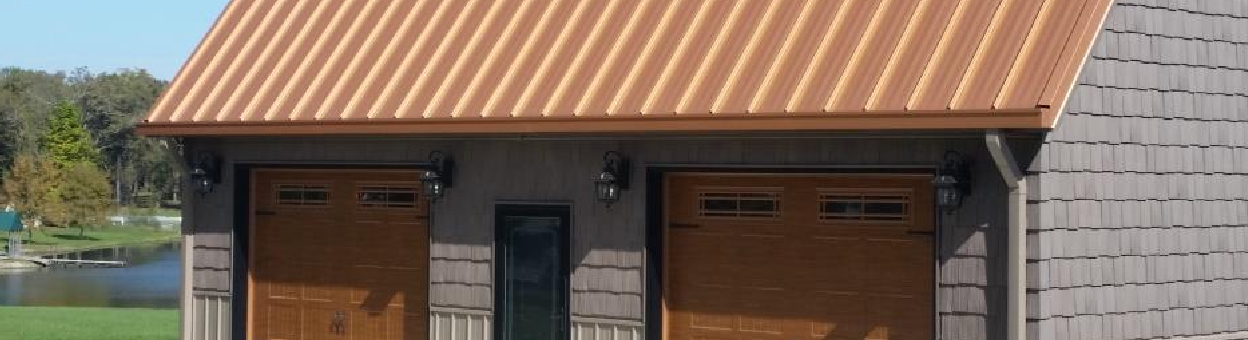
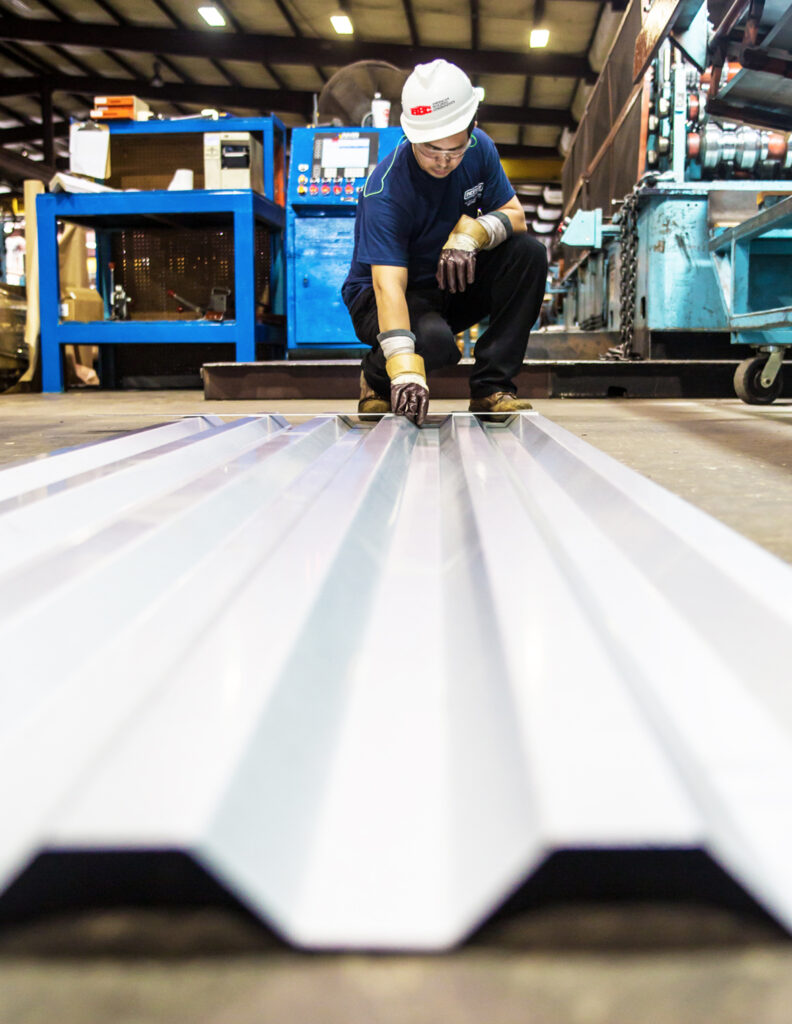
Each metal building installation is unique and even the most experienced of installers can run into trouble on a job. Whether a panel isn’t engaging properly, it’s not meeting stated tolerances or fasteners are missing or not working, anyone who takes on the task of installing metal panels needs to know when to call a metal panel manufacturer for support, guidance and resources at any time to ensure the success of their project.

ABC Blog: When to Call a Metal Panel Manufacturer

Manufacturer Resources:

While it’s not the manufacturer’s responsibility to guarantee their panels are installed correctly, reputable manufacturers should set installers up for success. They can do this by providing product resources and recommendations on how to alleviate or mitigate potential pitfalls, and by sharing tips on how to avoid common mistakes that other installers have made.

  • Product Installation Manuals and Construction Drawings: Before installation begins, the product installation manual and detailed construction drawings should be reviewed by the installer—especially if this is his or her first time working with the product. These resources contain all the product information needed as well as installation best practices. American Building Components makes product details and installation information available to metal panel dealers and distributors through shop.abcmetalroofing.com. If you’re a dealer or distributor, click here to learn more and sign up for an account!

Installation techniques can vary based on the unique dimensions of the panel as well as on the actual building design. When an issue arises that is beyond an installer’s expertise, it’s in the best interest of everyone involved to call a metal panel manufacturer for input before permanent mistakes are made.

When to Call a Metal Panel Manufacturer

Examples of when American Building Components recommends that an installer immediately call a metal panel manufacturer are:

  • Product Damage: Building owners may not always be able to recognize material damage and understand how it can be detrimental. Therefore, installers should always evaluate all building materials before any installation begins. If—after review—damage is suspected, the building owner should take pictures of the damage and notify the manufacturer immediately. The manufacturer will advise if the issue is minor and installation can begin, or if the panels should not be installed. The last thing you want to do is install damaged panels and have to uninstall them and wait for new materials. The impact of removing and replacing panels like this will significantly increase cost and delay the construction schedule.
  • Fastener Issues: The type of fastener used depends on the material they will be fastening to (substrate). If the substrate differs from what’s stated in the project details, check with the manufacturer to verify that the provided fasteners can be used. If the screws aren’t engaging properly, or there any problems with the fastener type. The manufacturer can advise how to move forward based on the project details. In short, substituting fasteners with ones not supplied by the manufacturer is never recommended.

Remember: no problem is too small to call a metal panel manufacturer for advice! In part two of this series, we’ll share more situations when calling the manufacturer will save time, money and headache. For more information on metal roof and wall products, visit us online or reach out to your local representative today!

Concealed v. Through-Fastened Metal Roof and Wall Panels: How to Choose

All metal panels—whether for commercial, residential, industrial or agricultural applications—are attached to the structure using either fasteners, clips or a combination of both that keep them in place. Vertical panels, in particular, are often categorized by the type of fastening method used to attach them, which is most often either using hidden/concealed fasteners or using an exposed (through-fastened) method. Here we’ll look at the benefits your customers can experience when using these common fastening types, as well as their differentiators, including price/budget, durability, aesthetics and ease of installation.

Concealed-Fastened Roofing Panels

Concealed-fastened panels are attached to the substrate with clips, which means the panels are not pierced to secure the connection. The clips and fasteners, therefore, are concealed underneath the metal panels when properly installed—arguably making the roof more aesthetically pleasing. These panels are offered in various styles, depending on which options your customers choose and additional job-specific considerations. This method is common in architectural and residential applications where a clean appearance and protection from environmental exposure are priorities.

Through-Fastened (Exposed) Roofing Panels

Through-fastened panels are generally attached with screws or nails, which puncture the overlapping roofing sections to lock the panels into place. They are also installed using washers, which provide leakage protection around the puncture hole. The fasteners are on the outside face of the panel and are visible even after the installation is complete.

So, how do your customers decide which option is right for their project? See below for some factors that can help them choose between a concealed- or through-fastened approach.

Key Considerations

Price/Budget:

Concealed: Typically, concealed-fastened panels can be more expensive overall due to the longer installation time required. In addition to increasing the labor cost, this installation method also takes longer, which affects your customer’s project schedule. However, ABC’s SL-16® panel can be installed faster and for about the same cost as exposed-fastened panel systems.

Through-fastened: While less expensive, through-fastened applications are more prone to issues. For example, if a washer fails, the screw can pop, which allows water in and can cause leaks and corrosion. While washer material is of a higher quality and more dependable than in the past, this is still a concern.

Durability:

Concealed: Because concealed fasteners have limited weather exposure, they therefore generally have a longer lifespan than panels with exposed fasteners. Additionally, there is less wear and tear since concealed panel fasteners are not as affected by the metal panel expansion and contraction that occurs when temperatures fluctuate as exposed-fastened panels are.

Through-fastened: Because concealed fasteners have limited weather exposure, they generally have a longer lifespan than panels with exposed fasteners. Additionally, there is less wear and tear since concealed panel fasteners are not as affected by the metal panel expansion and contraction that occurs when temperatures fluctuate as exposed-fastened panels are.

Aesthetics:

Concealed: Aesthetically, the main question is whether your customers want the screws to be visible or if it’s important that they are hidden. A concealed-fastened application is considered more aesthetically pleasing, as the lack of visible fasteners, creating a smooth, clean appearance. Generally, residential and architectural buildings favor concealed-fastened roofing panels.

Through-fastened: As stated, the hundreds of fasteners required to secure panels are exposed and visible on the outside of the panels. This method is often used on agricultural and industrial buildings, as clean aesthetics are usually less important for customers in these markets.

Ease of Installation:

Concealed: Installing concealed-fastened metal panel systems is time-consuming and complicated as compared to through-fastened. In fact, the complexity of the process dissuades many DIY installers from taking on the task.

Through-fastened: Exposed-fastened metal panel systems require less installation time as each fastener is drilled directly onto the outside of the panels. This makes it the method of choice for the majority of DIY installers. Overall, this method works well with simple structures but can be difficult to use on more complex projects. It should also be noted that through-fastened panels should be installed with care so that there is proper sealing. There also may be length limitations due to thermal movement.

Conclusion

The type of fastener system your customers choose for a given metal panel project will depend on a wide array of factors—budget, durability, aesthetics and ease of installation. Making the right choice is one step in ensuring the success and integrity of their building for years to come.

For more information on ABC’s concealed and through-fastened metal panels, visit our website. As always, our team is ready to help with your metal panel needs, so reach out to your local representative today!

Proper Ventilation for Metal Roofs and Walls

Selecting metal roof and wall panels is a strategic investment for the life of a building. To protect their investment, it is key that your customers ensure the proper ventilation system is installed. Optimal air movement not only promotes temperature regulation and energy efficiency but also reduces the risk of moisture-related issues like condensation build-up. Here, we look at some of the main ventilation considerations and resources your customers need to ensure success.

ABC Blog: Proper Ventilation of Metal Roofs and Walls

Why is proper ventilation important?

Proper ventilation helps optimize the performance and efficiency of metal buildings by:

  1. Controlling condensation

Condensation can wreak havoc on metal, causing corrosion, reduced thermal performance of insulation, mold and mildew growth, and even insect infestations. For example, in warm and humid areas, outside air that enters a building without moving through a ventilation system can bring with it large amounts of humidity. This humid air can create an uncomfortable environment, accelerate panel weathering and increase the possibility of mold growth. This issue is worsened when the outside temperature falls below the inside temperature, creating a perfect breeding ground for condensation development.

  1. Regulating temperature

Regulating and maintaining ideal interior temperature can help cool the building in warmer months, keeping the structure comfortable to occupy. Temperature regulation also helps protect the integrity of the building from excess (and premature) metal panel expansion and contraction. This movement can weaken the integrity of fasteners, which are designed to keep panels from detaching/pulling away from the substrate.

  1. Preserving air quality inside the building

Proper ventilation helps remove volatile organic compounds and other air pollutants that are detrimental to human health and productivity. The Environmental Protection Agency (EPA) and the Occupational Safety and Health Administration (OSHA) have published guidance on indoor air quality standards in commercial/institutional buildings. These standards help determine ventilation needs that need to be met to ensure compliance.

Who Needs Ventilation?

As expected, most structures require proper ventilation in accordance with their geographic location, contents and/or building end-use. Structures housing chemicals or moist substances require more ventilation than those storing dry goods in relatively arid environments. Ventilating a building that stores ceramic in the desert is very different than ventilating an indoor sauna in practically any geographic location. Agricultural facilities in particular must employ proper ventilation to mitigate the dangers posed by ammonia and other corrosive airborne fumes. (See our Animal Housing blog post for more.)

How to Ensure Proper Ventilation:

Similarly, the ideal amount and type of ventilation your customers need depends on their building’s unique specifications and end use. Generally, structures larger than 2,400 sq. ft. may require more than one type of ventilator to allow air to move between them (cross-ventilation). Structures that house people, animals and/or valuable material also benefit from cross-ventilation using ridge vents near the roof and a louver vent located closer to the structure’s floor. In these cases, it is recommended that your customers work with design professionals and building engineers who can help determine the building ventilation requirements. These professionals can recommend the appropriate, high-quality metal panels and components that suit the unique requirements of their project.

So, what ventilation options are available for your customers? Ventilation solutions fall into two main categories: natural (unpowered) and mechanical (electrically assisted):

  • Natural ventilation methods include installing a ridge and eave vents that enable air to circulate naturally through the building. Your customers can also use vents that capitalize on the natural vacuum created when air moves quickly over angled surfaces like roofs. The lower pressure in this vacuum draws air out of the building—most often through ridge vents. This choice will depend on your customer’s aesthetic preferences and/or installation location limitations.


  • Mechanical or power-assisted ventilation helps draw more cubic feet of air into and out of the space per minute. Powered fans with curved blades and/or louvers are often used to achieve greater air flow. As previously noted, air flow is vital in preventing condensation, so this is particularly helpful in naturally humid environments.

Conclusion

In conclusion, proper ventilation is a critical component of any high-quality building. As metal panels are becoming more popular, understanding how to achieve an effective ventilation system can help ensure the success of your customers’ building projects.

For more on ABC’s ventilation solutions, visit our previous blog on condensation management, check out our ventilation-enabling components or reach out to your local representative today!

Metal Panel Installation: Surface Considerations and Building Applications

In our last blog post, we outlined the steps to take before metal panel installation to ensure projects are built to last. In this post, we’ll take a look at the important metal panel installation considerations that should be made, particularly when working with varying surface conditions and building end-uses.

Surface Considerations:

During the installation of metal panels, it is critical that installers:

  • make sure everything is square and on a level plane (i.e., plumb and true). If it’s not, it will need to be corrected. Note: It is not recommended that the building owner do this themselves unless they are experienced and comfortable assuming the associated risks.
  • ensure the integrity of the substrate is not compromised. If installation issues or delays are caused by faulty substrate, for example, the parties responsible for the substrate would need to correct the causal issue. In retrofit projects, existing substrate issues must be addressed, but it is likely that the original builder will not be able to be sourced to correct the problem. In this case, a roofing consultant or knowledgeable substrate tradesman can help advise.
Installing Metal Panels with Different Building Applications

While installation is generally the same for most end-use applications, some equipment may vary. Depending on the other products or materials in the mix, there are certain caveats to keep in mind. For instance:

  • Over Asphalt Shingles: While installing a metal roof over an existing asphalt shingle roof is possible, it is not recommended to place metal panels directly over asphalt. In this scenario, keep in mind that:
    • It’s best to remove asphalt shingles or use a furring strip to create a buffer. (This means you can use a 1” x 4” piece of wood to provide clearance between the asphalt shingles and the metal panels.)
    • It’s not ideal to lay underlayment on top of asphalt and then install a metal roof because the shingle will curl and those imperfections will show through the metal, particularly when using lighter gauge.
  • Over Dissimilar Metals: Do not let your metal panels come into contact with dissimilar metals or allow run-off water that has been in contact with dissimilar metals to come into contact with the metal panels.
  • Over Treated Lumber: Separator material can be recommended by your installer or preferred material provider (lumber yard, home improvement store, etc.) and should be used; appropriate fasteners designed to be used to connect treated lumber with metal panels should always be used in these cases as well.
Other Metal Panel Installation Considerations:

The need for the following features and considerations can vary based on projects.

  • Vapor barriers
  • Ice and water shields
  • Regardless of all else, you’ll always want to be sure local codes/Homeowners Association (HOA) requirements are met.
Final FAQ:

How to choose a Metal Panel installer? End-users can request a list of nearby installers who may be able to help with their project from their metal building material supplier. Material manufacturers do not make these recommendations.

What if your panels are installed incorrectly? Let the installer know about any issues as soon as possible and work to get them resolved quickly. If you think the improper installation jeopardizes the product warranty, please advise the company that sold the material to you (metal panel distributor) as soon as possible. They will work with the manufacturer to resolve any warranty issues.

For more information on metal panel installation considerations or to find a metal panel distributor or installer in your area, contact your local ABC representative.


Preparing for Installation of Your Metal Panels

There is no doubt that selecting metal roof and wall products is a wise investment. To make the most of that investment, it’s important to take certain preparation steps before beginning your metal panel installation. Once you’ve purchased the materials you need, the next order of business is to ensure the metal panels, trim and components are properly prepped. This is your best chance at keeping your job site safe, making sure your materials are not lost or damaged and ensuring your project stays on schedule so you reap the benefits of going metal.


  • Step One: Project Planning

    Starting your project with a clear plan will yield the best results. When planning your metal panel installation project, choosing an appropriate time to install is essential. Considerations will vary based on your location and include:

    • Moisture levels: it’s better to install when it’s dry (no rain, dew, snow or ice) as installing when surfaces are slick increases chances of slipping and injury.
    • Wind conditions: it’s better to install in low-wind conditions to prevent chances of injury/product damage.
  • Step Two: Material Check

    Once your materials are delivered to your warehouse or job site, the next order of business is to make sure you’ve received all of the building materials you ordered and that all pieces are in good condition. You will need to:

    • Manage a material receiving checklist
    • Check your panels for moisture, denting/bending, wind damage and additional transit abrasion
    • Ensure proper storage of your materials, including panels and trim in bundled and stacked sheets, to protect them from damage and prevent corrosion and/or galvanic reaction

    Check out ABC’s blog post on metal panel delivery and material handling for details on proper loading and unloading, cutting and job site safety. Additionally, our post on metal panel storage provides best practices on keeping your panels and components in pristine condition whether they’re going to be installed immediately or stored for future use or sale.

  • Step Three: Metal Panel Installation Preparation

    Once the location of the project is defined and the materials have been ordered, delivered and checked, the ultimate responsibility for on-site panel preparation lies with the installer, who should:

    • Re-check that all materials are present and in good condition
    • Arrange the material so that it stays undamaged and doesn’t pose a hazard to anyone on the site during installation
    • Ensure all metal panel installation tools are available and properly functioning, including drills, ladders and seamers
    • Make sure all safety preparations have been made and all safety gear is in good condition, including gloves, eye masks, safety helmets, boots and wrist guards.

Metal building panel and components manufacturers often make a variety of resources available for review, including product details, technical bulletins and installation manuals that can help building owners, distributors/contractors and installers alike. For more information on preparing for metal panel installation, contact your local ABC representative.

Metal Roof Pitch Part II: Panel Selection for Your Building End-Use

In part one of our series on metal panel roof pitch, we looked at the engineering and strength considerations that need to be taken into account when designing or specifying a building. In part two, we’ll review how to make the right metal panel selection for your building end-use by looking at the building type and roof pitch to find the optimal combination of form and function.

Types of roof panels:

Different types of metal roof panels are better suited for certain roof pitches and this mostly has to do with panel rib height and how they’re seamed together. For instance, the lower the pitch, the taller the rib of the roof panel needs to be in order to optimize water carrying capacity. Also, the lower the pitch, the slower water runs off the roof; combined with wind pressure, this can hold water at the eave. As an example:

  • On 2:12 and lower pitches for commercial/industrial jobs, weathertightness warranties will use a mechanically seamed panel because it creates an impenetrable lock that keep water from seeping between the panels. Seamed panels can be thought of as more hydrostatic (resistant to water), whereas non-seamed panels are hydrokinetic, i.e., water runs off of them, but they are not designed to be a water barrier.

Building Type and Use:

Whether residential, post-frame or commercial, structures follow general design criteria regarding metal roof slope, based on to the building type and use. For instance:

Gabled v. Hipped: gabled roofs provide more interior headroom while with hipped roofs, endwall sheet height can be reduced, making for easier ordering and installation as you don’t have to cut/miter the sheets.

  • Residential v. Post-Frame and Commercial Use: While it can generally be assumed that thicker-gauge panels are stronger, the type of building construction, location and end-use can affect the choice in panel thickness. Residential roofs generally have steeper slopes (often due to aesthetic sensibilities), while commercial and post-frame buildings will typically have a shallower pitch to increase the strength of the building. Buildings such as pole barns, post-frame buildings, warehouses and garages can require roof panels to span longer distances between supporting trusses and purlins and therefore require thicker panels to ensure the roof is structurally sound and can aid in reducing the chance of collapse under the weight of snow and water—particularly when the roof pitch is low. For smaller buildings—like residences—with supporting trusses and purlins that are typically closer together, thinner panels can be used in conjunction with thicker trim for an economic, structurally ideal residential metal roofing system. See our blog on metal panel gauges for more.
  • Economics: When a roof has a shallower pitch, less material is needed to cover the same roof span. This can be more economical since fewer square feet of material needs to be purchased, or at least help in offsetting the cost of the thicker panels commonly used on low-slope roof—a consideration often important to companies with multiple properties. Likewise, while more material may need to be purchased for a high-sloped roof, you may be able to buy thinner, less expensive panels since high-slope roofs don’t typically need to be able to support heavier loads like low-slope roofs do.
  • Aesthetics: Traditional residences typically feature a higher roof pitch while this may be less important to commercial building owners. However—from a functional standpoint—thicker panels can be more forgiving of installation errors such as over-tightened screws and aren’t as likely to transfer waves and bumps in sheathing.

Solar Panels and Roof Pitch:

The geographic location of a structure will determine the angle at which the solar panels should be installed. Generally. the closer to the equator you get, the lower the slope the solar panels can tolerate as roofs closer to the equator have more consistent exposure to sunlight as compared to those farther away. If you plan to add solar panels to your metal roof, be sure to check the Solar Reflective Index (SRI) values and minimum slopes set by the ASTM and local governing codes. These standards will advise adequate slope based on your location as well as help control things such as heat island effects, etc.  For more information on solar reflectance and how it is affected by the color of your metal roof panels, see our blog post on cool metal roofs.

Conclusion:

Roof slope is a factor that affects many decisions when it comes to any metal building roofing project regardless of the building’s end use. When embarking on any metal roofing project, be sure that the panels you’ve selected meet local building codes and are produced by a quality manufacturer with knowledge and experience designing for different applications to ensure you get exactly what you’re looking for. For more information on metal panel selection for your building end-use and to learn more about recommendations on roof slope for different building types, contact your local ABC representative today.

 Additional Resources:

For more information on slope requirements, visit NRCA’s website. For more information on steep-slope metal roofs and their benefits, visit the Metal Construction Association’s website.

Metal Roof Pitch Part I: Engineering and Strength Considerations

Whether you’re an owner who needs to consider roofing material options because of the nature or design of your building, or a distributor/contractor whose job it is to recognize whether a suggested design will or won’t work based on a range of circumstances, it is critical to understand the engineering behind why roof pitch and tensile strength are important on a metal building project. In part one of our series, we look at the engineering and strength considerations that need to be taken into account when designing or specifying a building, while part two will review the best type of metal panel to use based on the pitch and end-use of your building,

Engineering Considerations:

Ideally, your roof pitch will be the “sweet spot” between having a roof pitch that’s so shallow that the beared load is increased and having a roof pitch that’s so steep that wind uplift probability is increased—a factor which can also vary based on the building width. Specific engineering considerations with regard to roof slope include:

  • Snow Load Requirements: lower slopes create more load that the roof/structure must support. For example, when you have a flat roof and it snows, the snow will stay on the roof, adding more weight; on a sloped roof, a good amount of the snow will slide off of the roof, so the load will remain in an acceptable range the structure can support.
  • Wind Load: Preventing roof damage from high winds is largely dependent on roof geometry, slope and building material used. If outside air is allowed to penetrate a structure through cracks and other openings when wind flows over a building, the air pressure beneath the roof assembly increases. When this pressure becomes greater than the pressure directly above the roof (which happens as wind flows over a building), this can cause upward force on the roof system, leading to loss of structural integrity and significant damage. Wind uplift rating and minimum slope requirements are dictated by building codes in the market, so be sure to check with your local municipality for specific details.
  • Water Diversion: the steeper the pitch the faster it will channel and divert water, preventing it from pooling and causing other issue like mold, mildew and paint degradation. As with the snow load considerations mentioned above, the less additional weight burdening the roofing system, the better.
  • Minimizing Debris: steeper-sloped roofs also help minimize the chance that debris, mold and mildew have to build up on the roofing system. Unless there is a catastrophic weather event that drops large amounts of heavy debris—tree branches for example—there is a small chance that debris on a roof of any slope will exceed its ability to carry the load. However, because the more debris is able to slide down and off of a metal roof, the less that needs to be manually cleaned. Additionally, access to and cleaning the eaves of sloped roofs is much easier and less time-consuming that trying to perform the same maintenance on a roof with less slope.

The Strength of Metal Panels:

  • Tensile strength: This refers to the panel’s ability to resist breaking when it’s placed under pressure or tension—meaning the panel has a measured ability to bend under a certain amount of stress before it snaps. Galvanized steel panels can withstand between 50,000 and 80,000 pounds of pressure per square inch (50 KSI – 80 KSI)—significantly higher than the tensile strength of other roofing materials. Despite this, metal panels remain lighter and more impact resistant, keeping the likelihood and cost of repairs to a minimum. Check the tensile strength of your metal panels with the manufacturer and be sure to reference common testing standards related to roof slope, including ISO ratings and ASTM standards that test tensile strength.
  • Steel Hardness and Density: While it can generally be assumed that thicker-gauge panels are stronger, the type of building construction, location and end-use can affect the choice in panel thickness. Buildings such as pole barns, post-frame buildings, warehouses and garages can require roof panels to span longer distances and therefore require thicker panels as they are more structurally sound. These thicker panels will also aid in reducing the chance of collapse under the weight of snow and water—particularly when the roof pitch is low. For smaller buildings—like residences—with supporting trusses and purlins that are typically closer together, thinner panels can be used in conjunction with thicker trim for an economic, structurally ideal residential metal roofing system. See our blog on metal panel gauges for more.

Conclusion:

Following common standards, doing adequate research and conforming to manufacturer guidelines regarding slope will ensure you’re reaping the full benefit of your metal roof panel selection. For more information on metal roofs and to learn more about recommendations on roof slope, contact your local ABC representative today.

Additional Resources:

For more information on slope requirements, visit NRCA’s website. For more information on steep-slope metal roofs and their benefits, visit the Metal Construction Association’s website.

It’s the Little Things: How to Measure Metal Panels with a Micrometer

As installers and distributors know all too well, the tiniest differential when measuring metal panels for installation can mean success or failure. Close just isn’t good enough. That’s where a micrometer—a precision tool used for measurement accuracy—comes in. But how can you be sure the panels purchased for a project don’t exactly live up to their stated specifications or fit within a gray area that may seem minimal, but ends up causing problems when actually applied to a structure?

In a previous blog post, we discussed the importance of knowing the thickness (gauge) of your metal panels to ensure you know how to choose the correct thickness of the metal panels you choose to use on a project. This is important because you can easily find panels from different manufacturers that—while labeled with the same gauge measurement—can actually vary greatly in the actual thickness of the metal sheeting, creating a noticeable difference in panel stiffness and strength. Since the labels on the panels don’t tell the entire story, using a micrometer to measure the exact thickness of the panels is a sure-fire way to know what you’re paying for.

What is a Micrometer?

From the Greek, the word micrometer’s literal meaning comes from micros (small) and metron (measure). The tool, sometimes known as a micrometer screw gauge, is used to achieve precise, fine measurements of very small distances or thicknesses. Each of its two faces can be moved away from or toward the other by turning a screw with a fine thread. The precision device incorporates a calibrated screw (or thread), which is found internally on the spindle, and is usually in the form of calipers.

Available in both metric and imperial versions, a micrometer (often shortened to mike or mic) usually, but not always, takes the form of calipers (opposing ends joined by a frame). The device’s spindle is an accurately machined screw. When used to measure a metal panel, the sheet is placed between the tool’s spindle and anvil. The spindle is moved by turning the ratchet knob or thimble until the sheet is lightly touched by both the spindle and the anvil. Metric micrometers typically measure in 0.01mm increments and imperial versions in 0.001 inches.

Using a Micrometer:

  • Assuming the user takes great care, micrometers can provide more accurate measurement than other measuring devices (ex.: dial calipers, vernier calipers).
  • Micrometers are widely used not only for metal panel measurement, but also in other mechanical engineering areas where precise measurement of components is advised.
  • Micrometers have two scales: a primary scale located on the barrel (sleeve) and a secondary scale, which is located on the thimble. Values are derived from both scales and combined to come up with the total measurement.
  • As the spindle completes its revolution, the space between the spindle and the anvil (the measuring faces) is adjusted by the smallest values that can be represented on the primary sleeve scale (0.5mm for metric micrometers; 0.025 for imperial versions).

(Note: As a tool, even the highly accurate micrometer is limited in its measuring range, which is typically 25mm/1 inch. In other words, metric versions can measure 0-25mm, 25-50mm, 50-75mm etc.; imperial versions measure 0-1 inches, 1-2 inches, 2-3 inches, etc.)

Where to Get a Micrometer:

As a specialized engineering tool, micrometers are available from a variety of industrial equipment companies. Numerous brands and types are available in the market to meet particular needs, including specific applications or budgets. Additionally, feel free to reach out to a metal panel manufacturer for their recommendation on the best micrometer to use to measure metal roof and wall panels as well as for specific measurements on the panels they offer.

Preserve and Protect: Tips for Storing Metal Panels

The decision has been made to invest in metal roofing or siding for a project or business. Now it is incumbent upon job site professionals, business owners and/or contractors to ensure proper care is taken to preserve and protect the integrity and attractive appearance of your metal roof and wall panels from damage caused by moisture, corrosive chemicals or improper handling. To mitigate any potential issue, it is necessary to take a few simple precautions.


Material Receiving Checklist:

When the metal panels arrive, the first thing that should be done is to make sure the panels haven’t been damage while in transit. The metal panel manufacturer should have ensured that all materials were loaded and packed properly, so before anything is removed from the delivery truck, be sure to check that nothing looks damaged. If damage is found, the shipment carrier should be advised before they leave the delivery site and a notation should be made on the bill of lading. Every metal panel manufacturer will have specific instructions on how defects/damage should be notated and communicated to ensure proper and timely resolution of any issues. If there are no issues and everything looks good while on the truck, carefully unload the materials and check for the two most common issues: moisture and denting/bending:

  • Moisture: After unbundling, if there is moisture, the panels should be elevated, separated and dried in a secure are not exposed to wind or other elements.
  • Denting/Bending: If found, the carrier should be advised and the manufacturer should be made aware of the issue as quickly as possible. You should take inventory of the materials delivered as well as pictures of any damage a notation made on the bill of lading.
  • Additional Transit Abrasion: If found, the carrier should be advised and a notation made on the bill of lading. Take pictures of any damage as soon as you find it (don’t move the panels before taking pictures) and notify the manufacturer as soon as possible.

If you do have any issues with material, it is important to contact the material manufacturer or the place of purchase immediately to ensure the issue is addressed appropriately.

Protecting the Finish Before and During Installation:

On a jobsite, reasonable care should be taken when handling painted surfaces during unloading, unpacking, moving, handling and/or installation in order to protect the finish. Although the paint coating is tough and does provide impact resistance, dragging a panel across the surface of another panel will almost certainly mar the finish.

Storage Considerations:

Finally, when storing panels before sale, delivery to a buyer or jobsite, or while on the jobsite waiting for installation, you will want to take special care to store the panels in a proper manner to ensure the integrity of the material is protected. Here are some challenges, solutions and caveats for a number of common situations.

  • Prolonged Storage: This is NOT recommended when panels are bundled or in a damp environment. If conditions do not permit immediate erection, extra care must be taken to protect the material from damage caused by moisture. See the manufacturer’s installation manual for proper storage of materials as well as the section below for more details.
  • Bundled Sheets: Only store in a DRY place. Sheets should be unbanded and stood on end at a slight angle against an interior wall that is not exposed to wind in order to allow for good air circulation. If it is not possible to store sheets in an upright position, strapping bands should be broken and sheets should be blocked off the floor with one end slightly elevated.
  • Stacked Sheets: These should be completely protected from the elements while maintaining good airflow in order to prevent condensation.
  • Panel Coverings: A properly draped canvas tarpaulin that allows for adequate air flow is an example of a good protective cover. Do not use plastic as it causes sweating and condensation to occur.
  • Trim Storage: Do not store trim with strippable film in the sun for long periods of time as the ability to separate the film and its adhesive from the metal will become unmanageable.
  • Preventing Corrosion and Galvanic Reaction:
    • In order to prevent unwanted chemical reactions and corrosion, do not store the metal panels with materials made of dissimilar metals (lead, copper, etc.).
    • Strong acids (jet fuel exhaust, commercial cleaners/solvents, etc.) can degrade the finish and void the manufacturer’s warranty.

Conclusion:

Preserve and Protect—and also Inspect. Keeping these common-sense actions and precautions in mind, there is no reason that the unique aesthetic qualities of metal panels should ever be compromised on a jobsite. For more information on metal roof and wall panels and to learn more about how to protect them throughout their lifespan, contact your local ABC representative today.

Metal Panel Material Delivery and Handling

Handle with Care

What You Need to Know about the Delivery and Handling of Metal Panels

As sturdy and resilient as metal panels are, there are a number of considerations that must be accounted for in order to maintain the integrity of the product, ensure on-time and cost-efficient delivery, and guarantee safe, effective installation. First, metal panels can do no good if they can’t be properly delivered to the jobsite—in pristine condition—where and when they’re needed. Second, once the panels do arrive, proper handling can be the difference between a successful job or problems before, during and after the fact. Here we’ll take a brief look at some of the main considerations related to the delivery and handling of metal panels that support the best possible outcome.

Delivery Considerations

The main conditions to confirm and questions to ask before placing an order and establishing delivery parameters include the following:

  1. Delivery location: Is delivery offered in your area or to your jobsite?
    • Is your location accessible? In other words, are there unsafe or impassible terrain or road conditions that prohibit the delivery of the materials?
    • Can you accommodate the size of the delivery vehicle? This includes making sure roads and entrances are large enough that delivery vehicles can pass through/access.
    • What are the delivery terms and conditions? Be sure you understand the requirements of your selected delivery method before signing on the dotted line.
    • Have you arranged for offloading or do you have people and equipment to handle this? Most delivery truck drivers are not equipped or trained in offloading metal panels, so it’s best to make arrangements with someone who knows how to properly get your material off of the delivery vehicle.
  1. Delivery method and carrier options
    • Do you know the options your manufacturer offers?
    • Have you confirmed the rates associated with each delivery option? As with traditional shipping, metal panel and component delivery costs can vary based on the type of delivery selected as well as your proximity to the place of origin.
  1. Proper packaging to provide protection against transportation damage
    • What packaging option is right for your order? You may want to consider the kind and quantity of material you’re ordering, its destination and end use when selecting how you’d like it packaged.
    • How much does packaging cost? This varies by the manufacturer. Some offer complimentary packaging, but it’s best to know about any potential costs beforehand.

Handling Considerations

Some key issues to bear in mind after delivery has occurred include:

  1. Exercise care when loading, unloading, storing and installing metal roof and wall systems.
    • Handle materials in such a way as to prevent bending, warping, twisting and surface/paint finish damage.
    • Do not drag panels on the ground or against each other; they should be picked up to be moved.
  1. Cutting metal panels
    • Follow manufacturer instructions at all times to keep from voiding the panel warranty. (ABC’s recommendation is to use a portable profile shear, especially for across-the-profile cutting of metal panels. Power shears, nibblers or hand snips that can follow the contour of the panel’s profile are also acceptable.)
    • Never cut the exposed end of a metal panel with a metal or abrasive saw. This will erode the Galvalume® coating, causing premature rusting at the cut edge.
  1. Worker Safety
    • Take appropriate precautions against potential hazards, which include:
      1. Moving and handling metal panels manually and mechanically, whether using conveyors, cranes, slings, forklifts and/or ladders
      2. Stacking metal panels/metal panel bundles
      3. Cut/exposed edges
    • Follow the manufacturer’s recommended safety measures, including any outlined protocols, recommended machinery, Personal Protective Equipment (PPE), etc.

Following the precautions provided above can help mitigate many potential pitfalls often faced. A little care upfront will inevitably lead to a much smoother process for all involved during every phase of the process. And always remember, the manufacturer is here to help; contact your local ABC representative today.