Residential Metal Roofing Aesthetics

As the housing market continues to grow, so does the market for new construction homes and repair and remodel of existing homes. With the enhanced focus on sustainability and energy efficiency as well as new exterior design trends, metal roofing has become a popular option for homes across the country. As a result, the residential roofing market has grown at a rate of 14% per year.


Why are so many homeowners choosing metal roofing? In addition to its durability and sustainability, metal roofing offers superior design flexibility to fully customize the exterior of the home. Learn more about the aesthetic benefits of metal roofing for every home style.


Aesthetic Benefits of Residential Metal Roofing

The roof makes up a significant part of your home’s exterior, so it’s important to make the right choice. Metal roofing is the best option for your home as it offers superior design flexibility compared to traditional roofing materials. It is also a great choice to make your home stand out from the rest of the neighborhood.


Customizable

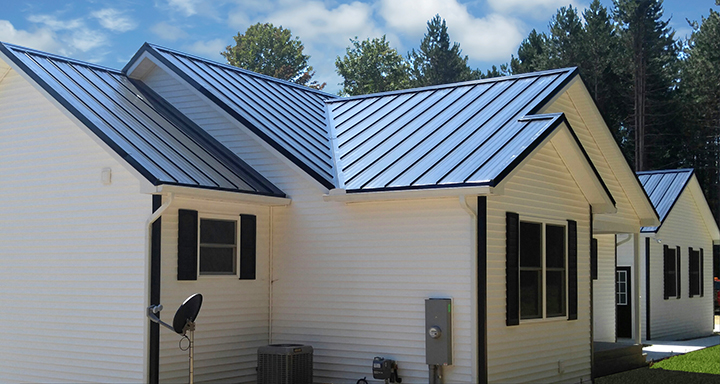
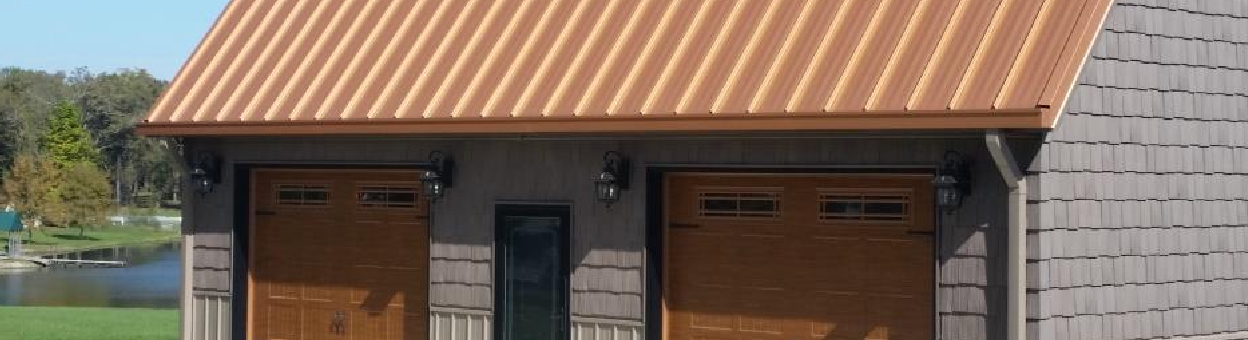
Residential metal roof panels come in a variety of styles, profiles and colors to complement every home style.


Create your desired exterior home aesthetic with a broad range of metal roofing colors from earth tones to bright colors and everything in between. Choose bold red or blue shades to make your home stand out. To create a natural looking home exterior, add a touch of brown, gray or green to your roof.
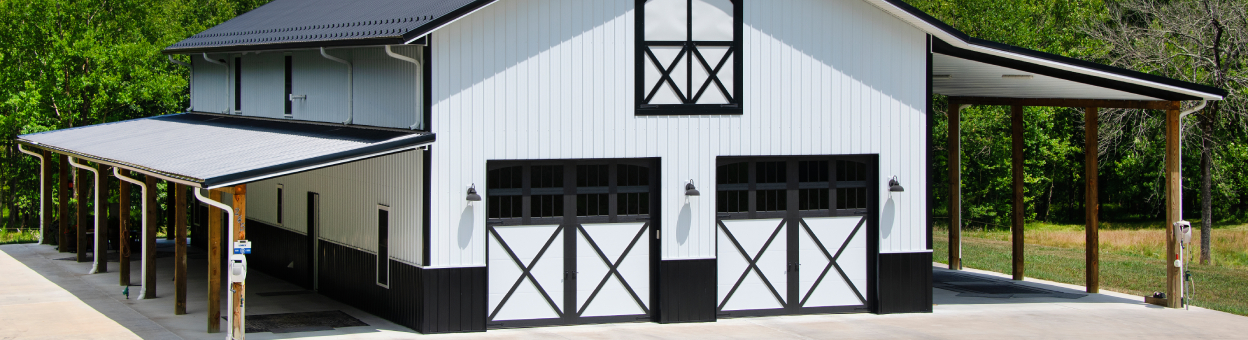
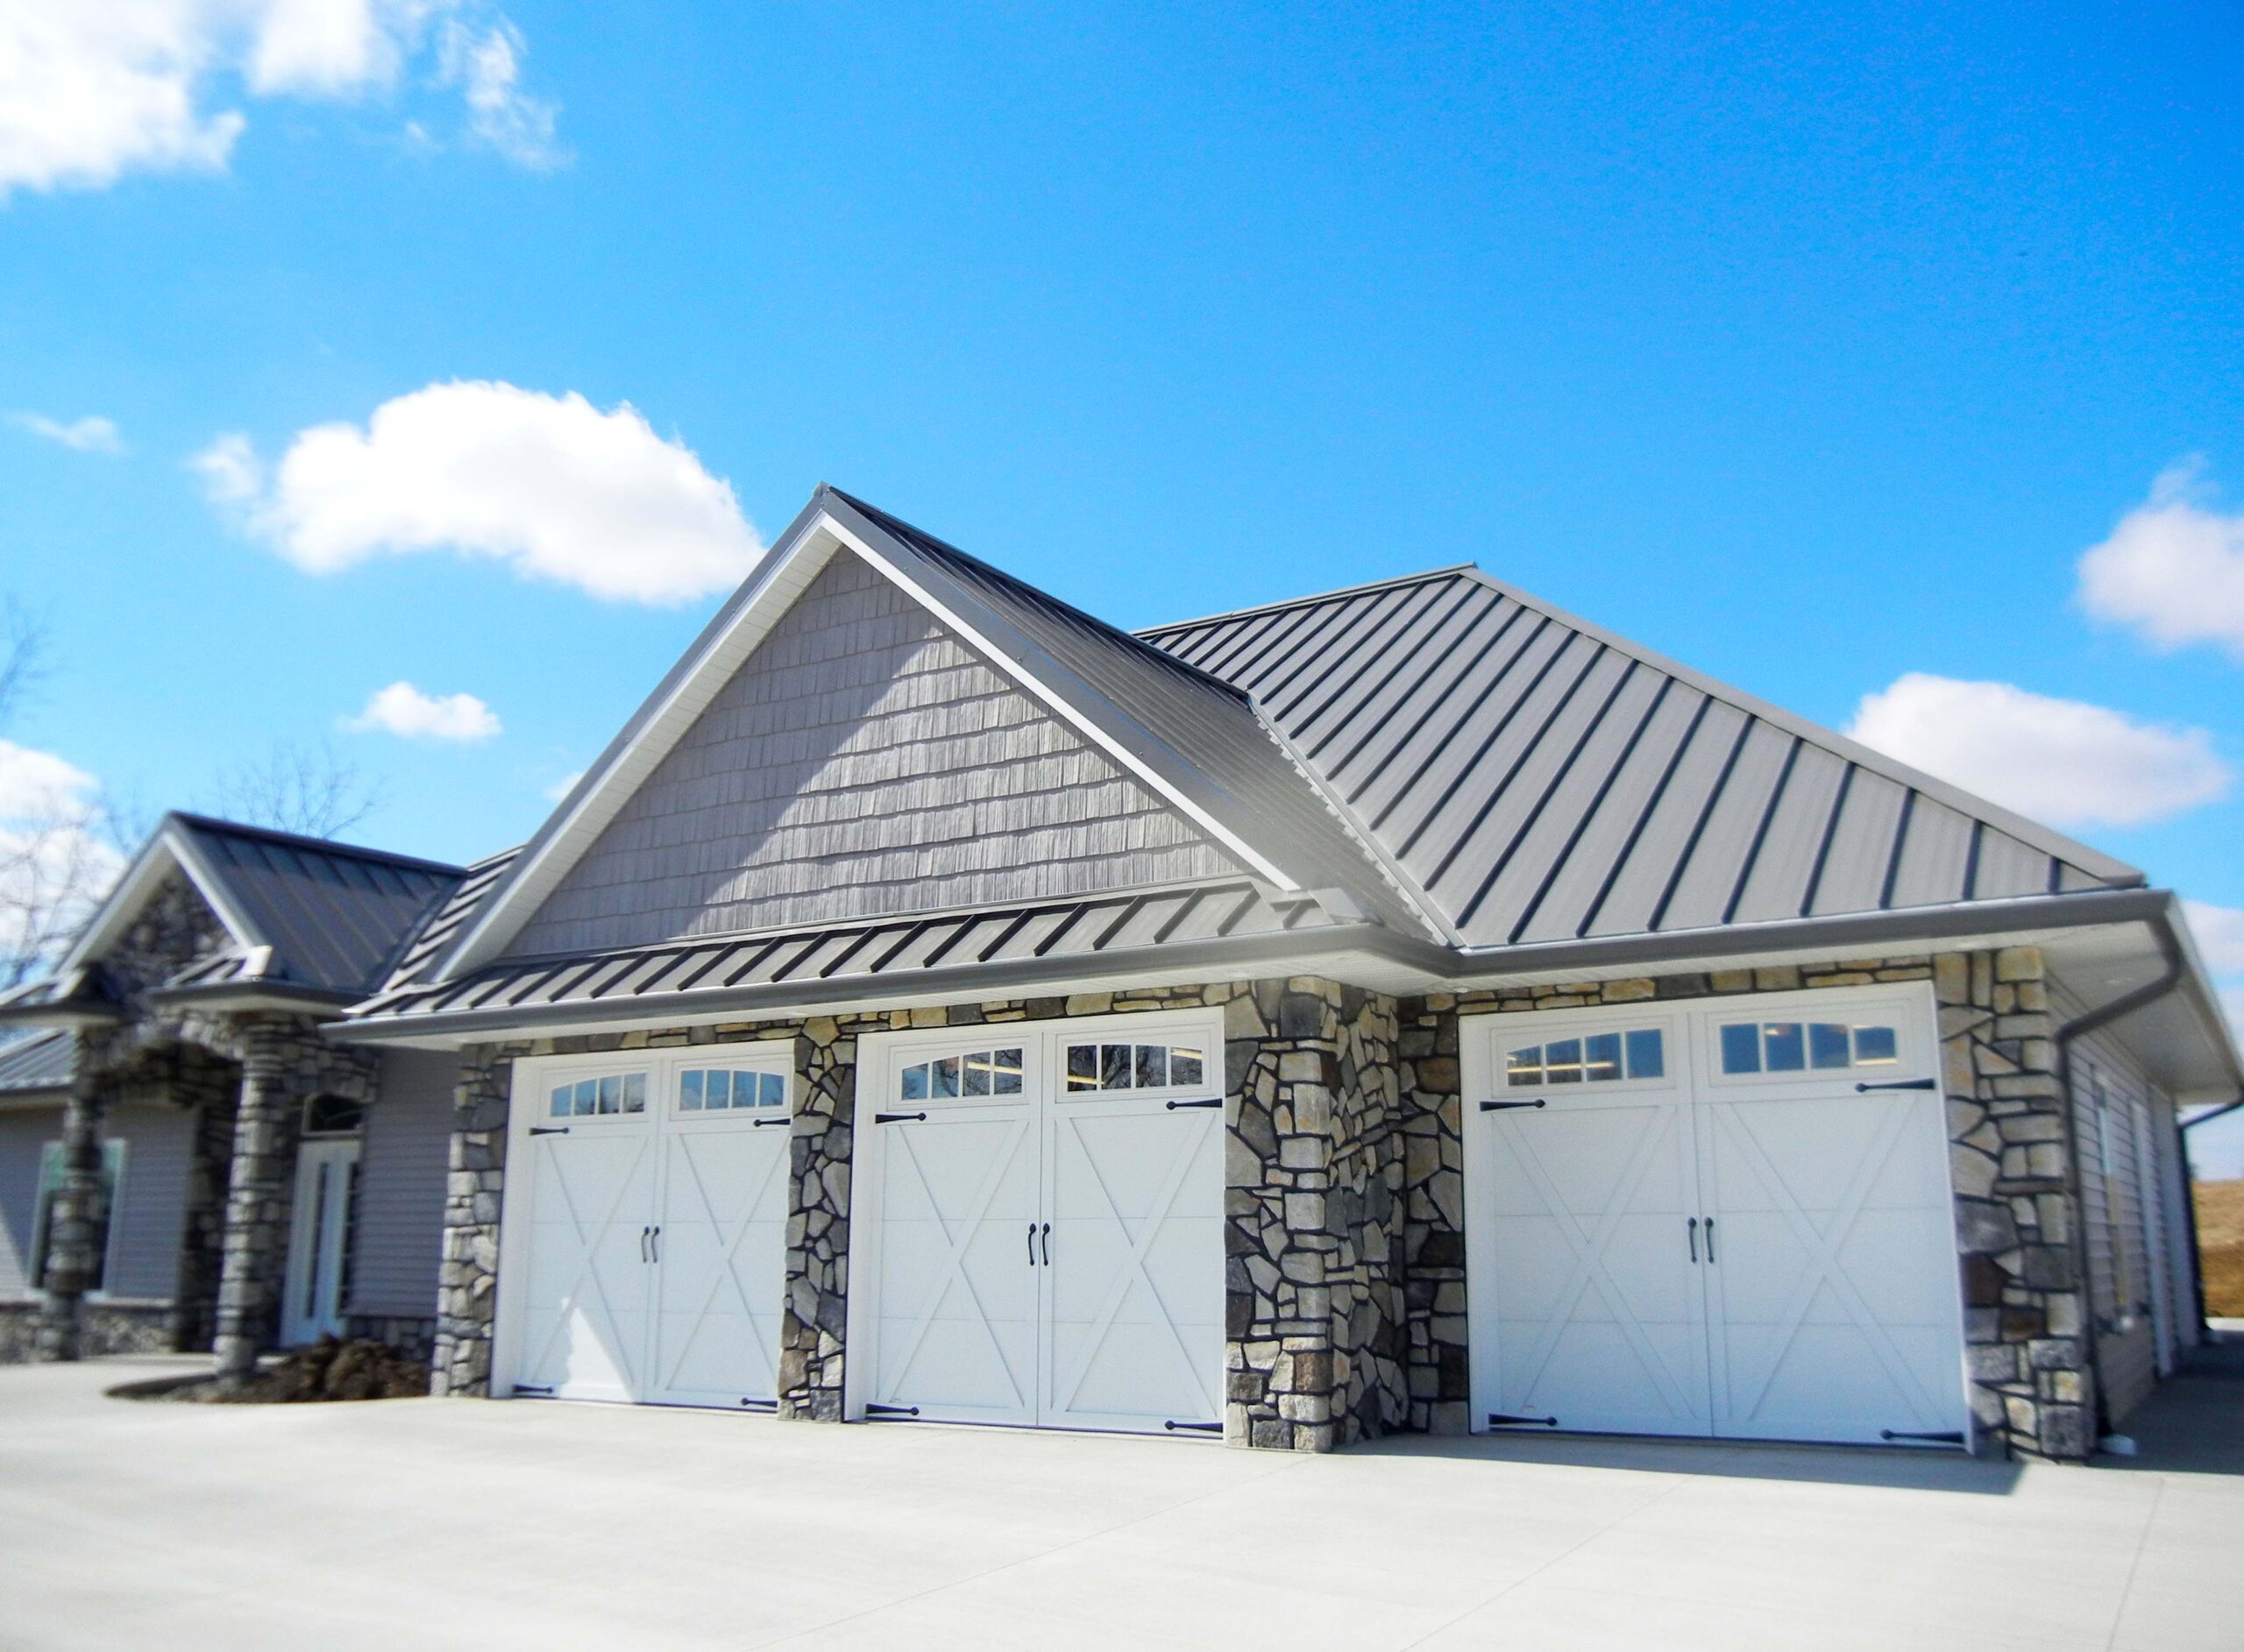


Eye-Catching Accent

One way to add curb appeal to your home is to mix and match materials. Using a variety of textures on your home’s exterior adds dimension and visual interest. Even if you’re not planning to install a complete metal roof, you can still use metal roofing as an accent. Consider installing metal roof panels on your covered porch and dormers to make your home stand out.
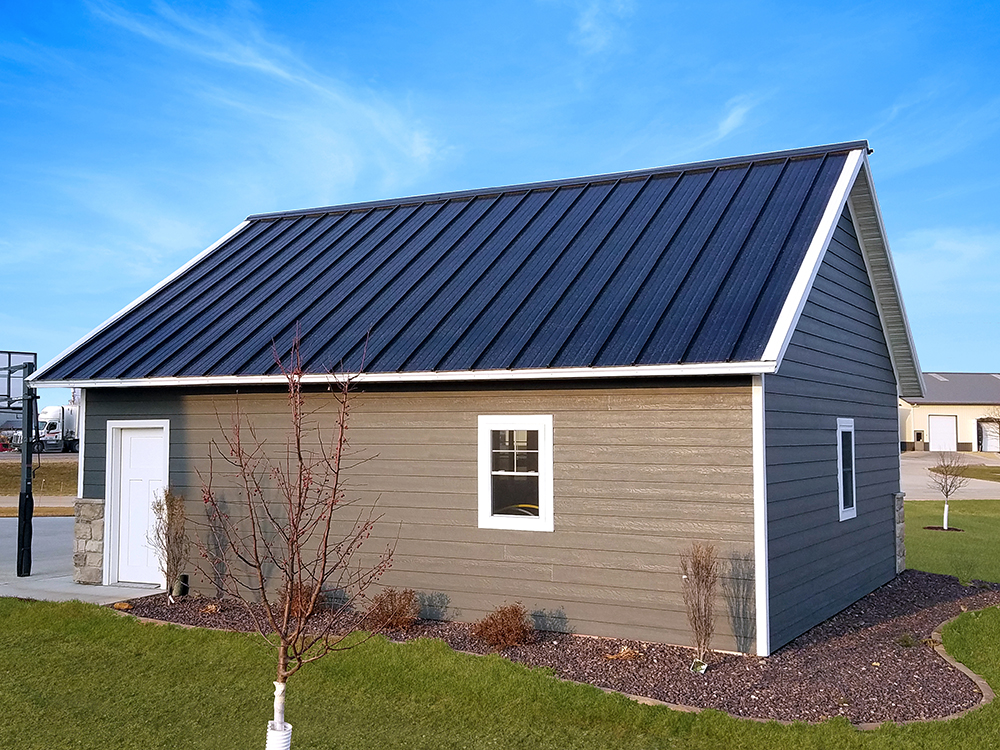
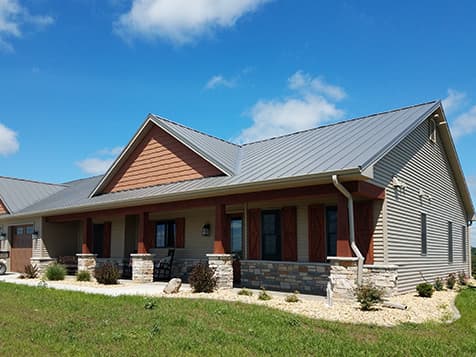
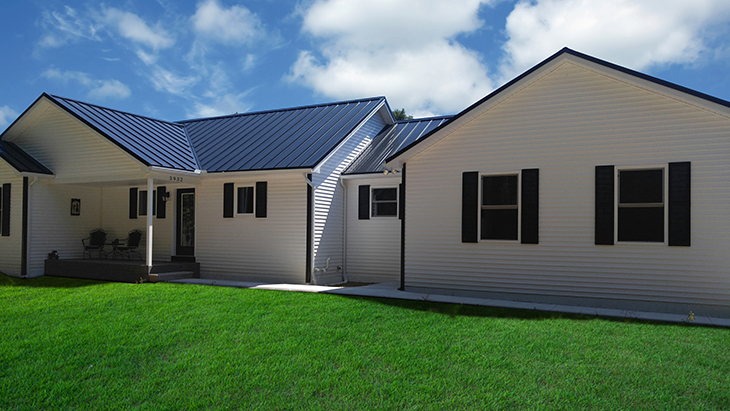
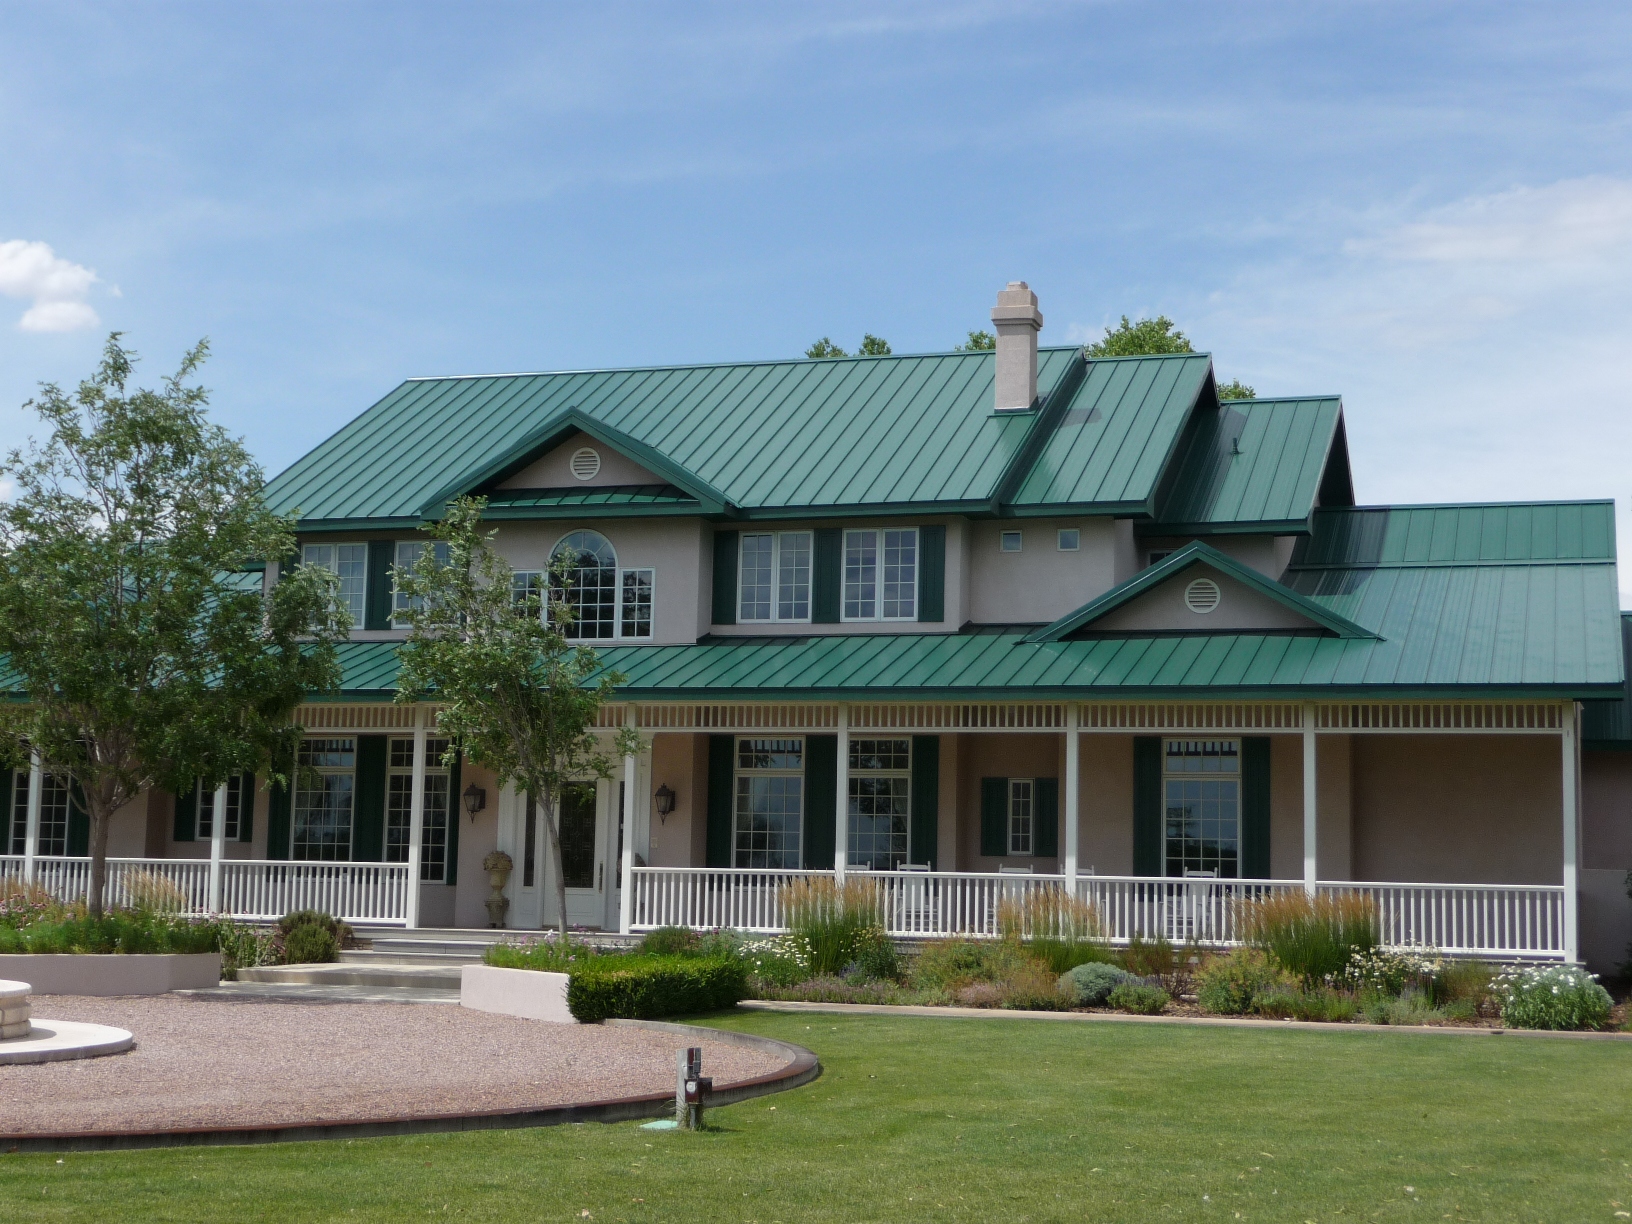


Fits Any Home Style

Metal roofing is a timeless option for every home style, from contemporary to classic, adding texture and dimension to your home’s exterior. Depending on the style of your home, metal roofing can add a touch of modernity or create the rustic charm that you’ve always dreamed of.


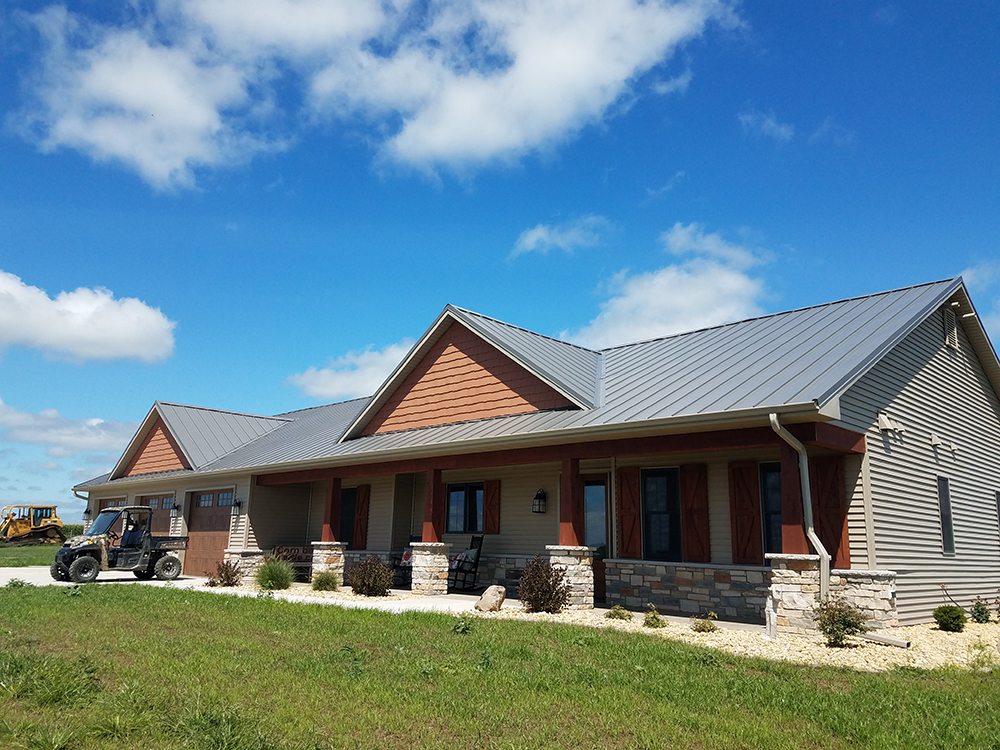
Ranch


Metal roofing adds a touch of rustic charm to traditional ranch style homes. When selecting metal roofing colors, it’s important to choose a color that complements the brick exterior. Light, natural tones such as browns and grays are ideal for this home style.

Craftsman


Craftsman homes are known for their rustic charm and are typically designed with natural materials such as wood, stone and metal. This makes metal roofing a perfect fit for your Craftsman-style home. Natural roofing colors such as browns, blues and grays are a great option to complement exterior cladding and accents.

Colonial


The architecture of Colonial-style homes is defined by the roofline and evenly spaced exterior features such as windows and columns. Metal roofing is a great option to add a classic touch to your Colonial home. Choose from a variety of bold metal roofing colors to create contrast and highlight the symmetry of your home’s exterior. For a more neutral look, consider traditional colors such as gray, brown and blue.

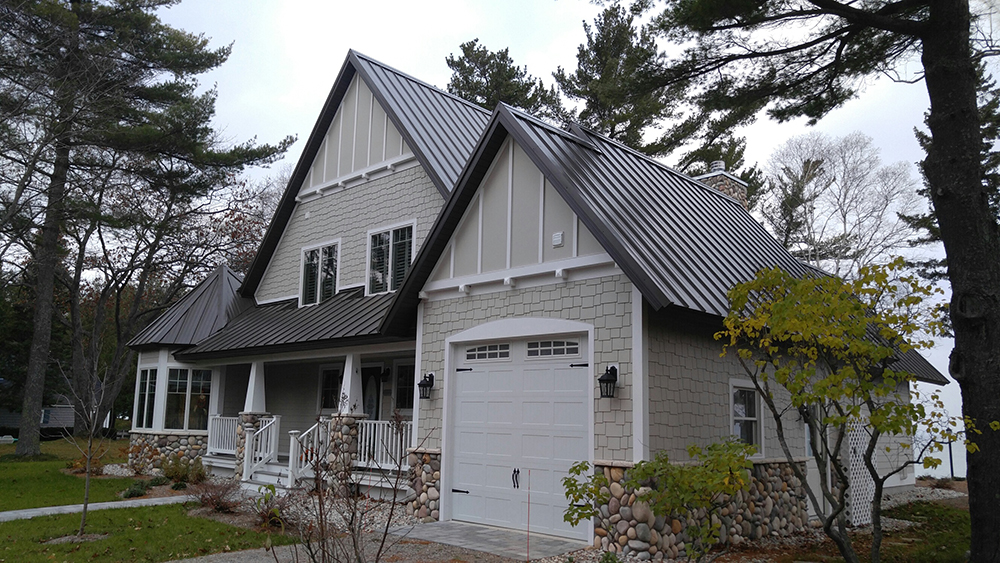
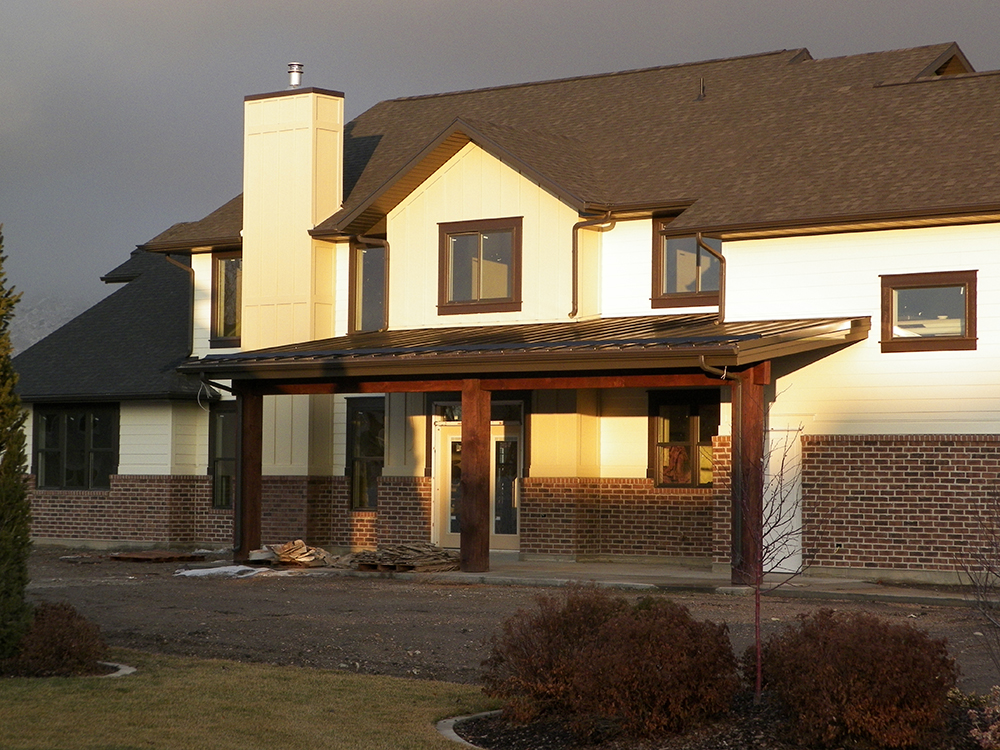
Tudor


Tudor-style homes are defined by mixed materials, half-timber framing and steeply pitched roofs. With the steep pitch, your roof will be highly visible, making it even more important to select a durable, aesthetically pleasing material like metal roofing. To complement the brickwork and accents on your Tudor-Style home, consider dark metal roofing tones such as browns and grays.

Modern


Modern-Style homes typically feature clean lines and low-pitched roofs. Although the low pitch roof is not highly visible, it can still create a bold contrast for your home’s exterior. Metal roofing is an ideal choice for modern homes as it is available in bold, eye-catching colors, such as black and blue, to highlight unique architectural features of your home. The sleek lines of metal roofing also contribute to the modern look. Use our metal roofing color visualizer tool to discover how metal roofing will look on your home.


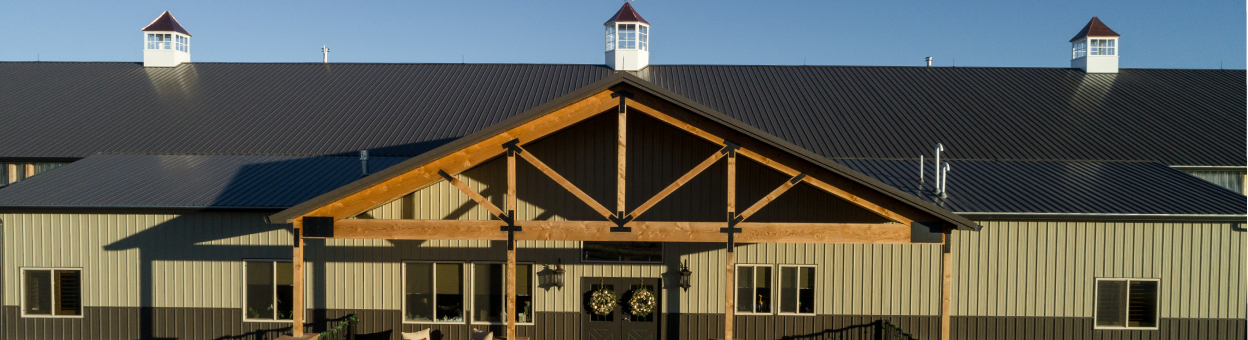
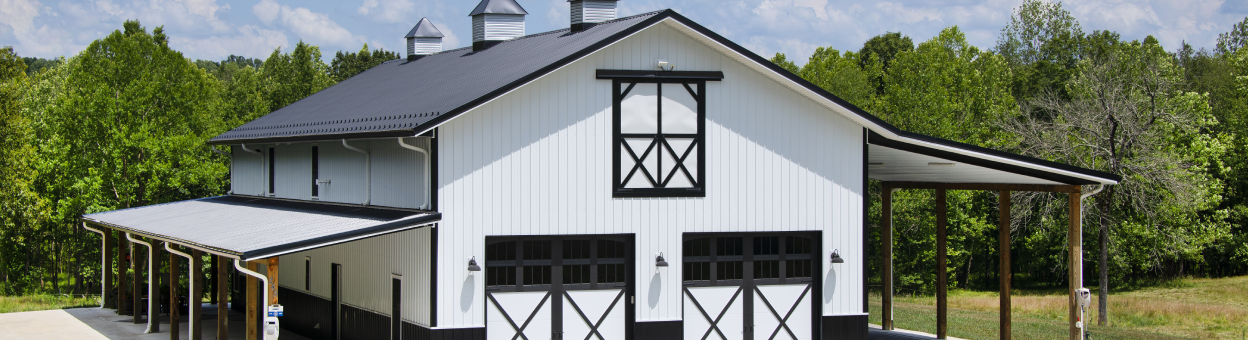
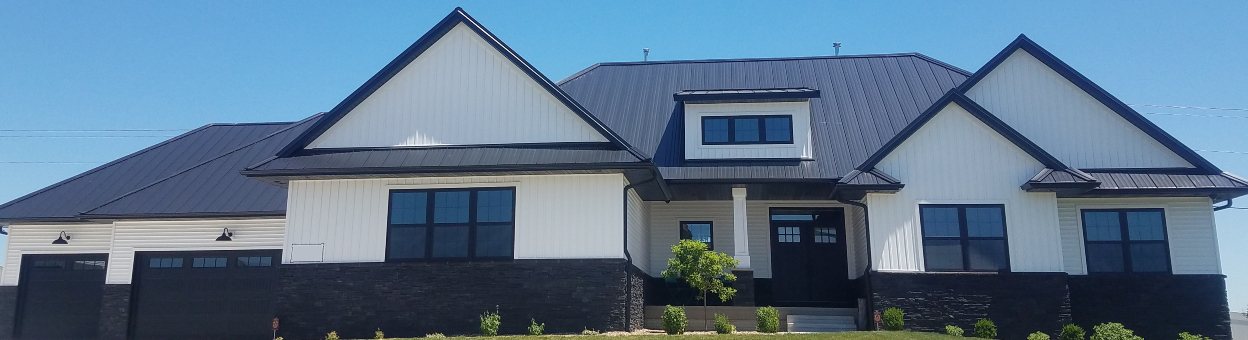
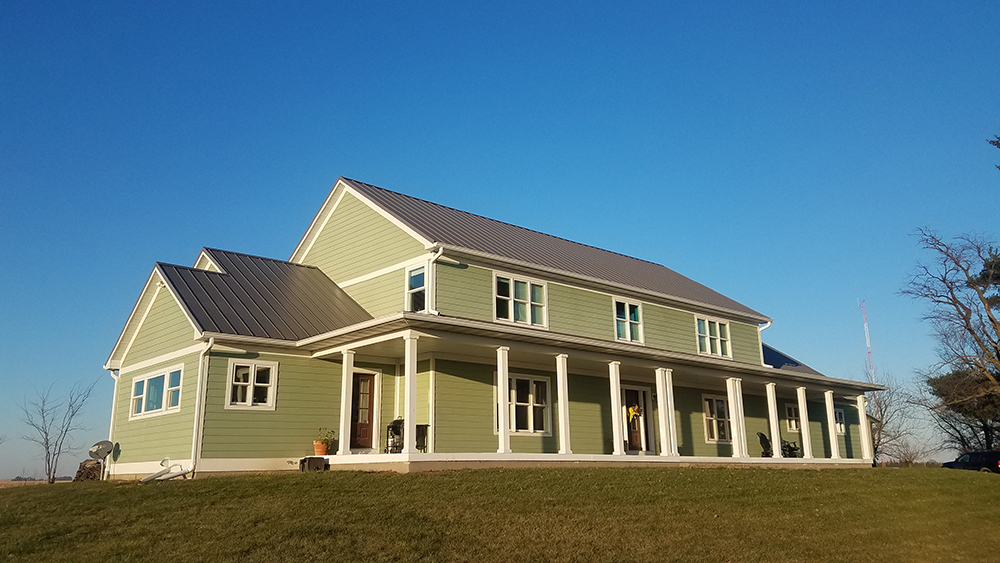
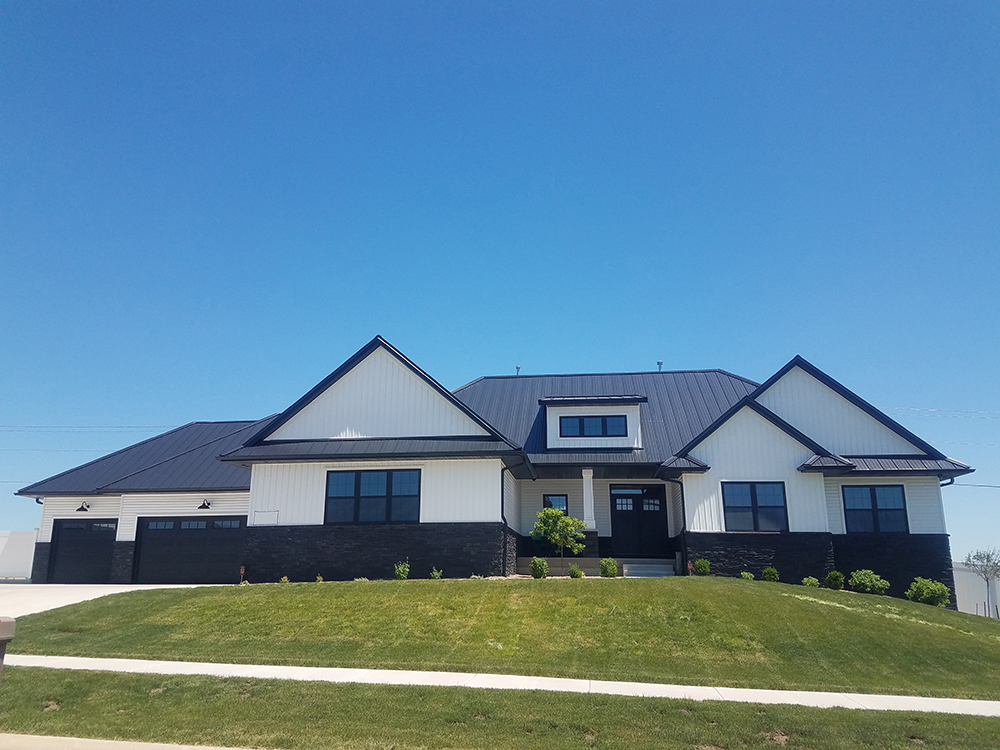
Achieving the “Modern Farmhouse” Look

The Modern Farmhouse is becoming popular with homeowners. It is characterized by a gable roof, featuring a top ridge and sloped sides that create a triangle. When deciding on roofing materials to achieve this style, homeowners have increasingly chosen standing seam metal roofing, as it delivers traditional rustic charm with a touch of modernity.


Modern Farmhouses typically feature a solid white exterior, relying on a variety of architectural features and accents to add curb appeal. To create visual interest, pair dark colored accents with light colored siding.


For example, adding black exterior windows and a black metal roofing will create eye-catching contrast with white siding.


Metal roof panels come in a broad selection of bold colors that are ideal for creating contrast against the white exterior cladding. Not interested in a complete metal roof? Add metal roof panels to your covered porch or dormers to mix and match textures.


How Much Does Residential Roofing Cost?

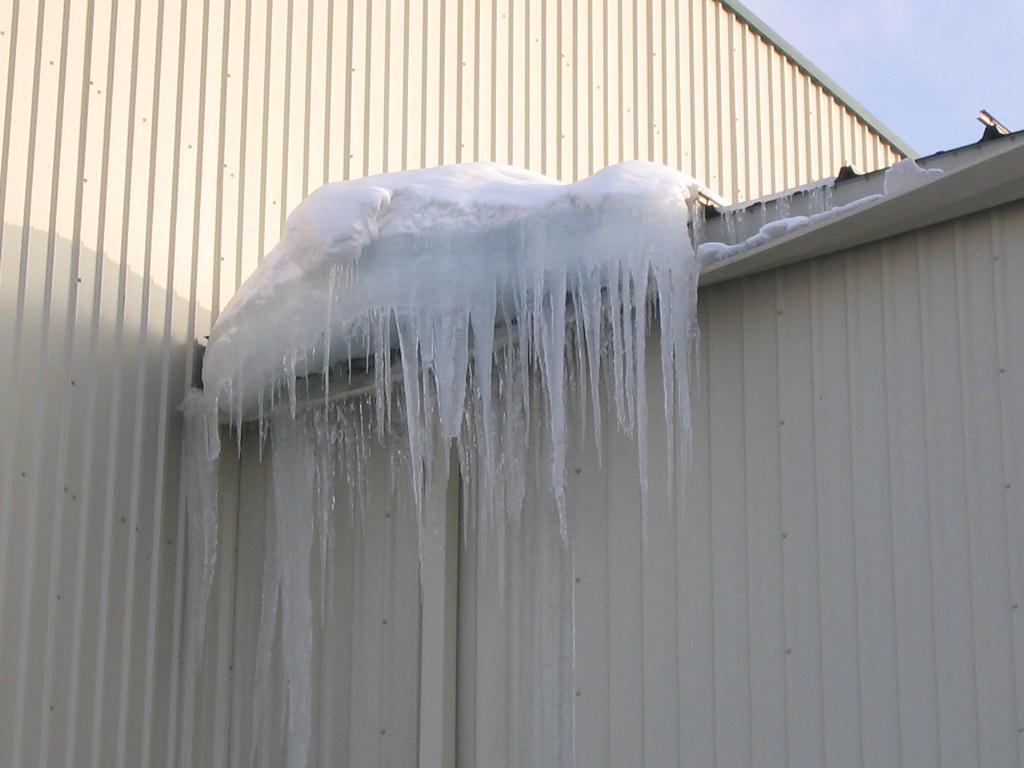
Residential metal roofing is a bigger upfront investment than traditional roofing options, but it ultimately provides long-term value that you can trust. While most asphalt roofs have a lifespan of 15-20 years, metal roofing can last up to 60 years. With the durability and longevity of metal roofing, you’ll see your investment pay off after 10 years.


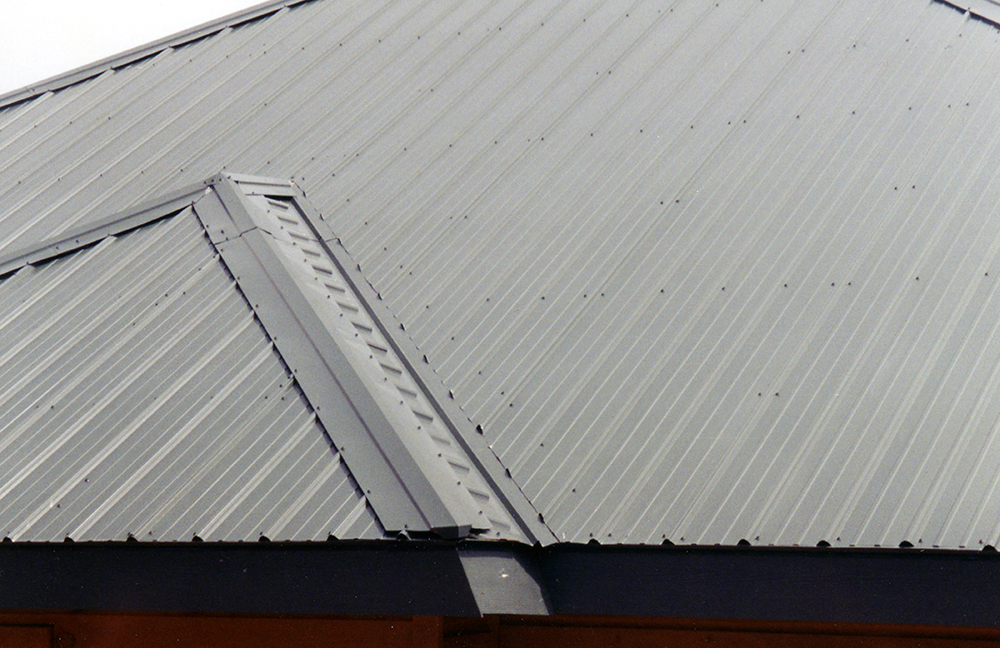
Hidden or concealed fastener panels are typically a more expensive option, offering sleek lines without exposed screws. For a more cost-efficient solution, explore exposed fastener metal roofing.


Why Choose Residential Metal Roofing?

Residential metal roofing is a value add for your home. It offers the design flexibility you want with the energy efficiency, durability and cost effectiveness that you need. Contact an expert today and learn more about these popular residential metal roofing styles:


5V Crimp – Ideal for coastal regions, this panel offers rustic charm with a contemporary mill-style finish.
SL-16 – This concealed fastener panel offers a clean, straight line appearance to add a modern touch to any home.
LokSeam – This snap together panel offers a sleek appearance that is ideal for adding a touch of modernity to your home’ exterior.

Selecting & Applying Metal Roofing Touch-Up Paint

Our metal roofing panels are designed for durability, featuring a baked-on paint finish that covers the Galvalume®-coated steel surface. This helps to preserve the look and functionality of your metal roofing panels for decades with minimal maintenance. Over the life of your metal roofing panels, however, it is possible that the baked-on paint finish can be damaged. For minor scratches, you are able to use touch-up paint to preserve the aesthetic appeal of your metal roof. Learn more about selecting and applying metal roofing touch-up paint.


What Causes Scratches & Dents?

Metal roofing panels are most commonly damaged during the installation process. To avoid scratching or denting your metal roofing panels, it’s important to store them properly and use caution when unpacking and installing them. Store them at a slight angle in a dry location that is out of the way of foot traffic and ongoing construction. Avoid dragging panels across each other when unbundling to prevent damage to the paint coating.

After metal roofing panels have been installed and before the installer leaves, walk around the building to look for scratches and dents within normal view. Address these issues with your installer.

After the installation process is complete, there are additional considerations to protect your metal roof from damage. Keep trees trimmed to prevent overgrown branches from scratching your metal roof panels. Additionally, use caution when walking on the roof or using tools as these activities could damage the paint coating. Check your roof for damage at least once a year as part of your annual maintenance routine to keep it in good condition.

Assess the Damage

If you find a scratch during routine maintenance or a post-installation check, start by assessing the damage. How noticeable is the scratch? Is the panel scratched down to the bare metal? These are important questions to ask when deciding whether to use touch-up paint or replace the panel altogether.

Use touch-up paint for light scratches that only affect the paint coating or for hairline scratches down to the bare metal. touch-up paint fades more quickly than the baked-on paint coating, especially with bright or dark colors. As a result, covering a sizable area with touch-up paint could create more of a problem as the touch-up paint begins to fade over the next couple of years which would be more noticeable than leaving it alone. If your panel has large scratches or gouges that go down to the bare metal, consider replacing it instead.

Choosing Touch-Up Paint

When choosing touch-up paint for your metal roof, it’s important to make sure that it’s compatible with the existing paint coating. The best way to do this is by purchasing touch-up paint from your metal roof panel manufacturer. Most manufacturers offer small containers of high-quality paint that are designed to match the color of your existing roof panels.

How to Apply Touch-Up Paint to Metal Roofing

When applying touch-up paint, make sure to read the specific instructions provided by your manufacturer.

In general, you will complete the following steps to apply touch-up paint:

  1. Make sure the surface temperature of your roof is 50 F.
  2. Clean the area by wiping it down with isopropyl alcohol. Make sure the surface is dry and free from contaminants before moving on.
  3. If the bare metal of the panel is showing, apply acrylic primer.
  4. Apply touch-up paint to the area using the dobber (or a small artist brush). Multiple coats may be likely to achieve the desired film thickness.
  5. Touch-up paint should be tack free within 30-45 minutes.
  6. It should dry completely within 24-48 hours.

For more information on how to touch-up your metal roofing panels, contact your local ABC sales representative.

Tips for Installing Metal Roofing Accessories

A properly-installed metal roof is expected to last 60 years or longer. However, incorrectly-installed roofing accessories can cause serious damage and decrease the life of your metal roof. The key to a long-lasting metal roof is correctly selecting and installing metal roofing accessories.

Considerations

When selecting and installing metal roofing accessories, it’s important to consider several factors.

Type of Construction– Consider the roofing substrate when selecting accessories. The fasteners used for installation will vary depending on the material that the panels and trim are attached to, such as framing or plywood sheeting.

Geometry of the Roof– When examining the geometry of the roof, look for symmetry and protrusions. If the roof has a chimney, skylight or other feature, flashing will be necessary to prevent leaks.

Roof Pitch & Slope– Since each panel profile channels water differently, it’s important to consider the slope and pitch of your roof when selecting metal roof panels. The recommended trim and accessories will depend on the panel profile selection.

Next, you can consider the aesthetic appeal of the available panel profiles and accessories for your building project.

Selecting Metal Roofing Accessories

Once you’ve examined your roof and selected the appropriate panel profile, you can choose metal roofing accessories to go with it. Each panel series has specific installation resources with a product checklist that outlines the standard accessories that should be used.

Installing Metal Roofing Accessories

When installing metal roofing accessories, it’s important to use caution when penetrating the roofing panels and select compatible materials. In most cases, the roofing contractor will be responsible for proper installation. All penetrations should be added to the project specifications and approved ahead of time by the roofing contractor.

Our manuals recommend detailed accessory installation instructions for each of the roof conditions mentioned above down to the trim, sealant and fasteners. For the longevity of your metal roof, it’s crucial to follow the standard details for your roofing conditions. Make sure to use the equipment offered by your manufacturer to preserve the weathertightness warranty.

Here are some things to avoid when installing metal roofing accessories:

  • Using dissimilar materials – Accessories made of dissimilar materials such as lead, copper and graphite can cause damaging reactions and corrosion.
  • Penetrating the roof before coordinating with the roofing contractor – To maintain the weathertightness warranty, all pipe penetrations should be coordinated with the roofing contractor.
  • Choosing the wrong clip for your insulation thickness – There are several different clip systems available that vary depending on the roof substrate.
  • Using an abrasive saw – Make sure to use the recommended tools. Using an abrasive saw could damage the cut edge, causing premature corrosion to the panel or trim, and likely damaging the paint system. This will void any finish warranty and create a potential spot for the roof system to leak. Instead, use snips or hand shears.

At ABC, we offer color matching fasteners, trim and other accessories to make your metal roofing project run smoothly. Have a question about installing metal roofing accessories? Reach out to your local ABC representative.

How To Prepare for Metal Roof Installation

Metal Roofing Installation Prep

If you’re looking to replace your current roof, metal roofing is a durable, low-maintenance alternative to asphalt shingles. To make the most of your investment, it’s important to plan ahead for the metal roof installation process. Learn about the steps that you and your contractor should take to prepare for metal roofing installation.

Consider Metal Roofing Options: Profiles, Gauge, Color, Etc.

Consult with a local distributor to select metal roofing materials for your building project. They’ll be able to provide resources such as product information, color charts, technical literature and product samples.

There are several factors to consider when selecting metal roofing panels. The most important consideration is the roof pitch. Make sure to choose a metal panel profile that will perform best with the pitch of your roof in order to keep it weathertight. Once you’ve selected the panel style, choose from a variety of profiles and colors depending on your budget and aesthetic preferences.

For residential applications, the Imperial Rib® panel, an exposed fastener panel, offers rustic charm. The SL-16® panel, a concealed fastener panel, provides a clean, sleek aesthetic.

Choose a Contractor

Next, you’ll need to select a contractor. During this process, it’s important to choose a contractor that has experience installing metal roofing. In many cases, your local distributor can provide references to narrow down your search.

Building Owner Prep Work

Although the contractor will be responsible for most of the heavy lifting, there are a few things you should do to prepare for metal roof panel installation.

Clear the Space

Make sure to clear the space around your home or building to prepare an adequate workspace for your contractor. For commercial properties, you may want to set up barriers to keep your customers safe. For residential buildings, you should remove items from the yard, patio, deck or balcony to keep them from being damaged. Consider protecting landscaping that’s in close proximity to the building by covering it with a tarp.

Alert Your Neighbors

As a courtesy to your neighbors, consider warning them about the loud noises that will likely occur during the metal roofing installation process.

Make Arrangements

Make arrangements for any individuals that may be disturbed by the noise. For residential buildings, you should also make arrangements for pets that may need to go outside during the day.

Contractor Prep Work

Measure the Roof & Create a Materials List

Once you’ve hired a contractor, they’ll begin their prep work by measuring the roof to create a materials list and determine order quantities. This list should contain all of the necessary materials including:

  • Panels
  • Trim (Edging)
  • Screws
  • Closure Strips/Closures
  • Venting Material
  • Other Roofing Accessories

Before the materials list is finalized, you should discuss with your contractor whether or not to vent the ridge cap. In residential situations, this is necessary to circulate air throughout the house.

Order Materials

In most cases, your contractor will be responsible for ordering the roofing materials through the local distributor. Before the order is placed, consider which warranty option is best for you. While a 40-year warranty is the most common choice, some of the lighter gauge materials offer a 20-year warranty option.

Inspect Material

Once the roofing materials are delivered, it’s important to inspect them. Your contractor should do the following:

  • Check the bill of lading to make sure that all materials have been delivered
  • Check the materials for damage including dents and scratched paint
  • If something is wrong with the order, contact the distributor to order replacement materials
Remove Old Roofing and Repair Damage

Remove the existing roofing down to the decking. After the existing roofing materials have been removed, the installer should check for bad decking and make any necessary repairs. All ice and water shields and underlayment should be removed and replaced as well.

Metal Roofing Installation

After all of the prep work is completed, the metal roof installation process can begin. During the installation process, it’s important to communicate with the main contact for your project about any concerns you may have. Once the installation process has been completed, make sure the work is done to your liking. Be sure to finalize payment and warranty information as well.

To learn more about the best practices for metal roof installation, contact your local ABC representative.

How Insulated Metal Panels Enhance Building Design and Performance

Insulated metal panels can be a high-performing, aesthetically-pleasing solution for your customers’ building projects—particularly when the weather is colder. These lightweight panels feature an insulating foam core with a metal skin face and offer superior performance and design flexibility. This makes them the ideal choice for many building projects in many industries.

ABC Blog: How Insulated Metal Panels Help Enhance Building Design and Performance

Enhanced Design Using Insulated Metal Panels

In addition to their functional responsibilities, Insulated Metal Panels also need to be aesthetically pleasing. Available in a variety of colors and profile shapes, they help meet the varying design requirements of your customers’ projects. Insulated metal panel finishes resembling traditional construction materials such as precast concrete, stucco, masonry and others are also available. This provides more customization and integration options for customers.

Flexibility and Code-Compliance

Insulated metal panels easily integrate with other building materials such as concrete tilt-up, stucco, brick, single-skin metal panels, glazing and exterior insulation and finish systems (EIFS). They also require less space for insulation to comply with energy codes as compared to other insulating methods. This helps to maximize enclosed space within your customers’ buildings.

Additionally, the use of insulated partition panels gives customers the flexibility to decide how much of their building they want to insulate. These interior panels can help section off portions of buildings that require temperature regulation like offices and storage space. Insulated partition panels can span floor to ceiling up to 20 ft., so in most cases no additional framing is needed for installation.

Strength and Savings

The strength of Insulated Metal Panels allows for greater spanning and load-bearing capabilities as compared to single-skin alternatives. With fewer required supports, these panels easily integrate into building designs without added cost.

And, of course, the advanced polyurethane core of Insulated Metal Panels can help reduce heating and cooling costs. This energy efficiency translates into savings for building owners across the life of the panels.

Superior Performance and Cost Savings of Insulated Metal Panels

Offering superior strength and durability across their lifecycle, Insulated Metal Panels are designed as a long-term building solution. Their consistent, all-in-one air and water barrier design makes them simple to install, which can expedite the project build and minimize schedule delays.

Minimal Maintenance Requirements

Needing minimal maintenance, Insulated Metal Panels help building owners save time and money, while delivering peace of mind their strength affords. Compared to some traditional materials, insulated metal panels are also easy to repair and replace. This reduces building material costs over time while also allowing flexibility for building expansion and remodeling down the line.

Putting it All Together

Superior design and performance make Insulated Metal Panels an efficient, effective, all-in-one solution for insulating metal buildings. Contact your local ABC sales representative today to learn more.

ABC Blog: Learn More About our Insulated Metal Panels!


Metal Roofing & Hurricane Season Part 2: Tips to Help Your Customers Protect Their Metal Roof

As with any kind of roof, proper maintenance is integral to protecting against hurricane damage. In part 1 of this series, we reviewed how choosing metal roofing can help prevent wind damage to homes and businesses. And while choosing metal panels as a roofing solution is the first step to damage prevention and increasing roof longevity, there are additional precautions your customers can take to protect their investment.

ABC Blog | Metal Roofing and Hurricane Season

Professional inspection 

Prevention is key. To maintain the strength and durability of metal roofs, your customers should have a licensed metal roofing professional inspect it regularly. While your customers can manually inspect their roof themselves, a qualified roofing inspector can thoroughly examine it, identify areas of concern and provide a detailed report including roof life expectancy, photos and repair estimates. Professional inspectors can also make hurricane preparedness recommendations based on your customer’s roof type.

Ensure all fasteners are secure 

Fasteners are the key to preventing roof uplift as a result of high winds. Be certain the roof is properly fastened to the truss and that the correct fastener type, diameter, length and thickness are used. Consider the thickness of the panel, substrate and any other materials between the panel and truss to when selecting fastener length to ensure roof panels are secure. (Screws often need to be triple the length to accommodate the thickness of what’s being screwed down.) Additionally, although placement of fasteners may seem like a minor detail, screw pattern can actually be a major factor in a roof’s structural integrity. Be sure to follow the panels manufacturer’s instructions to the letter during installation.

Check for rust, loose screws and flaking paint 

When rust develops on metal, it can accelerate degradation, compromising the integrity of your customer’s structure and leaving it vulnerable—particularly in inclement weather. While ABC offers Galvalume® metal panels that prevent rust from occurring, standing water and heat from direct exposure to the sun can degrade this protection over time. Therefore, it is important that customers regularly check for rusty and loose screws as well as flaking paint which can also cause rust development. If rust is found, advise your customer to contact their roofing contractor for repair options.

Install hurricane straps

An added layer of protection from high winds, hurricane straps (or roof tie-downs) securely tie rafters to load-bearing walls. Made of galvanized metal, they can attach to most roof types, protecting it and the structure beneath. Hurricane straps can also help keep a roof from detaching and causing damage to nearby structures and objects. Many homes already have them (depending on how old the roof is), but even structures with hurricane straps should be checked to make sure they were installed properly.

Add roof reinforcements

Although most metal roofing is resistant to wind-related damage, adding reinforcements can decrease the likelihood of damage. This is particularly true if your customer’s building project is located in a hurricane-prone area. To reinforce their metal roof, your customers can add sturdy overlapping materials on top such as heavier metal panels or two-by-fours. A professional roofing contractor can advise your customer on the best reinforcement option for their structure.

Brace gable ends

Gable ends experience a lot of exposure to high winds, making them vulnerable to wind damage. If your customer’s structure has a gable end, they should ensure that it has been solidly built and appropriately braced.

Trim your trees 

Trees that hang over your customer’s roof can be dangerous any time of year, but particularly during a hurricane. Falling tree limbs can cause severe roof damage, allow water into the structure, cause electrical issues or even injure someone inside. Trimming trees to is an easy way to prevent damage and injury.

Perform an interior inspection 

If your customer is experiencing issues with their roof, chances are that they will also see damage inside their structure. Your customers should be aware of any spots, stains, peeling paint and daylight seeping in. These are all serious indicators of a compromised roof and should be addressed immediately.

Secure the Yard

Unsecured items around your customers’ property can become a major threat to your customer’s home or business during a hurricane. With strong winds, patio furniture, trampolines, grills and even potted plants can become dangerous projectiles. If these objects strike your customers roof, they could cause severe damage. Customers should move small items inside and secure larger items with rope or zip ties.

Choosing metal panels as a roofing solution is the first step to preventing building damage during hurricane season. There are, however, extra precautions your customers can take to prevent damage and protect their investment.

For additional information on metal roof performance during hurricane season, read part one of our blog series. For additional tips on how to storm-proof your roof, reach out to your local ABC representative today.

Quote and order metal building products anytime, anywhere and from any device using our online ordering tool. If you don’t already have an account, register for access today!DISTRIBUTORS: Shop online at shop.abcmetalroofing.com!

Note: This post was updated from a previously-published version.

Metal Roofing and Hurricane Season Part 1: Securing the Roof

For customers who live and work in coastal areas, preparing for hurricane season is vital. This preparation helps mitigate the risks and damage tropical storms can cause to their homes and businesses. Most hurricane-preparedness tips include making a hurricane emergency kit, reviewing insurance policies and outlining family emergency and evacuation plans. While these are all important activities, there are few that focus on the impact roofing material can have on the safety and security of your customers and their property. In this two-part blog series, we’ll evaluate the performance of metal roofing in coastal areas and provide practical tips to help your customers protect their assets during storms.

First, we’ll review one of the most vulnerable parts of your customers’ structure: the roof. Roof cover damage accounts for most non-storm-surge-related insurance claims during a hurricane. Damage to this vital building element can be dangerous and devastating since even partial damage can leave the entire structure vulnerable to wind, water and other structure- and property-damaging elements. To help prevent these ill-effects, selecting a roof material that can stand up to tropical weather is essential.

Metal Roofing for Hurricane Season

Metal Roofing Performance in Coastal Communities

Metal roofing is made of interlocking panels that provide unique strength and durability. When properly installed, some can withstand abuse from hurricane-force winds up to 140-mph as well as wildfires, hailstorms and tornadoes. American Building Components (ABC) metal panels feature UL 580 Class 90 Wind Uplift Resistance, UL Class 4 Hail Impact Resistance and Class A Fire ratings to support this. Metal roofs also have fewer seams as compared to traditional asphalt shingle roofing. Fewer seams means fewer entry points for water that can soak attic insulation and cause ceiling collapse and other damage.

Many metal roofing panel profiles adhere to strict approval codes designed to prevent property loss and damage from high winds. One example is the Miami-Dade County Approval—one of the most stringent building codes in the industry. To help your customers meet these strict requirements, panels like ABC’s PBR and 5V Crimp profiles, as well as most insulated metal panels can be specified to qualify for Miami-Dade County-approval. To ensure your customers’ roof adheres to Miami-Dade standards, be sure that the panel meets guidelines for thickness and features a Miami-Dade approval sticker. Even if a Miami-Dade approved panel is used, if not installed properly using correct fasteners, it will not be effective. Remind your customers that the manufacturer’s installation instructions should provide all necessary details to ensure proper function and protection.

The True Savings of Metal Roofing

By choosing metal roofing, your customers can save money in the long run. Although other roofing options are cheaper up-front, customers who install metal panels benefit from their superior design and durability. This pays dividends in the form of lower maintenance costs and insurance premiums over the life of their metal roof. A properly-installed, thick-gauge metal roof can last up to 50 years. That’s more than double the lifespan of traditional asphalt shingle roofs many customers are familiar with.  In addition, some manufacturers back the durability and lifespan of their metal roofing products with industry-leading warranties that provide peace-of-mind.

For tips on how to prevent roof damage during hurricane season, read part two of our ‘Metal Roof and Hurricane Season’ blog series. For additional information on how to storm-proof your roof, reach out to your local ABC representative today.DISTRIBUTORS: Shop online at shop.abcmetalroofing.com!

How to Prevent Ice Dams on Metal Roofs

Those in areas prone to below-freezing temperatures are likely familiar with ice dams and the costly damage they can cause. With winter weather already upon us, it’s important to ensure your building is protected against the dangerous and expensive effects of ice dams.

What Causes Ice Dams to Develop?

Most ice dams are a result of building air barrier flaws. When warm indoor air escapes through a rooftop, it warms the roof sheathing. This rise in temperature melts the underside of the layer of snow on top. The melted snow then moves down the slope of the roof toward the eaves, where it freezes into ice. As this process continues, the ice thickens, resulting in ice dams. These obstructions can cause water to back up and form a reservoir that can damage ceilings.

Ice Dams | ABC Blog

How Can Ice Dams Be Prevented?

To prevent ice dams, follow these four steps:

  1. Seal Air Leaks: Sealing air leaks between the warm building interior and the attic or ceiling is imperative to prevent increased sheathing temperatures that can lead to ice dams. If your roof leaks every winter, it’s likely that an air leak is to blame. And, getting a new roof is not likely to help—even if it features more ventilation. The simple way to determine if you have air leaks is to get into your attic and check. Leaks can likely be easily sealed with two-component polyurethane spray foam. And extending any exhaust fans that don’t reach outside can help adequately seal the structure.
  1. Ensure Proper Insulation: Many buildings don’t have adequate insulation levels to prevent ice damming. Building codes based on your geographic location can help you determine how much insulation you need. If the structure’s design doesn’t allow for adequate insulation, we recommend installing as much closed-cell spray polyurethane foam as possible. If replacing your roof, you can also install additional rigid foam insulation on top of the existing roof sheathing before you install the new roof. When taking that approach, make sure all products used are compatible with your new roof and adhere to manufacturer’s recommendations. It’s also imperative that attic insulation completely covers the top plates of a building’s exterior walls.
  1. Improve Ventilation: Improving ventilation alone will not prevent air leaks that cause ice damming and should never be your first or only defense. In fact, improving ventilation without sealing air leaks and installing adequate insulation can increase heating costs and make ice damming problems worse. Despite this, if combined with steps one and two above, addressing your roof ventilation can’t hurt. The best ventilation options include soffit and ridge vents. It’s important to remember that all attic ventilation systems require an insulation dam (blocking) between the trusses and ventilation baffles at the attic’s perimeter, facing the soffits, to maintain a ventilation channel from the soffit to the attic and protect against wind-wash.
  1. Use Underlayment: Covering your roof sheathing with two or more layers of rubberized membrane underlayment is another protection method that is far less effective if not used in concert with steps one and two. To use properly, it should extend from roof eaves to a point that’s three feet higher than your exterior wall.

Additional measures like framing your roof with raised-heel trusses can also help prevent ice dams. Additionally, avoiding including valleys as well as gutters that are at or above the roofing plane is ideal. Taking these steps can help ensure people and property are safe from overhead dangers. This should be a priority when designing, installing and maintaining your metal roof.

For additional information on how metal roofs perform in winter weather, read part one and part two of our ‘Metal Roofs and Snow’ blog series. For additional tips on how to winter-proof your roof, reach out to a local ABC representative today.

DISTRIBUTORS: Shop online at shop.abcmetalroofing.com!

Roofing and Snow: Everything You Need to Know – Part Two

Additional considerations for working with metal panels in winter.

In part one of our series on metal roofing and snow, we covered five of the most important elements to consider when preparing structures for winter weather. In this post, we’ll review four more ways to prevent unexpected, costly damage of metal panels in winter.

  1. Consider roof material and surface color

Metal roofs absorb heat quickly and radiate it effectively. Darker panel colors can enhance this solar absorption effect, which can save you money year-round. But because UV light can pass through 3-5 inches of snow, when combined with heat loss through the roof, it becomes more difficult for snow to stay solid. To minimize the chance of ice damming, you should ensure your roof system is properly sealed and insulated. If not, ice damming may occur and the melting and re-freezing of snow throughout the day can result in icy layers that promote snow sliding—no matter the roof material or color.

  1. Review weathertightness factors

For low-sloped roofs (less than 3:12), it is especially important for panel seams to be watertight to prevent water (melted snow) from leaking into the structure. This can be problematic when snow gathers and stays on a roof. Architects, designers and specifiers, therefore, should consider using panels that have passed the ASTM 2140 water head test or FM 4471 Appendix G water test. Water-resistant underlayment should also be considered for all roof slopes.

ABC Blog: Roofing and Snow: Everything You Need to Know about Metal Panels in Winter - Part Two
A close-up of this dormer roof illustrates how the impact of sliding ice and snow can damage panel seams.
  1. Consider your roof layout

Design elements like valleys and slope changes cause snow to collect and increases your snow load. Also, when dormers extend from a large roof area and one area is significantly bigger than the other, the structure is susceptible to experiencing unbalanced sliding snow. This imbalance can actually tear open standing seams and displace panels. Also consider that drifting snow may accumulate behind HVAC units, at perimeter walls, and behind solar and photovoltaic (PV) panels.

  1. Ensure Proper Roof Maintenance

One of the best ways to prevent snow and ice issues is to regularly inspect and maintain your roof. In addition to cleaning and inspecting your roof for possible issues, properly removing standing snow and preventing ice dams is a vital part of avoiding damage to your metal panels in winter. This often requires that you get into your attic to inspect for air leaks—the leading cause of ice dams. Read more about how to properly maintain and remove snow from your roof in this blog post.

If an issue is discovered, consult your roofing material manufacturer for recommendations as well as advice on warranty claims. Additionally, you can reach out to a trusted roofing professional in your area. These professionals can thoroughly inspect your roof system to help you determine ways to rectify any potential issues. You’ll want to do this before damage and/or injury occurs and before you pay for sub-par or ineffective repairs.

If you missed part one of this series, click here for our top five considerations. These include managing snow load and sliding snow, preventing ice dams, using retention systems and more! For more information on how metal panels fare in winter weather conditions and for advice on how to winter-proof your roof, reach out to an ABC representative today.

Roofing and Snow: Everything You Need to Know – Part One

What to consider when designing and building in snow-prone areas.

While properly-designed metal roofs historically perform well in winter, heavy snowfall can be detrimental to buildings of all kinds. Those who live and work in and around them are also at risk when snow and ice cause dangerous situations. Even though winter doesn’t formally begin until late December, colder weather is upon us. And while you might not be expecting snow or ice yet, keep these roofing and snow tips in mind when designing, constructing and maintaining structures in areas where there’s a chance for snow and/or ice over the course of the year.

Considerations for Snow-Bearing Roofs:

  1. Anticipate Snow Load

Snow accumulates on every roof type, and as this happens, it increases the amount of weight your structure is bearing. This increased weight (snow load) can pose several threats to the structure and those in and around it. For example, when the weight of snow or ponded water from melted snow exceeds the structure’s limits, the roof or even the entire structure can collapse. Be sure you’re aware of the weight your structure can bear and remove snow to keep it within its limits. Consult the International Building Code (IBC) as well as state and local codes for guidance based on your location.

  1. Prevent Ice Dams

Most ice dams are the result of air barrier flaws in buildings. If warm indoor air escapes through the roof floor, it warms the roof sheathing and melts the underside of the layer of snow on top. This water then moves down the slope of the roof toward the eaves, where it freezes into ice. As this process continues, the ice gets thicker and thicker, resulting in ice dams. The presence of these dams allow water to back up and form a reservoir that can cause major damage.

To prevent ice dams, you should:

  • Seal all air leaks at the attic floor
  • Ensure proper insulation
  • Provide adequate attic ventilation

Another tip is to use a peel and stick membrane on the roof deck extending from the eave to about 3’ up-slope from the exterior wall. For more specific details on the ice dam prevention tips above, read our recent blog post.

  1. Prevent Sliding Snow

Gravity can cause accumulated snow to slide down the roof’s slope (shedding), potentially injuring people and damaging property below. Despite this, snow shedding must occur to keep the snow load from accumulating beyond the buildings structural limits. Balancing snow load and shedding is important and requires that you consider geographical and building material and roof design factors.

ABC Roofing and Snow Blog
Ice and snow sliding down the main roof has damaged the roof panels and the valley trim on this connector roof.

Roof slopes of 45 degrees (12:12) or more, can accelerate sliding snow with sometimes immense and dangerous consequences. For example, if snow accumulates and then falls onto an exterior gas line, pipes could rupture. From there, the smallest of ignition sources could set the structure ablaze. In addition, the weight of sliding snow can propel any icicles formed on eaves can be propelled down by the force and weight of sliding snow onto people and property below.

On slopes less than 45 degrees (6:12 to 9:12), low amounts of friction (like on smooth roof surfaces) means it offers less resistance to sliding. Striations and embossing on roofing materials like metal panels add a small 3D profile and improve the resistance to sliding, especially when they run traverse to the slope.

This can get complicated, but in general, installing metal panels with snow retention devices on a steeply-sloped roof is recommended. This approach will naturally shed snow and ice, and protect your structure from excessive snow loads. If you have a low-sloped roof, be sure it’s design supports snow as shedding won’t occur naturally. Including enough snow retention devices from ridge to eave is also imperative for this design.

  1. Use Retention Systems

A variety of retention options, such as snow fences, bars or guards, are designed to make snow and ice melt completely or fall from roofs in small amounts. This helps reduce risks associated with sudden rooftop avalanches while maintaining the clean lines of the roof. It is important that snow retention systems are carefully engineered and properly installed. Models like S-5!’s snow-retention device design resource allow you to input your roof dimensions and expected snow load to adequately engineer snow fence assemblies.

  1. Protect Roof Attachments
ABC Roofing and Snow Blog_Pipe Protection
This pipe penetration is protected from sliding ice and snow by a small section of S-5! ColorGuard to the panel seams immediately up-slope from the pipe.

The weight of sliding snow can be powerful enough to take off attachments like exhaust vents. To combat this, reduce the shear load by installing rigid vent pipes securely and as high up on the roof slope as possible. If this is not possible, protect the pipes with a snow retention system.

While metal roofing responds well to harsh winter weather, it is imperative to take the time to keep snow, ice and moisture from causing issues. No matter the roofing design or material used, keeping people and property safe from overhead dangers should be a priority when designing, installing and maintain your structure.

In part two of this roofing and snow series, we’ll review additional considerations. It contains tips on roof layout, color, weathertightness and maintenance, which also play important roles in winter weather protection.

For more information on roofing and snow like how metal panels fare in winter weather conditions and for advice on how to winter-proof your roof, reach out to an ABC representative today.