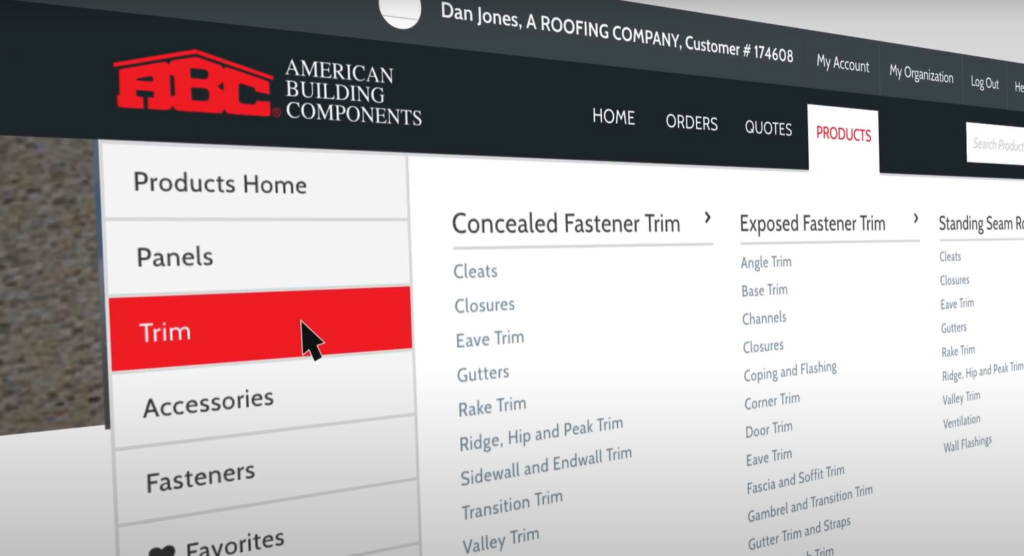
Ordering Metal Roof & Wall Trim Online

Metal roof and wall trim is used to seal joints and edges to keep moisture out while providing a seamless transition between panels to create a polished look. With our online ordering tool, you can browse our selection and order the trim your customers need from anywhere at any time. Learn more about ordering trim online!

Online Trim Options

Our metal roofing and wall trim is available in all standard colors to match our panels. The trim style and profile you select should depend on the panel profile used on your building project. When ordering through the ecommerce platform, there are four main trim categories to choose from: 

  • Concealed Fastener Trim – used with our SL-16 Panel
  • Exposed Fastener Trim – used with multiple profiles, such as Imperial Rib and PBR
  • Standing Seam Trim – used with LokSeam
  • Custom Trim – used in a variety of applications

All ecommerce manuals are organized based on the panel groupings, indicating the correct type of trim for each panel. Choosing the proper trim is important because the following variables are different for each panel profile: 

  • Rib Heights
  • Rib Spacing
  • Installation Methods
  • Attachment Methods

Ordering Custom Trim

ABC Metal Roofing makes it easy to order custom trim to meet your specific needs. Just like our standard trims, special trim is available in all of our standard colors, with length options up to 20 feet.  ABC also sells flat sheets and coil stock, if you prefer to fabricate your own trim items. Learn more about how to order:


How to Draw Trim

When drawing your trim, keep these points in mind:

  • All dimensions must be noted in inches with a tolerance of 1/16 of an inch
  • Custom trim can be produced in lengths of up to 20ft.
  • Color side must always be noted
  • Label all degrees of bend
  • Trim ends can be hemmed (the standard is ½”)
  • Label each trim with a piecemark of your choosing to help identify the special trim throughout order and production process

Special trim drawings must be submitted online before the order can be completed. Each customer has the option to upload their own saved document or download and edit a standard template.


Pricing

All custom trims are priced based on the total square footage of each part. Each gauge and color system has a unique cost per square foot. Bends are priced at $0.80 each while hems are $1.60 each.

If you’re planning to reorder the same trim, we can work with you to set up a unique part number to make it easier to reorder.


Placing Your Order

Browse our selection of trim to find the best fit for your customer’s project. Visit our online ordering tool to place your order today! Not a registered user?  Register for an account to access this convenient tool. 

How To Cut Metal Panels

Even with an accurate materials list, cutting metal roof and wall panels on-site is often a necessary part of the installation process. To avoid damaging your metal panels, it’s important to use the correct tools and overall best practices. Learn more about how to cut metal panels.


Safety Precautions

Before cutting your metal panels, take appropriate safety precautions to avoid getting hurt. Use gloves to protect your hands from being cut by the sharp metal panel edges. If metal filings fall on the surface of your metal panel, try to blow them off instead of touching them with your hands. Put on safety goggles to protect your eyes from airborne metal filings.

Tools

To avoid damaging the panels or their coating, it’s important to use proper tools. Snips are generally recommended for trim work while shears and nibblers are used for the panels themselves. Some of the best tools to use include:


● Aviation Snips: Good choice for small cuts, including cuts near pipe penetrations.
● Electric Shears: Ideal for lengthier cuts along steel.
● Mechanical Shears: Add-on tool that fits into an impact or screw gun. Ideal for use on standing seam panels at hips and valleys.
● Nibblers: Also known as turbo shears, they’re ideal for cutting openings for windows and doors.

Skill saws can also be used if this is the only resource available. Be sure to use a blade that is specifically designed for metal panels. Turn the panel upside down so that the painted side is facing the ground to make sure filings don’t stick to the paint coating.

Avoid Using:
● Torches
● Cut-Off Saws
● Reciprocating Saws
● Hacksaws
● Grinders

These tools heat up the metal panel and can melt or damage the edge that was cut. They can also cause metal filings to go airborne, creating a safety hazard. If those metal filings stick to the panel’s painted coating, they can cause surface rust.


Cutting Metal Panels

Marking the Panels

Before cutting your panels, be sure to measure and mark the cuts you’re planning to make. To mark your panels, lay them down flat with the painted side down. Make sure the panel is stable by clipping the panel in with c-clamps.

Do not mark on the finished side of the panel to avoid marring the visible surface. Avoid using a pencil with graphite lead as this is a dissimilar metal and could cause your metal panel to corrode. Instead, use a chalk line or magic marker. Use a straightedge or combination square to draw a straight line.

Cutting Technique

Before making a cut, be sure to line up the snip blade with the marking. Keep the blade perpendicular to the metal sheet you’re cutting. Work slowly and make steady and consistent cuts for smoother lines. Keep your cuts short to avoid jagged edges. For quicker, straighter cuts, use nibblers or mechanical shears.


Improve Efficiency by Planning Ahead

Cutting metal panels and trim in the field is easily one of the most time-consuming parts of the installation process. To avoid extra cutting in the field, it’s important to create an accurate materials list upfront. To do this, plan out how your panels will cover the roof or wall areas. Make sure the coverage width and count of the panels ordered is sufficient to cover the area you are installing. Consider which side of the building you will start with and how the ends of the wall or roof will be finished. It is possible that you may be able to avoid splitting a panel lengthwise if you do proper calculations in advance. Additionally, some panels are only able to be installed in one direction. Next, review the standard trim details such as valleys, hips, and around doors and windows. Be sure you have appropriate panels to cover these areas as well, and order to the closest pre-cut length available.

If you have any additional questions about how to cut metal panels in the field, contact your local ABC Sales Representative.

Selecting Metal Roofing Trim

There are a variety of factors to consider when selecting metal roofing trim, including the application, roofing style and curb appeal expectations. Once you’ve made your selection, it’s important to ensure that the trim is properly installed to protect your building from water leaks.


Common Metal Roofing Trim

Before jumping into considerations for metal roofing trim selection, here are some of the most common types of metal roofing trim:

Valley Trim: Used when two roofs are joined together to help drain off rain and snow.
Transition Flashing: Used for roofs with two different pitches.
Endwall/Sidewall Flashing: Used for projections that come out of the roof such as dormers, chimneys, lean tos and more.
Gable Trim: Used to end panels on the roof.
Eave Trim: Applied where the Fascia board is installed on the low side of the roof.

Metal Roofing Trim Considerations

For consistent performance, it’s ideal to purchase metal roofing trim from the same manufacturer that produced your metal roofing panels. This will extend the life of your roof panel and protect your structure from damage. It will also ensure that the paint systems are compatible. When selecting metal roof trim, look for a heavier gauge material to improve dent resistance. For added protection, look for steel panels that have a Class 4 Hail Rating and a Class A Fire Rating.

Selecting Trim for Your Metal Roof

Roof Style

To select metal roofing trim for your building project, you should examine the roof to determine the metal roofing style. Is it a fastened through or concealed fastener roof? What are your expectations for curb appeal? Do you want a rustic look or a touch of modernity?

Gutters
Consider whether or not your roof will have gutters as this will affect the selection and application of eave trim.

Ridge Caps
Ridge caps are installed on the peak of the roof to help protect against damage from exposure to wind, sun and rain. There are two types of ridge caps to consider for your metal roof: single bend and double bend. Single bend ridge caps are designed for use on homes with roof ventilation materials and provide a clean, modern look.. Double bend ridge caps on the other hand are more durable, making them ideal for post-frame applications.

Roof Overhangs
Do you have overhangs on your roof? For homes and buildings that have ventilation on the eaves, consider adding ventilation material in the peak of the roof . For non-vented overhangs, use a closure to keep out weather and critters.

Roofing Composite
You will need to examine any existing roofing composite materials to determine whether to keep it or remove it. Additional framing material might be needed if installing panels over the existing roof. This will affect the selection of gable and eave trims.

To learn more about how to select metal roofing trim, reach out to your local ABC representative.

Why Choose ABC

At ABC, we offer a wide variety of trim to accommodate most applications. If none of our standard trim offerings fit your project, we can manufacture custom trim designed to fit your unique specifications. We offer a broad color palette for our metal roof panels, trim and gutter systems so you can create eye-catching curb appeal.

Browse our selection of metal roofing trim or contact a sales representative today.

How Metal Trim Earns its Keep

Selecting the right trim and installing it correctly is crucial to ensuring metal buildings look good and stay dry.

The success of any metal panel roof depends heavily on the trim. Aside from providing an elegant, finished look, these hard-working components serve as part of the flashing system by sealing joints, side seams and end laps against leaks. The right trim installed in the right manner will help keep metal buildings dry and good-looking for years to come.

Where is trim used?

When most people think of trim, the pieces that come to mind are those installed around a roof’s perimeter: the ridge, or peak; the eaves, or lower edges; and the rake, or side edges. But just as important are those less noticeable pieces installed wherever there’s a change in roof slope, as in a valley, or where the roof meets a vertical surface like a dormer wall. Valley and dormer trim play particularly tough, yet vital roles because they have to prevent water trapped by leaves or snow from backing up into the structure. This is just as important on metal walls where trim sheds water away from windows and doors, and waterproofs inside and outside corners.

Trim performance and aesthetic

In addition to performing well, the trim also has to be attractive, and trim thickness can be a major factor in how good the roof looks. Although the trim pieces are usually the same thickness as the panels, as we mentioned in our post on Metal Panel Gauges, it can be helpful to step up to something thicker, which is less likely to telegraph imperfections in the underlying roof or to dent if the installer mistakenly over-drives a screw. Additionally, a heavier-gauge trim can help prevent “Oil-canning”—the deformation of sheet metal—which can be common on trims applied to corners and door jambs. Using A 26-gauge trim piece on a 29-gauge roof may even allow for the selection of thinner roof panels, adding to homeowner satisfaction without adding much to—and maybe even reducing—the cost.

Installation factors make a difference

Trim can only succeed at its job when installed in the proper sequence. On a roof, the eave and valley flashings must be put in place before the panels, while the rake and ridge pieces wrap around the tops of the panel edges. Done right, this sequencing creates overlaps that naturally shed water. The proper overlaps also protect the roof against wind-driven rain by ensuring that any water that sneaks past the trim during a storm hits an underlying piece of metal and drains back out to daylight so it can be evaporated. As an added layer of redundancy, the installer will include a sealant tape between the trim pieces and the panels. These serve as gasketing to keep water on the outside. Additionally, trims that are hemmed at the edges can add rigidity to and fight corrosion of the factory cut edge.

Even the highest quality materials will not perform optimally unless installed correctly. To ensure each piece of trim is perfectly straight and square from end to end, with no bumps or dips, the installer will usually have someone on the ground confirm that everything looks right before fastening each piece.

For information on ABC’s trim, including diagrams and installation manuals, visit our website or contact a local sales representative today.