Metal Roofing and Hurricane Season Part 1: Securing the Roof

For customers who live and work in coastal areas, preparing for hurricane season is vital. This preparation helps mitigate the risks and damage tropical storms can cause to their homes and businesses. Most hurricane-preparedness tips include making a hurricane emergency kit, reviewing insurance policies and outlining family emergency and evacuation plans. While these are all important activities, there are few that focus on the impact roofing material can have on the safety and security of your customers and their property. In this two-part blog series, we’ll evaluate the performance of metal roofing in coastal areas and provide practical tips to help your customers protect their assets during storms.

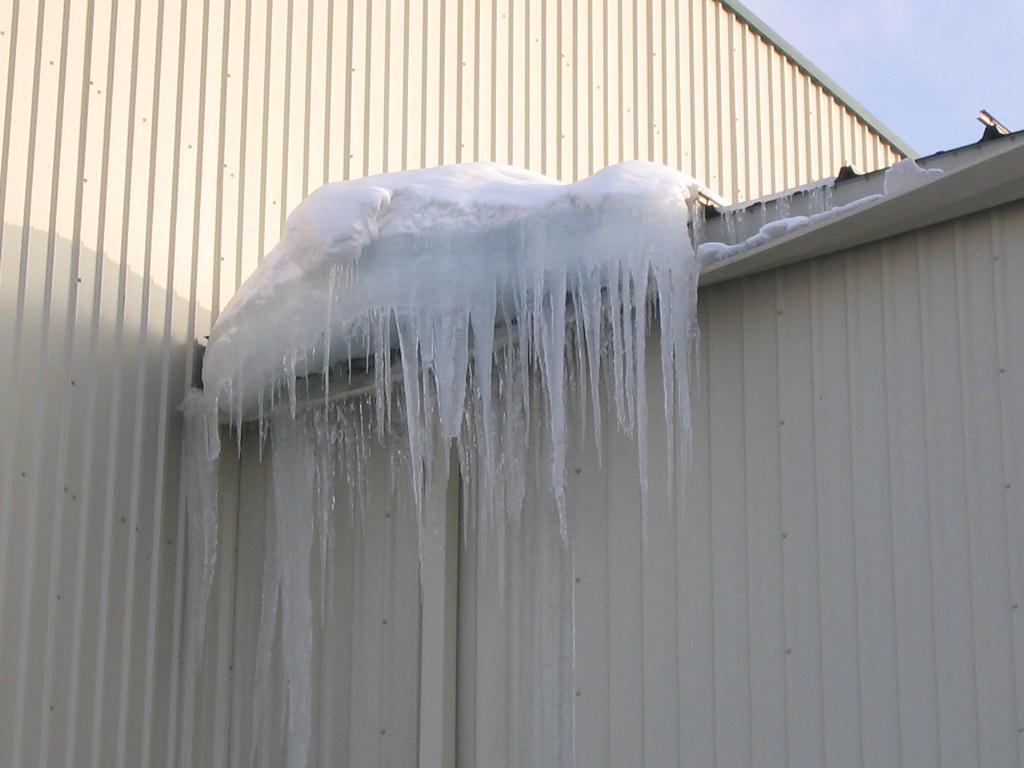
First, we’ll review one of the most vulnerable parts of your customers’ structure: the roof. Roof cover damage accounts for most non-storm-surge-related insurance claims during a hurricane. Damage to this vital building element can be dangerous and devastating since even partial damage can leave the entire structure vulnerable to wind, water and other structure- and property-damaging elements. To help prevent these ill-effects, selecting a roof material that can stand up to tropical weather is essential.

Metal Roofing for Hurricane Season

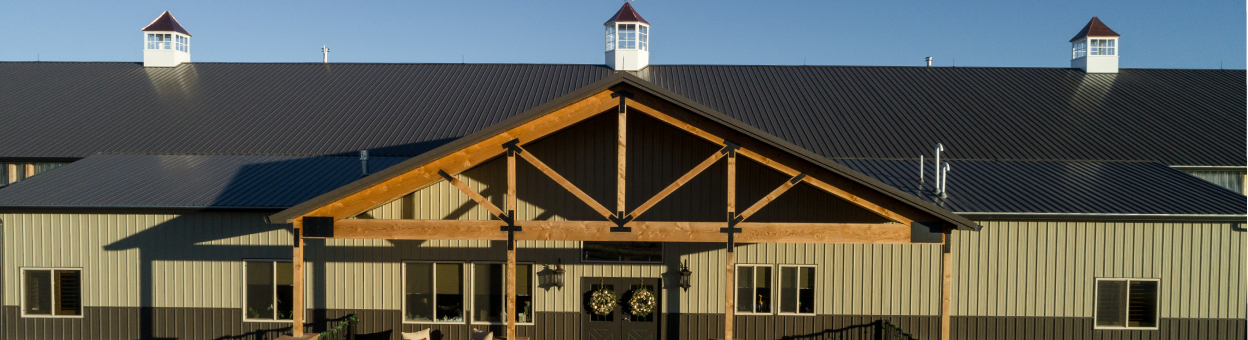
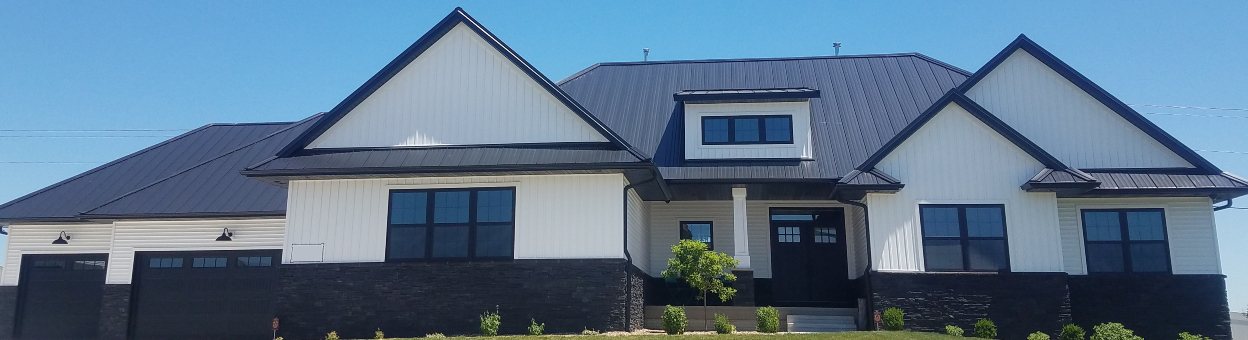
Metal Roofing Performance in Coastal Communities

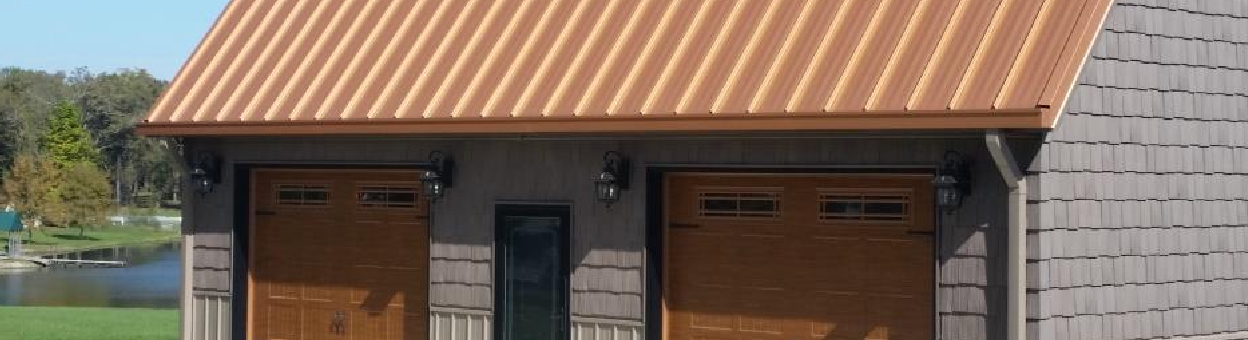
Metal roofing is made of interlocking panels that provide unique strength and durability. When properly installed, some can withstand abuse from hurricane-force winds up to 140-mph as well as wildfires, hailstorms and tornadoes. American Building Components (ABC) metal panels feature UL 580 Class 90 Wind Uplift Resistance, UL Class 4 Hail Impact Resistance and Class A Fire ratings to support this. Metal roofs also have fewer seams as compared to traditional asphalt shingle roofing. Fewer seams means fewer entry points for water that can soak attic insulation and cause ceiling collapse and other damage.

Many metal roofing panel profiles adhere to strict approval codes designed to prevent property loss and damage from high winds. One example is the Miami-Dade County Approval—one of the most stringent building codes in the industry. To help your customers meet these strict requirements, panels like ABC’s PBR and 5V Crimp profiles, as well as most insulated metal panels can be specified to qualify for Miami-Dade County-approval. To ensure your customers’ roof adheres to Miami-Dade standards, be sure that the panel meets guidelines for thickness and features a Miami-Dade approval sticker. Even if a Miami-Dade approved panel is used, if not installed properly using correct fasteners, it will not be effective. Remind your customers that the manufacturer’s installation instructions should provide all necessary details to ensure proper function and protection.

The True Savings of Metal Roofing

By choosing metal roofing, your customers can save money in the long run. Although other roofing options are cheaper up-front, customers who install metal panels benefit from their superior design and durability. This pays dividends in the form of lower maintenance costs and insurance premiums over the life of their metal roof. A properly-installed, thick-gauge metal roof can last up to 50 years. That’s more than double the lifespan of traditional asphalt shingle roofs many customers are familiar with.  In addition, some manufacturers back the durability and lifespan of their metal roofing products with industry-leading warranties that provide peace-of-mind.

For tips on how to prevent roof damage during hurricane season, read part two of our ‘Metal Roof and Hurricane Season’ blog series. For additional information on how to storm-proof your roof, reach out to your local ABC representative today.DISTRIBUTORS: Shop online at shop.abcmetalroofing.com!

How to Prevent Ice Dams on Metal Roofs

Those in areas prone to below-freezing temperatures are likely familiar with ice dams and the costly damage they can cause. With winter weather already upon us, it’s important to ensure your building is protected against the dangerous and expensive effects of ice dams.

What Causes Ice Dams to Develop?

Most ice dams are a result of building air barrier flaws. When warm indoor air escapes through a rooftop, it warms the roof sheathing. This rise in temperature melts the underside of the layer of snow on top. The melted snow then moves down the slope of the roof toward the eaves, where it freezes into ice. As this process continues, the ice thickens, resulting in ice dams. These obstructions can cause water to back up and form a reservoir that can damage ceilings.

Ice Dams | ABC Blog

How Can Ice Dams Be Prevented?

To prevent ice dams, follow these four steps:

  1. Seal Air Leaks: Sealing air leaks between the warm building interior and the attic or ceiling is imperative to prevent increased sheathing temperatures that can lead to ice dams. If your roof leaks every winter, it’s likely that an air leak is to blame. And, getting a new roof is not likely to help—even if it features more ventilation. The simple way to determine if you have air leaks is to get into your attic and check. Leaks can likely be easily sealed with two-component polyurethane spray foam. And extending any exhaust fans that don’t reach outside can help adequately seal the structure.
  1. Ensure Proper Insulation: Many buildings don’t have adequate insulation levels to prevent ice damming. Building codes based on your geographic location can help you determine how much insulation you need. If the structure’s design doesn’t allow for adequate insulation, we recommend installing as much closed-cell spray polyurethane foam as possible. If replacing your roof, you can also install additional rigid foam insulation on top of the existing roof sheathing before you install the new roof. When taking that approach, make sure all products used are compatible with your new roof and adhere to manufacturer’s recommendations. It’s also imperative that attic insulation completely covers the top plates of a building’s exterior walls.
  1. Improve Ventilation: Improving ventilation alone will not prevent air leaks that cause ice damming and should never be your first or only defense. In fact, improving ventilation without sealing air leaks and installing adequate insulation can increase heating costs and make ice damming problems worse. Despite this, if combined with steps one and two above, addressing your roof ventilation can’t hurt. The best ventilation options include soffit and ridge vents. It’s important to remember that all attic ventilation systems require an insulation dam (blocking) between the trusses and ventilation baffles at the attic’s perimeter, facing the soffits, to maintain a ventilation channel from the soffit to the attic and protect against wind-wash.
  1. Use Underlayment: Covering your roof sheathing with two or more layers of rubberized membrane underlayment is another protection method that is far less effective if not used in concert with steps one and two. To use properly, it should extend from roof eaves to a point that’s three feet higher than your exterior wall.

Additional measures like framing your roof with raised-heel trusses can also help prevent ice dams. Additionally, avoiding including valleys as well as gutters that are at or above the roofing plane is ideal. Taking these steps can help ensure people and property are safe from overhead dangers. This should be a priority when designing, installing and maintaining your metal roof.

For additional information on how metal roofs perform in winter weather, read part one and part two of our ‘Metal Roofs and Snow’ blog series. For additional tips on how to winter-proof your roof, reach out to a local ABC representative today.

DISTRIBUTORS: Shop online at shop.abcmetalroofing.com!

Roofing and Snow: Everything You Need to Know – Part Two

Additional considerations for working with metal panels in winter.

In part one of our series on metal roofing and snow, we covered five of the most important elements to consider when preparing structures for winter weather. In this post, we’ll review four more ways to prevent unexpected, costly damage of metal panels in winter.

  1. Consider roof material and surface color

Metal roofs absorb heat quickly and radiate it effectively. Darker panel colors can enhance this solar absorption effect, which can save you money year-round. But because UV light can pass through 3-5 inches of snow, when combined with heat loss through the roof, it becomes more difficult for snow to stay solid. To minimize the chance of ice damming, you should ensure your roof system is properly sealed and insulated. If not, ice damming may occur and the melting and re-freezing of snow throughout the day can result in icy layers that promote snow sliding—no matter the roof material or color.

  1. Review weathertightness factors

For low-sloped roofs (less than 3:12), it is especially important for panel seams to be watertight to prevent water (melted snow) from leaking into the structure. This can be problematic when snow gathers and stays on a roof. Architects, designers and specifiers, therefore, should consider using panels that have passed the ASTM 2140 water head test or FM 4471 Appendix G water test. Water-resistant underlayment should also be considered for all roof slopes.

ABC Blog: Roofing and Snow: Everything You Need to Know about Metal Panels in Winter - Part Two
A close-up of this dormer roof illustrates how the impact of sliding ice and snow can damage panel seams.
  1. Consider your roof layout

Design elements like valleys and slope changes cause snow to collect and increases your snow load. Also, when dormers extend from a large roof area and one area is significantly bigger than the other, the structure is susceptible to experiencing unbalanced sliding snow. This imbalance can actually tear open standing seams and displace panels. Also consider that drifting snow may accumulate behind HVAC units, at perimeter walls, and behind solar and photovoltaic (PV) panels.

  1. Ensure Proper Roof Maintenance

One of the best ways to prevent snow and ice issues is to regularly inspect and maintain your roof. In addition to cleaning and inspecting your roof for possible issues, properly removing standing snow and preventing ice dams is a vital part of avoiding damage to your metal panels in winter. This often requires that you get into your attic to inspect for air leaks—the leading cause of ice dams. Read more about how to properly maintain and remove snow from your roof in this blog post.

If an issue is discovered, consult your roofing material manufacturer for recommendations as well as advice on warranty claims. Additionally, you can reach out to a trusted roofing professional in your area. These professionals can thoroughly inspect your roof system to help you determine ways to rectify any potential issues. You’ll want to do this before damage and/or injury occurs and before you pay for sub-par or ineffective repairs.

If you missed part one of this series, click here for our top five considerations. These include managing snow load and sliding snow, preventing ice dams, using retention systems and more! For more information on how metal panels fare in winter weather conditions and for advice on how to winter-proof your roof, reach out to an ABC representative today.

Roofing and Snow: Everything You Need to Know – Part One

What to consider when designing and building in snow-prone areas.

While properly-designed metal roofs historically perform well in winter, heavy snowfall can be detrimental to buildings of all kinds. Those who live and work in and around them are also at risk when snow and ice cause dangerous situations. Even though winter doesn’t formally begin until late December, colder weather is upon us. And while you might not be expecting snow or ice yet, keep these roofing and snow tips in mind when designing, constructing and maintaining structures in areas where there’s a chance for snow and/or ice over the course of the year.

Considerations for Snow-Bearing Roofs:

  1. Anticipate Snow Load

Snow accumulates on every roof type, and as this happens, it increases the amount of weight your structure is bearing. This increased weight (snow load) can pose several threats to the structure and those in and around it. For example, when the weight of snow or ponded water from melted snow exceeds the structure’s limits, the roof or even the entire structure can collapse. Be sure you’re aware of the weight your structure can bear and remove snow to keep it within its limits. Consult the International Building Code (IBC) as well as state and local codes for guidance based on your location.

  1. Prevent Ice Dams

Most ice dams are the result of air barrier flaws in buildings. If warm indoor air escapes through the roof floor, it warms the roof sheathing and melts the underside of the layer of snow on top. This water then moves down the slope of the roof toward the eaves, where it freezes into ice. As this process continues, the ice gets thicker and thicker, resulting in ice dams. The presence of these dams allow water to back up and form a reservoir that can cause major damage.

To prevent ice dams, you should:

  • Seal all air leaks at the attic floor
  • Ensure proper insulation
  • Provide adequate attic ventilation

Another tip is to use a peel and stick membrane on the roof deck extending from the eave to about 3’ up-slope from the exterior wall. For more specific details on the ice dam prevention tips above, read our recent blog post.

  1. Prevent Sliding Snow

Gravity can cause accumulated snow to slide down the roof’s slope (shedding), potentially injuring people and damaging property below. Despite this, snow shedding must occur to keep the snow load from accumulating beyond the buildings structural limits. Balancing snow load and shedding is important and requires that you consider geographical and building material and roof design factors.

ABC Roofing and Snow Blog
Ice and snow sliding down the main roof has damaged the roof panels and the valley trim on this connector roof.

Roof slopes of 45 degrees (12:12) or more, can accelerate sliding snow with sometimes immense and dangerous consequences. For example, if snow accumulates and then falls onto an exterior gas line, pipes could rupture. From there, the smallest of ignition sources could set the structure ablaze. In addition, the weight of sliding snow can propel any icicles formed on eaves can be propelled down by the force and weight of sliding snow onto people and property below.

On slopes less than 45 degrees (6:12 to 9:12), low amounts of friction (like on smooth roof surfaces) means it offers less resistance to sliding. Striations and embossing on roofing materials like metal panels add a small 3D profile and improve the resistance to sliding, especially when they run traverse to the slope.

This can get complicated, but in general, installing metal panels with snow retention devices on a steeply-sloped roof is recommended. This approach will naturally shed snow and ice, and protect your structure from excessive snow loads. If you have a low-sloped roof, be sure it’s design supports snow as shedding won’t occur naturally. Including enough snow retention devices from ridge to eave is also imperative for this design.

  1. Use Retention Systems

A variety of retention options, such as snow fences, bars or guards, are designed to make snow and ice melt completely or fall from roofs in small amounts. This helps reduce risks associated with sudden rooftop avalanches while maintaining the clean lines of the roof. It is important that snow retention systems are carefully engineered and properly installed. Models like S-5!’s snow-retention device design resource allow you to input your roof dimensions and expected snow load to adequately engineer snow fence assemblies.

  1. Protect Roof Attachments
ABC Roofing and Snow Blog_Pipe Protection
This pipe penetration is protected from sliding ice and snow by a small section of S-5! ColorGuard to the panel seams immediately up-slope from the pipe.

The weight of sliding snow can be powerful enough to take off attachments like exhaust vents. To combat this, reduce the shear load by installing rigid vent pipes securely and as high up on the roof slope as possible. If this is not possible, protect the pipes with a snow retention system.

While metal roofing responds well to harsh winter weather, it is imperative to take the time to keep snow, ice and moisture from causing issues. No matter the roofing design or material used, keeping people and property safe from overhead dangers should be a priority when designing, installing and maintain your structure.

In part two of this roofing and snow series, we’ll review additional considerations. It contains tips on roof layout, color, weathertightness and maintenance, which also play important roles in winter weather protection.

For more information on roofing and snow like how metal panels fare in winter weather conditions and for advice on how to winter-proof your roof, reach out to an ABC representative today.

Advancements in Metal Roof and Wall Panels

The evolution of metal roof and wall panels in the steel building industry.

ABC Blog | Advancements in Metal Roof and Wall Panels

Metal roof and wall panels are commonly used in today’s building industry and are highly valued for their versatility, durability and aesthetic features. This wasn’t always the case, though. Over the last several decades, the metal building industry has evolved and the use of metal panels and coordinated metal building components is now a major boon for builders as it helps them provide on-time, on-budget, attractive project to a wide-ranging customer base.

To meet changing demands and standards, the industry has continued to develop and progress since the Industrial Revolution. This era saw more than just an increase in the use of iron as a construction material. In the late 1880s, metal became a profitable option well-suited for steel-framed buildings, skyscrapers and train stations. During WWII and in the decades that followed, modern steel became the universal standard. Common uses included military shelters, oil storage, churches and private buildings—including landmarks like the Empire State Building.

 1940s – 1950s:

During the 1940s and 1950s, industry sales centered around standardized buildings (pre-engineered)—mostly to the agricultural, industrial and government markets. Typically unpainted and unattractive, these metal roof and wall panels simply met their functional purpose. However, their ability to be ordered, delivered and installed quickly and easily made them very valuable.

1960s:

The innovation of pre-painted wall panels in 1959 transformed the metal building industry. Formerly focused on agricultural and industrial end-uses, the additional color options made metal panels more appealing to commercial markets. In the late 1960s, the innovative standing-seam metal roof panel delivered advantages previously unheard of. As seen with American Building Components’ LokSeam® panel, this design features fewer seams that are raised above the panel. With fasteners situated above the panel level, the risk of damage from moisture that can collect there is reduced. Standing seam metal roofs are also designed to allow for expansion and contraction that naturally occurs as a result of changing temperatures. This provided owners, designers and contractors with a high-quality roof that can be specified and used for large buildings. Their low upfront cost and superior performance and lifespan made metal buildings the preferred solution for low-rise, non-residential buildings.

1970s – 1980s:

In the 1970s, the metal panel industry primarily focused on commercial, industrial and agricultural buildings of 10,000 sq.ft. or smaller. In the 1980s, the industry continued to grow in response to customer and market needs. New coating technologies were introduced to provide better corrosion resistance, making metal buildings a more viable long-term option. Technological advances in wind loading for walls and wind uplift for roofs also addressed structural engineering concerns previously held.

1990s:

In the 1990s, metal building construction nearly doubled because metal had proven to be flexible, cost-efficient and time-saving. As a result. the industry expanded to include retail buildings and civil/service facilities, such as schools and hospitals. Emerging metal panel technology, such as snow load solutions, was beginning to be investigated and addressed. In particular, the advancement of computer technology helped create more robust design systems. This enabled manufacturers and contractors to quickly price and deliver detailed preliminary design drawings with greater efficiency and accuracy.

Early 2000s:

The first two decades of this century brought more diverse product and service offerings to the market. These included practical and aesthetic innovations like insulated metal panels (IMPs) as well as new roofing finishes. This decade also saw a new focus on metal building safety in response to dangerous California earthquakes. To help mitigate the risks, research into the structural implications of seismic activity was conducted, resulting in updated building standards. Customer requirements also drove energy performance optimization and engineering guidelines for tapered structural components, and new exterior finishes and styles for metal roof and wall panels were introduced. This included the use of horizontal instead of vertical siding systems and smooth-surface panel faces.

Today…and Beyond:

The dramatic and innovative industry advancements of the past have given way to the full and complete metal panel solutions for a wide range of building types—including unconventional ones like custom residences—that we enjoy today. Continued research, partnerships and collaboration are further driving industry expansion and diversification—a trend that shows no sign of slowing.

For more information on American Building Components’ metal roof and wall panels, trim and components, visit us online. Metal Product Distributors: quote and order metal building products anytime, anywhere and from any device using our online ordering tool. If you don’t already have an account, register for access today!

DISTRIBUTORS: Shop online at shop.abcmetalroofing.com!


Metal Panel Installation: Surface Considerations and Building Applications

In our last blog post, we outlined the steps to take before metal panel installation to ensure projects are built to last. In this post, we’ll take a look at the important metal panel installation considerations that should be made, particularly when working with varying surface conditions and building end-uses.

Surface Considerations:

During the installation of metal panels, it is critical that installers:

  • make sure everything is square and on a level plane (i.e., plumb and true). If it’s not, it will need to be corrected. Note: It is not recommended that the building owner do this themselves unless they are experienced and comfortable assuming the associated risks.
  • ensure the integrity of the substrate is not compromised. If installation issues or delays are caused by faulty substrate, for example, the parties responsible for the substrate would need to correct the causal issue. In retrofit projects, existing substrate issues must be addressed, but it is likely that the original builder will not be able to be sourced to correct the problem. In this case, a roofing consultant or knowledgeable substrate tradesman can help advise.
Installing Metal Panels with Different Building Applications

While installation is generally the same for most end-use applications, some equipment may vary. Depending on the other products or materials in the mix, there are certain caveats to keep in mind. For instance:

  • Over Asphalt Shingles: While installing a metal roof over an existing asphalt shingle roof is possible, it is not recommended to place metal panels directly over asphalt. In this scenario, keep in mind that:
    • It’s best to remove asphalt shingles or use a furring strip to create a buffer. (This means you can use a 1” x 4” piece of wood to provide clearance between the asphalt shingles and the metal panels.)
    • It’s not ideal to lay underlayment on top of asphalt and then install a metal roof because the shingle will curl and those imperfections will show through the metal, particularly when using lighter gauge.
  • Over Dissimilar Metals: Do not let your metal panels come into contact with dissimilar metals or allow run-off water that has been in contact with dissimilar metals to come into contact with the metal panels.
  • Over Treated Lumber: Separator material can be recommended by your installer or preferred material provider (lumber yard, home improvement store, etc.) and should be used; appropriate fasteners designed to be used to connect treated lumber with metal panels should always be used in these cases as well.
Other Metal Panel Installation Considerations:

The need for the following features and considerations can vary based on projects.

  • Vapor barriers
  • Ice and water shields
  • Regardless of all else, you’ll always want to be sure local codes/Homeowners Association (HOA) requirements are met.
Final FAQ:

How to choose a Metal Panel installer? End-users can request a list of nearby installers who may be able to help with their project from their metal building material supplier. Material manufacturers do not make these recommendations.

What if your panels are installed incorrectly? Let the installer know about any issues as soon as possible and work to get them resolved quickly. If you think the improper installation jeopardizes the product warranty, please advise the company that sold the material to you (metal panel distributor) as soon as possible. They will work with the manufacturer to resolve any warranty issues.

For more information on metal panel installation considerations or to find a metal panel distributor or installer in your area, contact your local ABC representative.


Metal Roof Pitch Part II: Panel Selection for Your Building End-Use

In part one of our series on metal panel roof pitch, we looked at the engineering and strength considerations that need to be taken into account when designing or specifying a building. In part two, we’ll review how to make the right metal panel selection for your building end-use by looking at the building type and roof pitch to find the optimal combination of form and function.

Types of roof panels:

Different types of metal roof panels are better suited for certain roof pitches and this mostly has to do with panel rib height and how they’re seamed together. For instance, the lower the pitch, the taller the rib of the roof panel needs to be in order to optimize water carrying capacity. Also, the lower the pitch, the slower water runs off the roof; combined with wind pressure, this can hold water at the eave. As an example:

  • On 2:12 and lower pitches for commercial/industrial jobs, weathertightness warranties will use a mechanically seamed panel because it creates an impenetrable lock that keep water from seeping between the panels. Seamed panels can be thought of as more hydrostatic (resistant to water), whereas non-seamed panels are hydrokinetic, i.e., water runs off of them, but they are not designed to be a water barrier.

Building Type and Use:

Whether residential, post-frame or commercial, structures follow general design criteria regarding metal roof slope, based on to the building type and use. For instance:

Gabled v. Hipped: gabled roofs provide more interior headroom while with hipped roofs, endwall sheet height can be reduced, making for easier ordering and installation as you don’t have to cut/miter the sheets.

  • Residential v. Post-Frame and Commercial Use: While it can generally be assumed that thicker-gauge panels are stronger, the type of building construction, location and end-use can affect the choice in panel thickness. Residential roofs generally have steeper slopes (often due to aesthetic sensibilities), while commercial and post-frame buildings will typically have a shallower pitch to increase the strength of the building. Buildings such as pole barns, post-frame buildings, warehouses and garages can require roof panels to span longer distances between supporting trusses and purlins and therefore require thicker panels to ensure the roof is structurally sound and can aid in reducing the chance of collapse under the weight of snow and water—particularly when the roof pitch is low. For smaller buildings—like residences—with supporting trusses and purlins that are typically closer together, thinner panels can be used in conjunction with thicker trim for an economic, structurally ideal residential metal roofing system. See our blog on metal panel gauges for more.
  • Economics: When a roof has a shallower pitch, less material is needed to cover the same roof span. This can be more economical since fewer square feet of material needs to be purchased, or at least help in offsetting the cost of the thicker panels commonly used on low-slope roof—a consideration often important to companies with multiple properties. Likewise, while more material may need to be purchased for a high-sloped roof, you may be able to buy thinner, less expensive panels since high-slope roofs don’t typically need to be able to support heavier loads like low-slope roofs do.
  • Aesthetics: Traditional residences typically feature a higher roof pitch while this may be less important to commercial building owners. However—from a functional standpoint—thicker panels can be more forgiving of installation errors such as over-tightened screws and aren’t as likely to transfer waves and bumps in sheathing.

Solar Panels and Roof Pitch:

The geographic location of a structure will determine the angle at which the solar panels should be installed. Generally. the closer to the equator you get, the lower the slope the solar panels can tolerate as roofs closer to the equator have more consistent exposure to sunlight as compared to those farther away. If you plan to add solar panels to your metal roof, be sure to check the Solar Reflective Index (SRI) values and minimum slopes set by the ASTM and local governing codes. These standards will advise adequate slope based on your location as well as help control things such as heat island effects, etc.  For more information on solar reflectance and how it is affected by the color of your metal roof panels, see our blog post on cool metal roofs.

Conclusion:

Roof slope is a factor that affects many decisions when it comes to any metal building roofing project regardless of the building’s end use. When embarking on any metal roofing project, be sure that the panels you’ve selected meet local building codes and are produced by a quality manufacturer with knowledge and experience designing for different applications to ensure you get exactly what you’re looking for. For more information on metal panel selection for your building end-use and to learn more about recommendations on roof slope for different building types, contact your local ABC representative today.

 Additional Resources:

For more information on slope requirements, visit NRCA’s website. For more information on steep-slope metal roofs and their benefits, visit the Metal Construction Association’s website.

Metal Roof Pitch Part I: Engineering and Strength Considerations

Whether you’re an owner who needs to consider roofing material options because of the nature or design of your building, or a distributor/contractor whose job it is to recognize whether a suggested design will or won’t work based on a range of circumstances, it is critical to understand the engineering behind why roof pitch and tensile strength are important on a metal building project. In part one of our series, we look at the engineering and strength considerations that need to be taken into account when designing or specifying a building, while part two will review the best type of metal panel to use based on the pitch and end-use of your building,

Engineering Considerations:

Ideally, your roof pitch will be the “sweet spot” between having a roof pitch that’s so shallow that the beared load is increased and having a roof pitch that’s so steep that wind uplift probability is increased—a factor which can also vary based on the building width. Specific engineering considerations with regard to roof slope include:

  • Snow Load Requirements: lower slopes create more load that the roof/structure must support. For example, when you have a flat roof and it snows, the snow will stay on the roof, adding more weight; on a sloped roof, a good amount of the snow will slide off of the roof, so the load will remain in an acceptable range the structure can support.
  • Wind Load: Preventing roof damage from high winds is largely dependent on roof geometry, slope and building material used. If outside air is allowed to penetrate a structure through cracks and other openings when wind flows over a building, the air pressure beneath the roof assembly increases. When this pressure becomes greater than the pressure directly above the roof (which happens as wind flows over a building), this can cause upward force on the roof system, leading to loss of structural integrity and significant damage. Wind uplift rating and minimum slope requirements are dictated by building codes in the market, so be sure to check with your local municipality for specific details.
  • Water Diversion: the steeper the pitch the faster it will channel and divert water, preventing it from pooling and causing other issue like mold, mildew and paint degradation. As with the snow load considerations mentioned above, the less additional weight burdening the roofing system, the better.
  • Minimizing Debris: steeper-sloped roofs also help minimize the chance that debris, mold and mildew have to build up on the roofing system. Unless there is a catastrophic weather event that drops large amounts of heavy debris—tree branches for example—there is a small chance that debris on a roof of any slope will exceed its ability to carry the load. However, because the more debris is able to slide down and off of a metal roof, the less that needs to be manually cleaned. Additionally, access to and cleaning the eaves of sloped roofs is much easier and less time-consuming that trying to perform the same maintenance on a roof with less slope.

The Strength of Metal Panels:

  • Tensile strength: This refers to the panel’s ability to resist breaking when it’s placed under pressure or tension—meaning the panel has a measured ability to bend under a certain amount of stress before it snaps. Galvanized steel panels can withstand between 50,000 and 80,000 pounds of pressure per square inch (50 KSI – 80 KSI)—significantly higher than the tensile strength of other roofing materials. Despite this, metal panels remain lighter and more impact resistant, keeping the likelihood and cost of repairs to a minimum. Check the tensile strength of your metal panels with the manufacturer and be sure to reference common testing standards related to roof slope, including ISO ratings and ASTM standards that test tensile strength.
  • Steel Hardness and Density: While it can generally be assumed that thicker-gauge panels are stronger, the type of building construction, location and end-use can affect the choice in panel thickness. Buildings such as pole barns, post-frame buildings, warehouses and garages can require roof panels to span longer distances and therefore require thicker panels as they are more structurally sound. These thicker panels will also aid in reducing the chance of collapse under the weight of snow and water—particularly when the roof pitch is low. For smaller buildings—like residences—with supporting trusses and purlins that are typically closer together, thinner panels can be used in conjunction with thicker trim for an economic, structurally ideal residential metal roofing system. See our blog on metal panel gauges for more.

Conclusion:

Following common standards, doing adequate research and conforming to manufacturer guidelines regarding slope will ensure you’re reaping the full benefit of your metal roof panel selection. For more information on metal roofs and to learn more about recommendations on roof slope, contact your local ABC representative today.

Additional Resources:

For more information on slope requirements, visit NRCA’s website. For more information on steep-slope metal roofs and their benefits, visit the Metal Construction Association’s website.

Metal Panels for Tiny Homes: Part 2

California Tiny Home

COPYRIGHT DC PHOTOGRAPHY STUDIOS.


In the first article in our three-part series on tiny homes we presented an overview of the tiny home trend, including lifestyle considerations and cost benefits. In the second installment, we discussed how tiny homes are built with the same types of materials, construction and aesthetics you find in larger, traditional residences. Metal panels—a popular material choice for tiny homes—provide advantages such as affordability, mobility and customization. Some additional factors in choosing metal panels for tiny home construction are weather, installation and maintenance. Here we’ll take a look at these considerations in a bit more detail.

Weather Considerations:

While building tiny homes in mild climates can be pretty straightforward, there are many built in locations that must take specific weather conditions into consideration. Just as with traditional homes, tiny homes exposed to freezing temperatures need to be winterized to keep everything functioning, and can be heavily insulated, built with air-tight, double-paned windows and designed and oriented for optimum sun exposure to keep the heat in. For warmer climates and seasons, tiny homes designed to optimize air flow and fitted with adjustable shading to protect you from the sun’s heat can be an addition to more traditional temperature regulation methods, which should of course be properly installed and serviced.

When it comes to preparing for extreme weather, there are very few additional precautions to be taken in comparison with traditional single-family homes. One exception is that tiny homes should be built with hurricane ties and straps, earthquake tie-downs and other anchors to secure the structure. Building to codes specific to any area you would plan to take your tiny home is vital to ensuring it remains undamaged and you remain safe.

The Metal Panel Difference: Metal panels from American Building Components are designed and manufactured with several environmental considerations in mind. For areas prone to hurricanes and other tropical activity, ABC offers wind-tested metal panels built to withstand gusts of up to 140 miles per hour. This strength and durability is also important for those who plan to haul their tiny homes on highways at high speeds. If heavy snow and ice are common during your winters, the fast-shedding nature of metal panel makes them ideal. Eco-friendly insulated metal panels for roof and wall applications and cool metal roofs can also help regulate the temperature of your home and offer additional energy efficiency. Metal panels are also fire resistant (unlike thatched roofs, which are a fire hazard) and can withstand hailstorms and other extreme weather events. Your metal roofing manufacturer can provide advice based on your environmental needs.

Installation and Maintenance:

Understanding the maintenance requirements of any building material used to construct a tiny home is essential to maximizing the lifespan of the structure, safeguarding your investment and reducing any headaches that could arise from poor planning and inattention to the detail. It is, therefore, important that you fully understand the material you are using and that you follow the manufacturer’s installation and maintenance instructions, which should be made readily available to you. Also, be sure to read and understand any product warranties to ensure you know about any exclusions or requirements.

The Metal Panel Difference: One caveat with metal panels for tiny homes is the precision that installers (or DIY’ers) need to use in order to get the most value out of the material. While metal panels require a greater level of accuracy during the installation process, the benefits far outweigh the challenges. Resources on how to install and care for metal panels are abundant. In addition to referencing the manufacturer’s installation manuals, you can check out their how-to videos and lean on their customer service team for support and installer recommendations.

To extend the lifespan and strength of metal panels for tiny homes, maintenance consists mostly of preventing and correcting issues such as damage from the build-up of debris as well as storm-related traumas like hail stones, falling branches, etc. For specific maintenance tips, check out our recent blog on metal panel maintenance.

The last word

The benefits metal panels offer make their use for tiny home building a no-brainer. While homes made from other materials lose value over time, metal roofs provide long-term performance and environmental benefits, cost efficiencies and extended durability for the tiny home community. For more information on ABC’s metal panels, visit our website or contact a representative today.

Metal Panels for Tiny Homes: Part 1

In our previous blog post on tiny homes, we looked at the tiny home trend and outlined some of the pros, cons and lifestyle considerations for those interested in pursuing this increasingly popular, yet untraditional approach to housing. One of the obvious benefits is affordability, as the mere reduction of square footage lowers costs in terms of materials, labor, energy and maintenance, to name a few. Tiny homes are built with the same types of materials, construction and aesthetics you find in larger, traditional residences. Not surprisingly, metal panels are a popular material choice. Here we’ll look at the mobility and customization aspects of tiny homes and the additional advantages of choosing metal panels for tiny home construction.

Mobility

Tiny homes are typically built on trailer platforms with wheels (instead of a foundation), enabling them to be driven across the country. This mobility, however, demands that these homes are built to endure the hurricane-force winds of high-speed highway travel … no easy feat for any home.

The Metal Panel Difference: To ensure they can travel 65 mph on highways into 20 mph winds (the equivalent wind-load of a stationary house during a hurricane), many tiny home builders are turning to metal panels instead of more traditional building materials. Unlike with asphalt composition roofs, metal roofs do not need to be covered every time they’re moved as there is no concern over losing shingles while in transit.

Customization

Most homes purchased these days are significantly customizable and tiny homes are no exception. In addition to traditional customization like varying floor plans, paint color, floor material, fixture style, and interior and exterior decoration, there are also many eco-friendly customization options. Tiny homes can be built by recycling previously-used structures like shipping containers and transforming them into a living space, and can feature rainwater collection systems, composting toilets and solar array options for those looking to take their tiny homes “off the grid”. Tiny homes can also be made to be fully wheelchair accessible, as well as infant and toddler-friendly.

The Metal Panel Difference: A common misconception is that metal panels are only suitable for commercial applications. However, because they are available in a wide variety of styles, profiles and colors, metal roof and wall panels complement any residential structure, including tiny homes, making it easy to find the look that’s right for you. Beyond color choice and overall aesthetics, metal panels are manufactured and produced to provide a higher-quality building material option, giving you the aesthetic you want along with the durability you need.

The last word

The benefits metal panels offer make their use for tiny home building a no-brainer. While homes made from other materials lose value over time, metal roofs provide long-term performance and environmental benefits, cost efficiencies and extended durability for the tiny home community. For more information on ABC’s metal panels, visit our website or contact a representative today.

In the next installment of our Tiny Home series, where we go into further detail about the considerations and advantages of metal panels for tiny homes. Metal Panels for Tiny Homes: Part 2 will provide practical guidance on weather considerations, installation and maintenance.